
Views: 1616
Introduction:
If you’re looking to improve your website’s performance and reliability, moving your DNS to Amazon Route 53 is a great choice. With its high availability and scalability, Amazon Route 53 offers a powerful solution for managing your DNS records. In this guide, we’ll walk you through the steps to move your DNS from GoDaddy to Amazon Route 53.
Why Move DNS to Amazon Route 53?
Amazon Route 53 offers a number of benefits over GoDaddy’s DNS service, including:
- Higher availability and scalability: Amazon Route 53 uses a global network of servers to provide fast, reliable DNS resolution.
- Better performance: Amazon Route 53 offers advanced traffic routing and latency-based routing to improve website performance.
- Improved security: Amazon Route 53 offers features like DNSSEC and AWS Shield to protect against DNS-based attacks.
Step 1: Sign Up for Amazon Route 53
The first step is to sign up for Amazon Route 53 if you haven’t already. You’ll need an AWS account to use Amazon Route 53.
Step 2: Add a New Hosted Zone
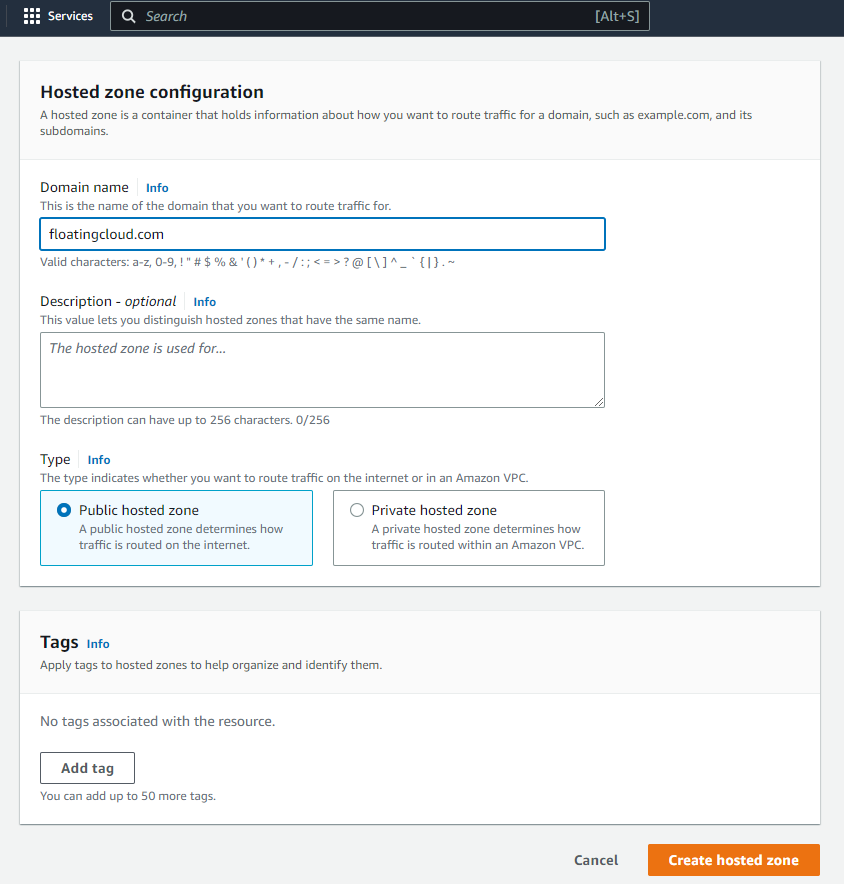
Once you’re logged into Amazon Route 53, you can create a new hosted zone for your domain. Go to the “Hosted Zones” section and click “Create Hosted Zone.” Enter your domain name and select a region for your DNS records. This works even if another service like Godaddy run the domain.

Enter the info needed, which is really just the Domain Name. Then click Create Hosted Zone.
Step 3: Retrieve Your DNS Records from GoDaddy
Next, you’ll need to retrieve your DNS records from GoDaddy. Log in to your GoDaddy account and go to the “DNS Management” page. Copy all of your DNS records, including the TTL values.
Step 4: Create Record Sets in Amazon Route 53
In Amazon Route 53, create record sets for each of your DNS records. Make sure to set the TTL values to match the values from GoDaddy. If you have a large number of DNS records, you can use the “Import Zone File” feature to import your records in bulk.
Step 5: Update Name Servers in GoDaddy
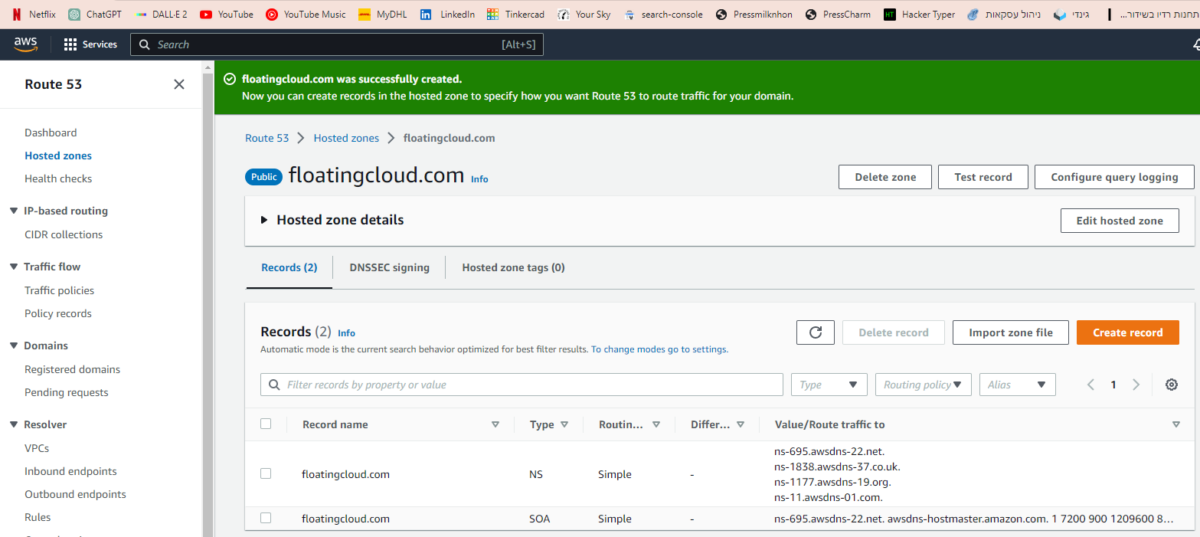
Finally, update the name servers for your domain in GoDaddy to point to Amazon Route 53. Go to the “Domain Management” page and click “Manage DNS.” Replace the existing name servers with the name servers provided by Amazon Route 53. Aftyer deleting the existing NameServers, You will want to copy the 4 AWS Nameservers into your godaddy account in “Manage DNS”. You can see these DNS entries in the image below, these are:
ns-695.awsdns-22.net.
ns-1838.awsdns-37.co.uk.
ns-1177.awsdns-19.org.
ns-11.awsdns-01.com.
PLease pay attention to the dot at the end. I am not sure if godaddy requires the dot or not.

Conclusion:
Moving your DNS from GoDaddy to Amazon Route 53 is a great way to improve your website’s performance and reliability. With its advanced features and high availability, Amazon Route 53 offers a powerful solution for managing your DNS records. By following the steps outlined in this guide, you can move your DNS to Amazon Route 53 quickly and easily.
You must be logged in to post a comment.