

Visits: 4367
Introducing Postfix Webmail: Your Ultimate Email Solution
Postfix webmail is a powerful and popular email server that offers a wide range of features and benefits for businesses and individuals alike. Whether you’re looking for a reliable and secure email solution for your website, or you want to set up a custom email server on your own server, Postfix webmail can be an excellent choice. In this comprehensive guide, we’ll take a deep dive into the world of Postfix webmail, exploring what it is, how it works, and most importantly, how you can set it up and use it efficiently to manage your emails. By the end of this guide, you’ll have all the knowledge and skills you need to get started with Postfix webmail and take your email game to the next level.

Postfix Webmail Linux email server with Postgres on Linux – Installation Instructions
You can install your Postfix Webmail Linux Email Server, after you have setup two DNS records You need to run a simple command. The command configures your Linux email server for your domain as well as creating https secure certificates for the IMAP server as well as for the web server that shows your webmail. The certificate copied to IMAP allows you to use a secure email connection to send and receive email. The certificate even renews itself. The DNS pre-setup is the most complicated part, so let’s get started. Setting up a full postfix linux email server with Roundcube Webmail is now very simple.
You can use these instructions to setup a large corporate email server for thousands of users, or SOHO biz with just a few addresses.
To start installing, launch the Complete Linux Email Server with Webmail in the AWS Cloud. You can also install ARM64 / Graviton Complete Linux Email Server with Webmail
Quick Instructions for Postfix Webmail Linux Email Server
- Login go to your AWS EC2 panel, click on your new instance and follow the login instructions to SSH login via various ways including ssh with the secret key Pem file that you have.
become root sudo -i - cd /opt/postfix-containerized/docker-files
- BE SURE TO use the correct fqdn that points to your postfix server. This should be the name that you wrote in the MX record. and that it Already has MX record .
- run the command:
./prepare-postifx.sh YOURMX-RECORD-FULLY-QUALIFIED-DOMAIN-NAME
- This script creates an https certificates which are used by the postfix mail server and the Roundcube webmail as well as an admin user with username admin@YOUR-FQDN .
- Open https://YOUR-FQDN the password is the Instance ID
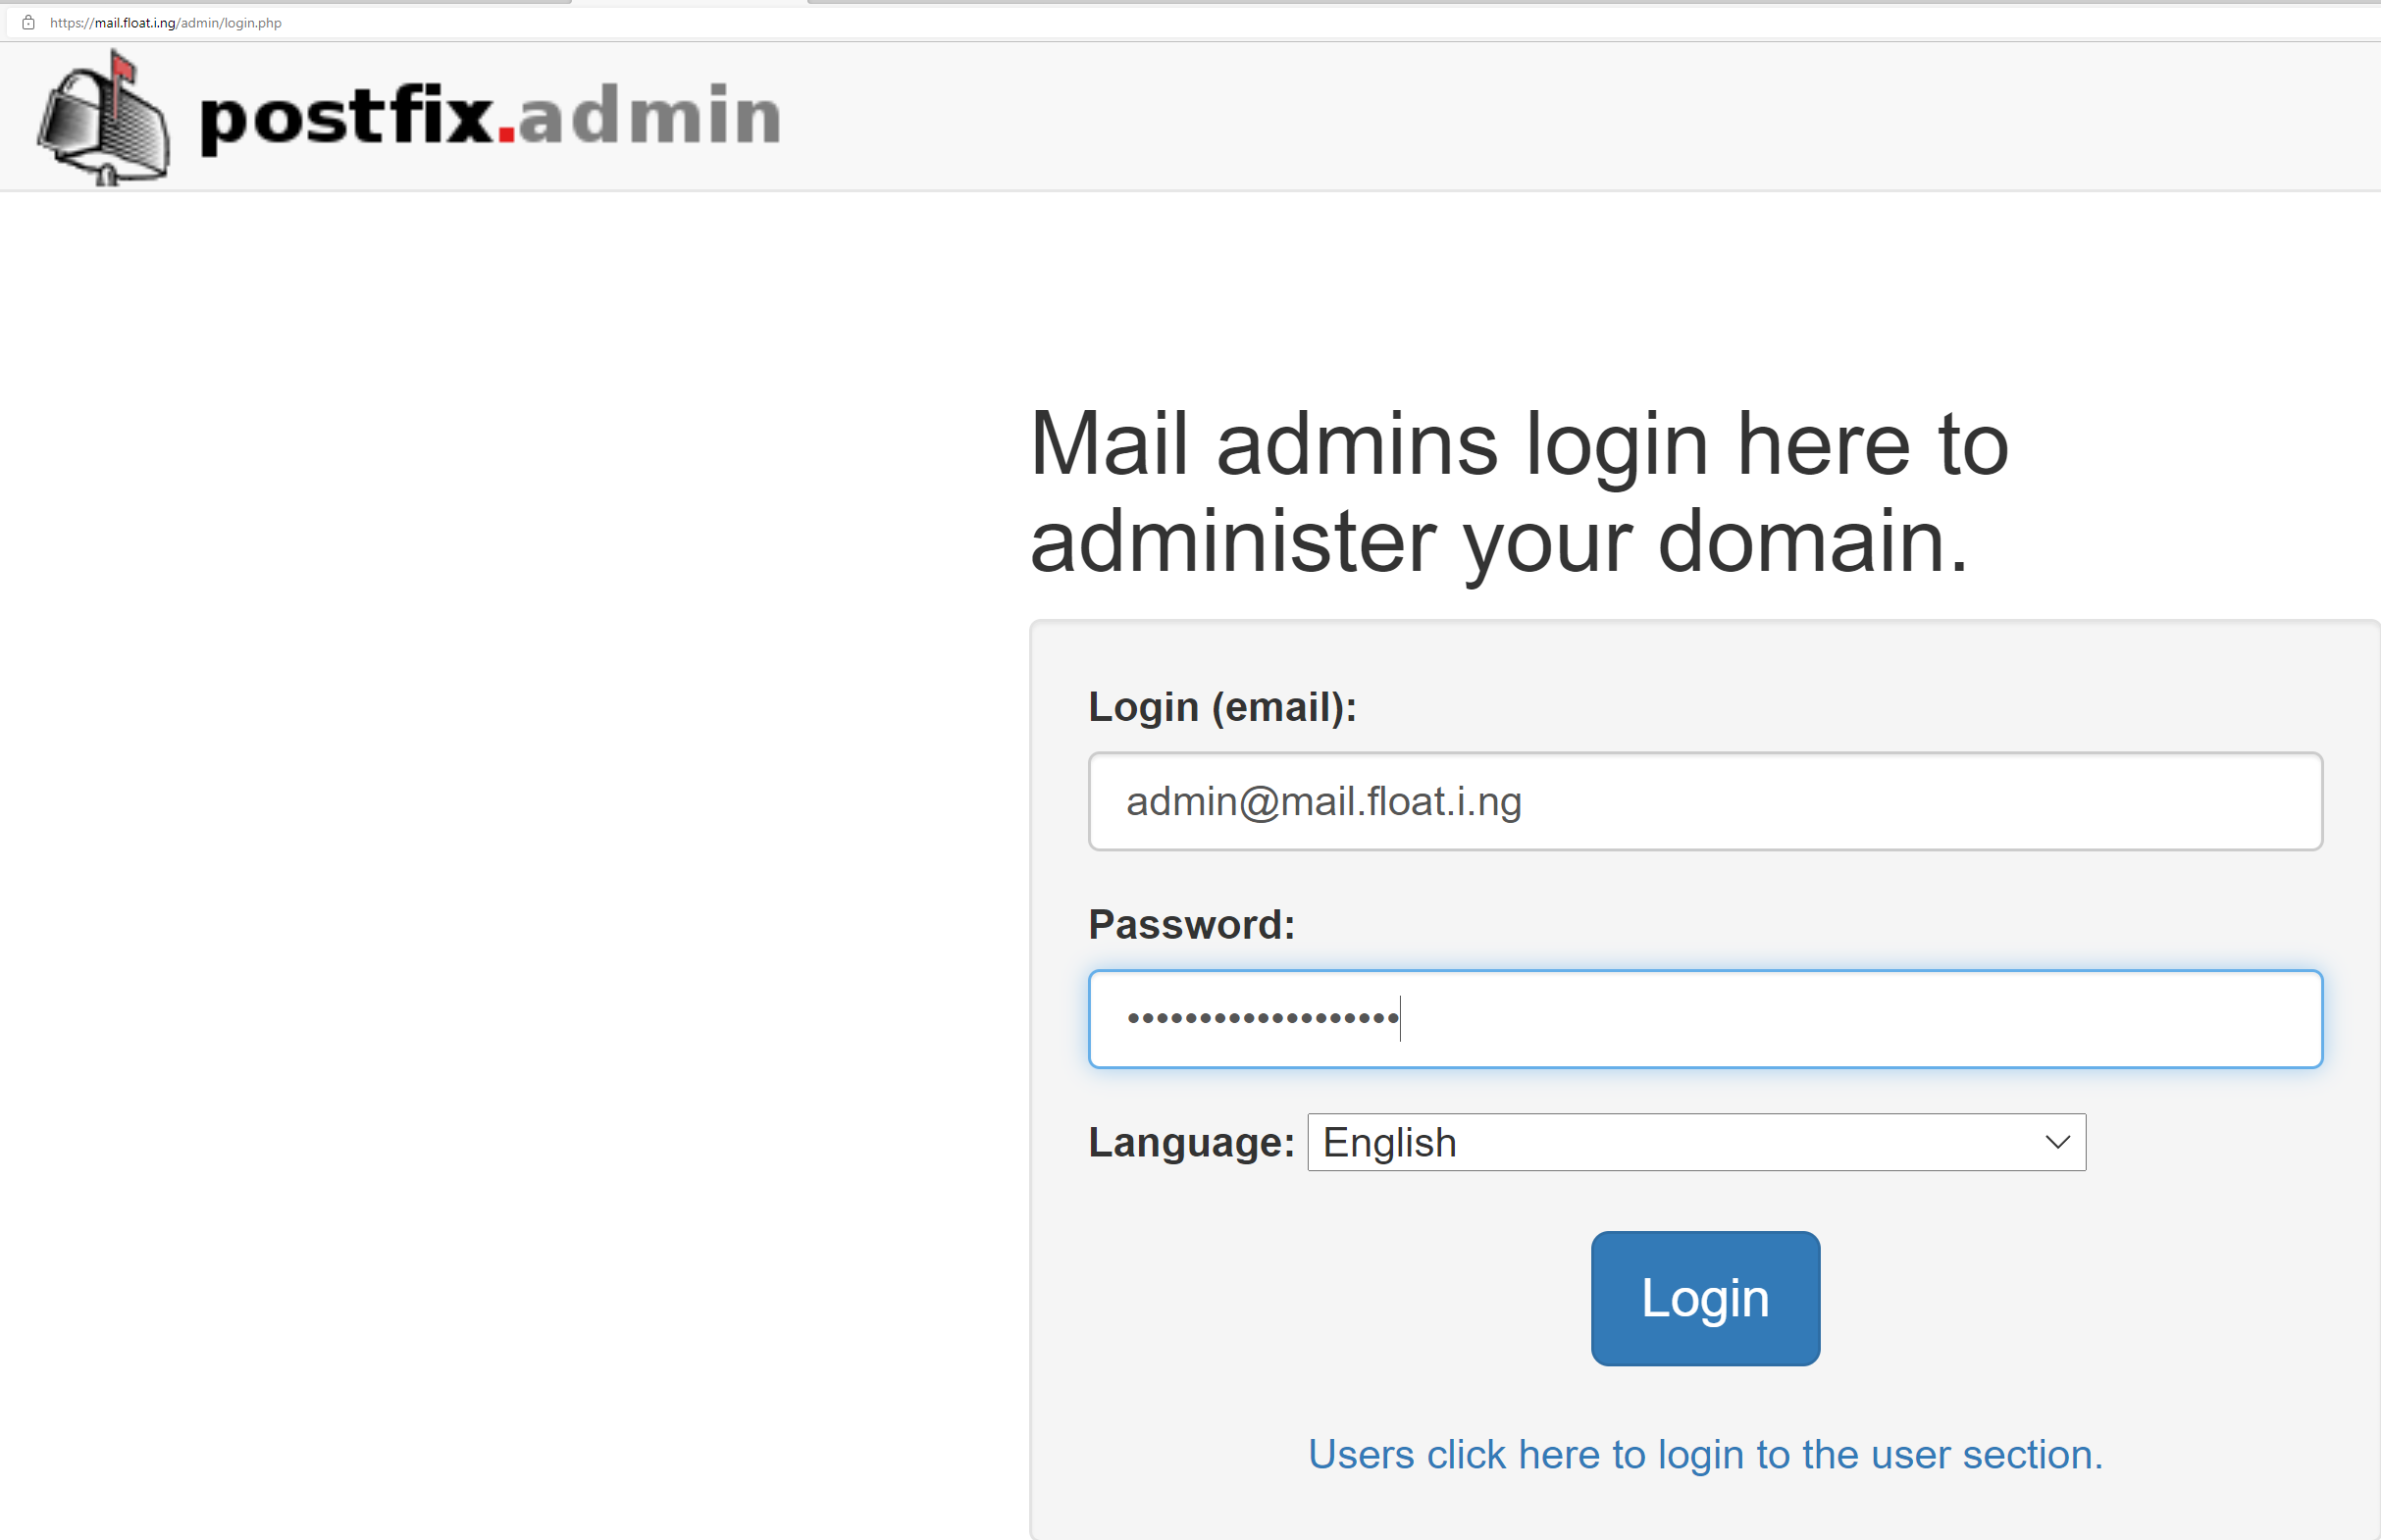
- To add users login to https://YOUR-FQDN/admin with same credentials, click on “Add Mailbox”
- Sending emails from Roundcube fails and times out?? This is because AWS has blocked your instance from sending ANY emails. You need to ask AWS for permission to use the EC2 instance for sending email. https://support.console.aws.amazon.com/support/contacts?#/rdns-limits
Extensive Instructions
Configure your DNS for Your New Postfix Webmail Linux Email Server
Before logging into your Postfix Linux Email Server on Amazon EC2 server, make sure that you have the correct DNS settings with A and MX records, Here are the instructions.
Register a domain with Route 53
Many people get stuck setting up an EC2 Instance as a mail server. Did you send a test message to your new instance and never receive the email ? To set up a mail server you first need the MX record to be properly setup in Route 53 or in Your DNS. Some of our Floating Cloud Clients get stuck setting up there Mail Servers. The best way to start is to first purchase your domain from AWS Route 53, that way it is easiest to set up. I like to purchase domains from AWS because the price doesn’t change from the second year on. Many domain registrars charge you only a couple of dollars to register a domain for a year, but then will charge you up the wazoooo for the following years.
These instructions assume that you purchased the domain from Route 53. To purchase a domain from AWS via Route 53 go to: https://console.aws.amazon.com/route53/home#DomainRegistration:
After Registering your domain Route 53 sets up a “hosted zone” for you this includes an SOA – Start of Authority Record and NS record that tells the universe what servers know your real IP addresses. I failed a job interview not know what an SOA was, so be sure to remember it!
Elastic IP Address connected to your Postfix Webmail Linux Email Server
First you need to own a domain, Then connect your registered domain to an Elastic IP address for the A record for the DNS. Do not use an assigned IP address when you launch and EC2!!! This changes when you shutdown then re-launch the instance. See https://docs.aws.amazon.com/AWSEC2/latest/UserGuide/elastic-ip-addresses-eip.html
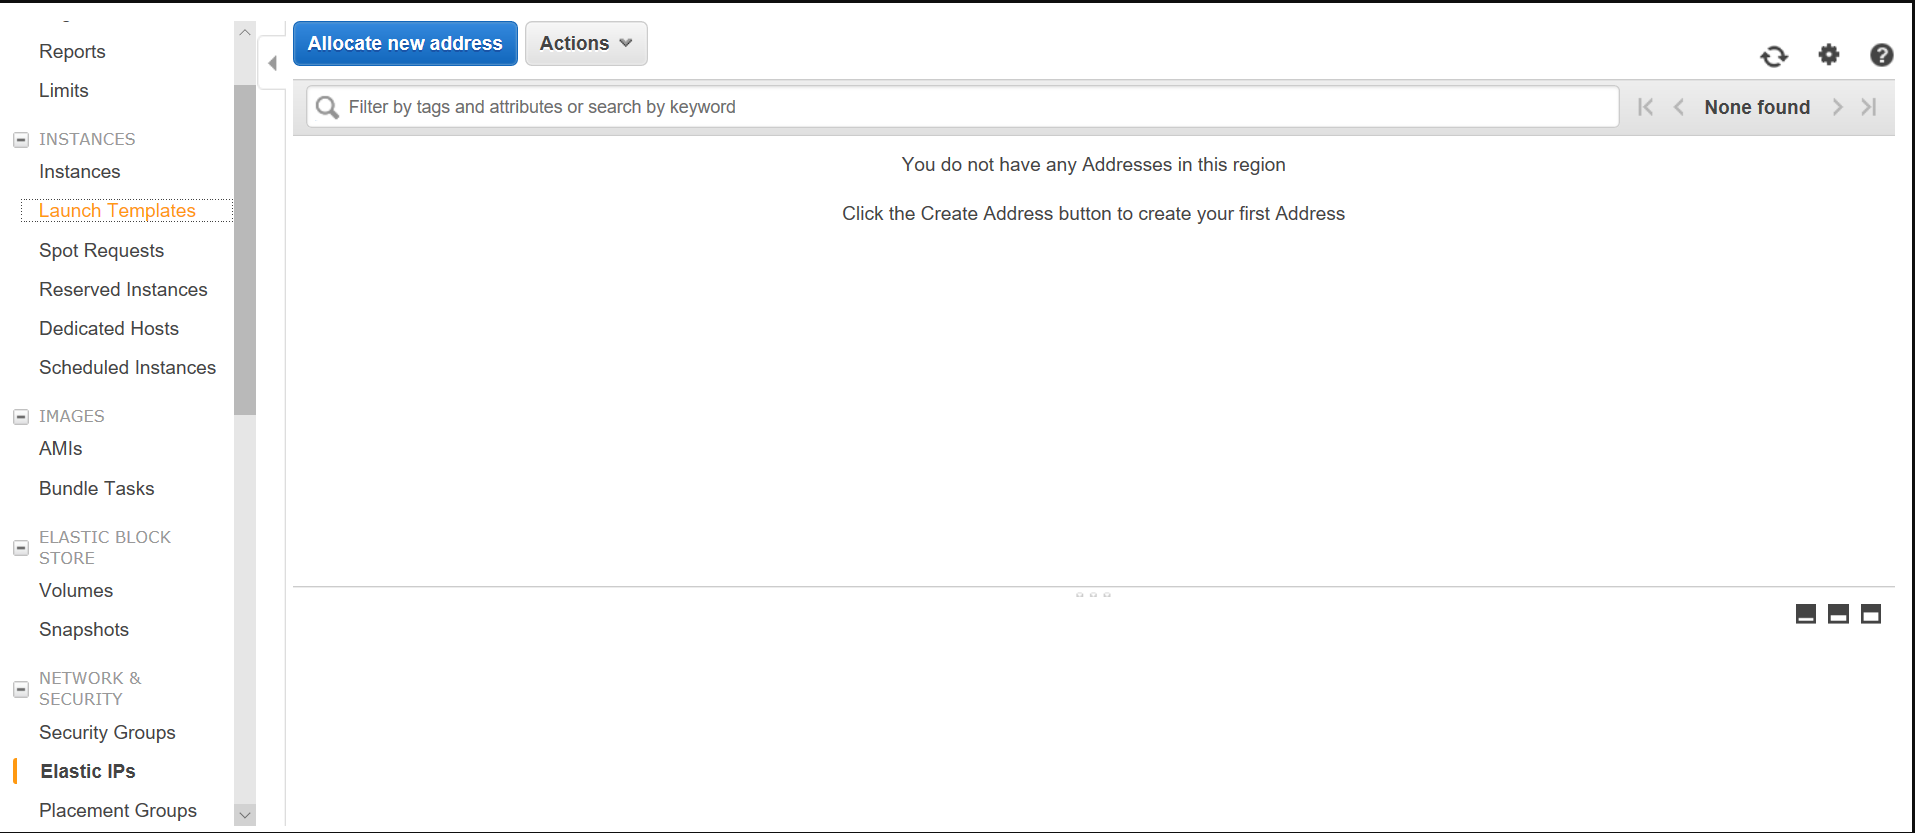
To get an Elastic IP Address for your Postfix Linux Email Server EC2 Instance open your EC2 console Panel. In the left column go all the way down until you see Elastic IP addresses, select that. It is under Networks and Security. Then click on the blue button at the top “Allocate New Address”, then Allocate in the next screen. Then you will receive an Elastic IP Address.
Now you need to assign the IP Address to the Postfix Linux Email Server EC2 Instance that you previously launched. You should label your EC2 instances, then when it is easy to remember which instance is which in these kind of configurations. You can click on your new IP address that will appear or select it from the list of Elastic IPs that has now started.
Right Click on your IP Address from with the list of IPs and select “Associate Address”
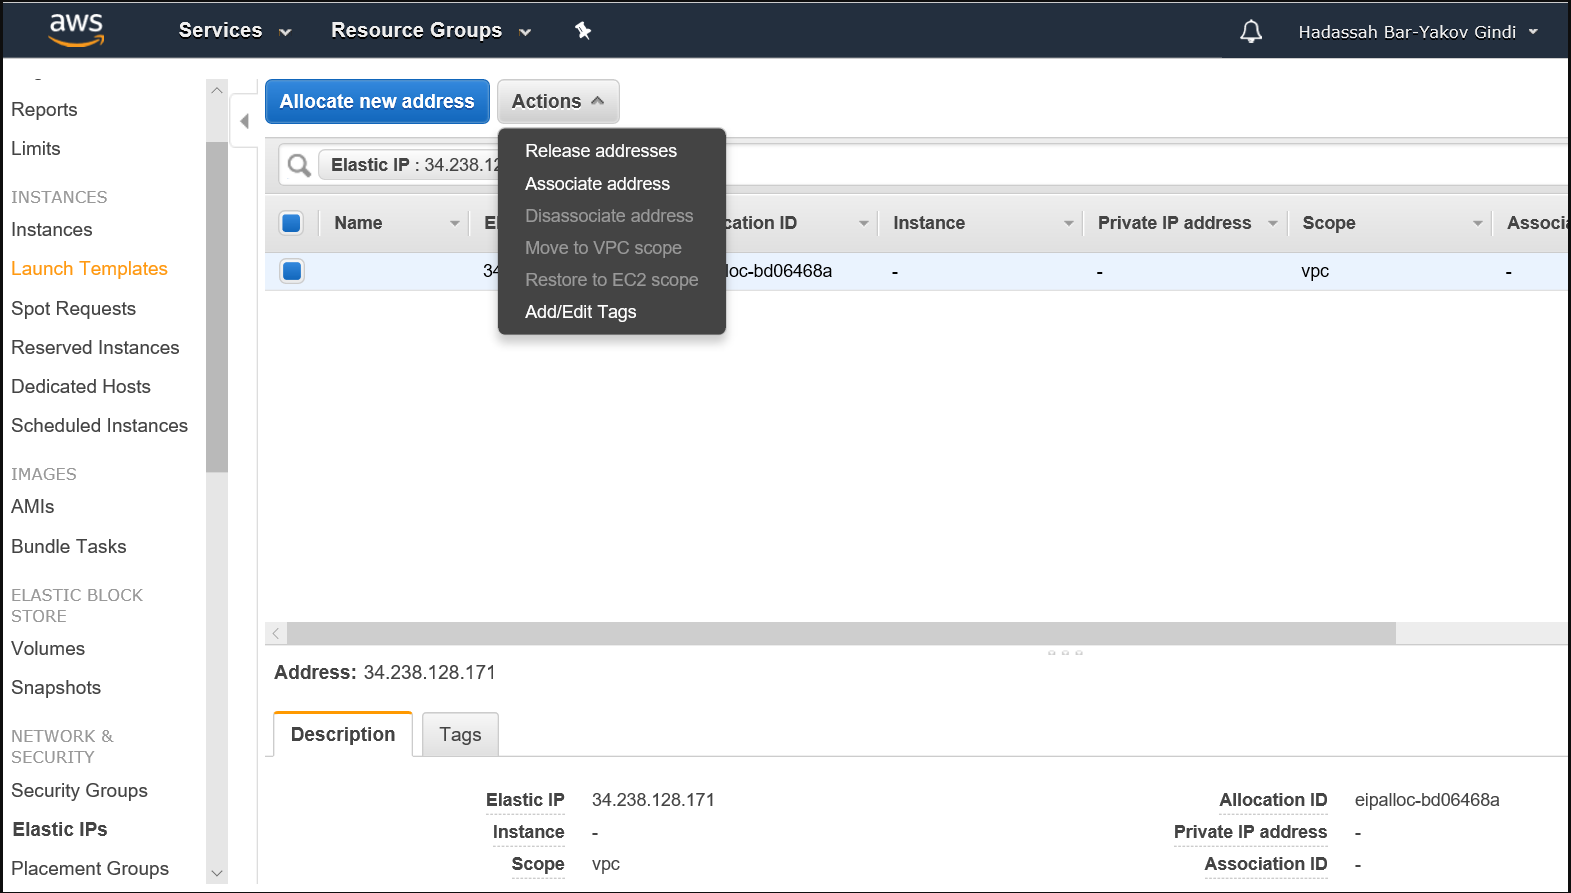
Select from the list of instances your Instance that needs the IP Address, then click the blue “Associate” button

Setup the Route 53 DNS
After you have setup your DNS, you can setup the DNS with your instance.
Copy your Elastic IP Address number from list of Elastic IPs
Now go into Route 53 from the services drop down menu at the top of your Console Panel. It is under Networking & Content Deliver in the lower left, but might move.
Then click on Hosted Zones, since you purchased your domain from AWS they set this up automatically.
Now Select your domain name from within the list of hosted zones. For our demonstration purpose we will set up a domain called test.floatingcloud.io, so that we can eventually receive email to username@test.floatingcloud.io . There are many ways to set up DNS and MX records but we are keeping it simple.
Select create Record Set. In the right window next to “Name” write your subdomain name if you have one or leave it blank for Top Level. Next to value paste your Elastic IP address.
Now you have set up an A record. You can connect to it via SSH or RDP, if it has a working webserver, your domain will now work.
Now we need to point out MX record the server. the MX record tell the internet where to send mail. You can have an A record with an entirely different domain name receive mail on behalf of different domain. For instance you can have an A record for mail.yourdomain.com and point the MX record for the Top Level Domain yourdomain.com and recevie email to user user@yourdomain.com . But we are keeping it simple here, using the same sub-domain name for both A and MX records.
So again select “Create Record Set” at the top of the window. In the drop down menu in the same right window select MX Record.
Now in the Value window put the number 10 before the domain name, then a space followed by your domain name of the above A record. Next to name type in your subdomain, if you are using one or leave it blank if it is top level. The number represents priority, if you later setup and backup mail server, you give this a higher number for it to be used only if the first one is down.
We have written instructions at our Floating Cloud Blog:
https://floatingcloud.io/setup-mx-record-in-route-53-with-a-domain-that-you-registered-with-aws-3/
If your domain is registered at goaddady, follow these instructions.
https://il.godaddy.com/en/help/add-an-a-record-19238
https://il.godaddy.com/en/help/add-an-mx-record-19234
Login and Run the Configure Script for Postfix Linux Email Server
The simplest way to login to your AWS Postfix Linux Email Server EC2 instance is to use connect via session manager, which opens a web page with the Command prompt.
Using AWS Session Manager you can connect to your instances via Web Console instead of SSH. This is similar to what was always offered by Azure and Google Cloud.

Then Select Session Manager
If you see that its greyed out, you need to still configure it.
So instead go to ssm manager Quick Start
Now select get started on the left side, If you dont see get started in correct home region, it’s because you have set it up before.
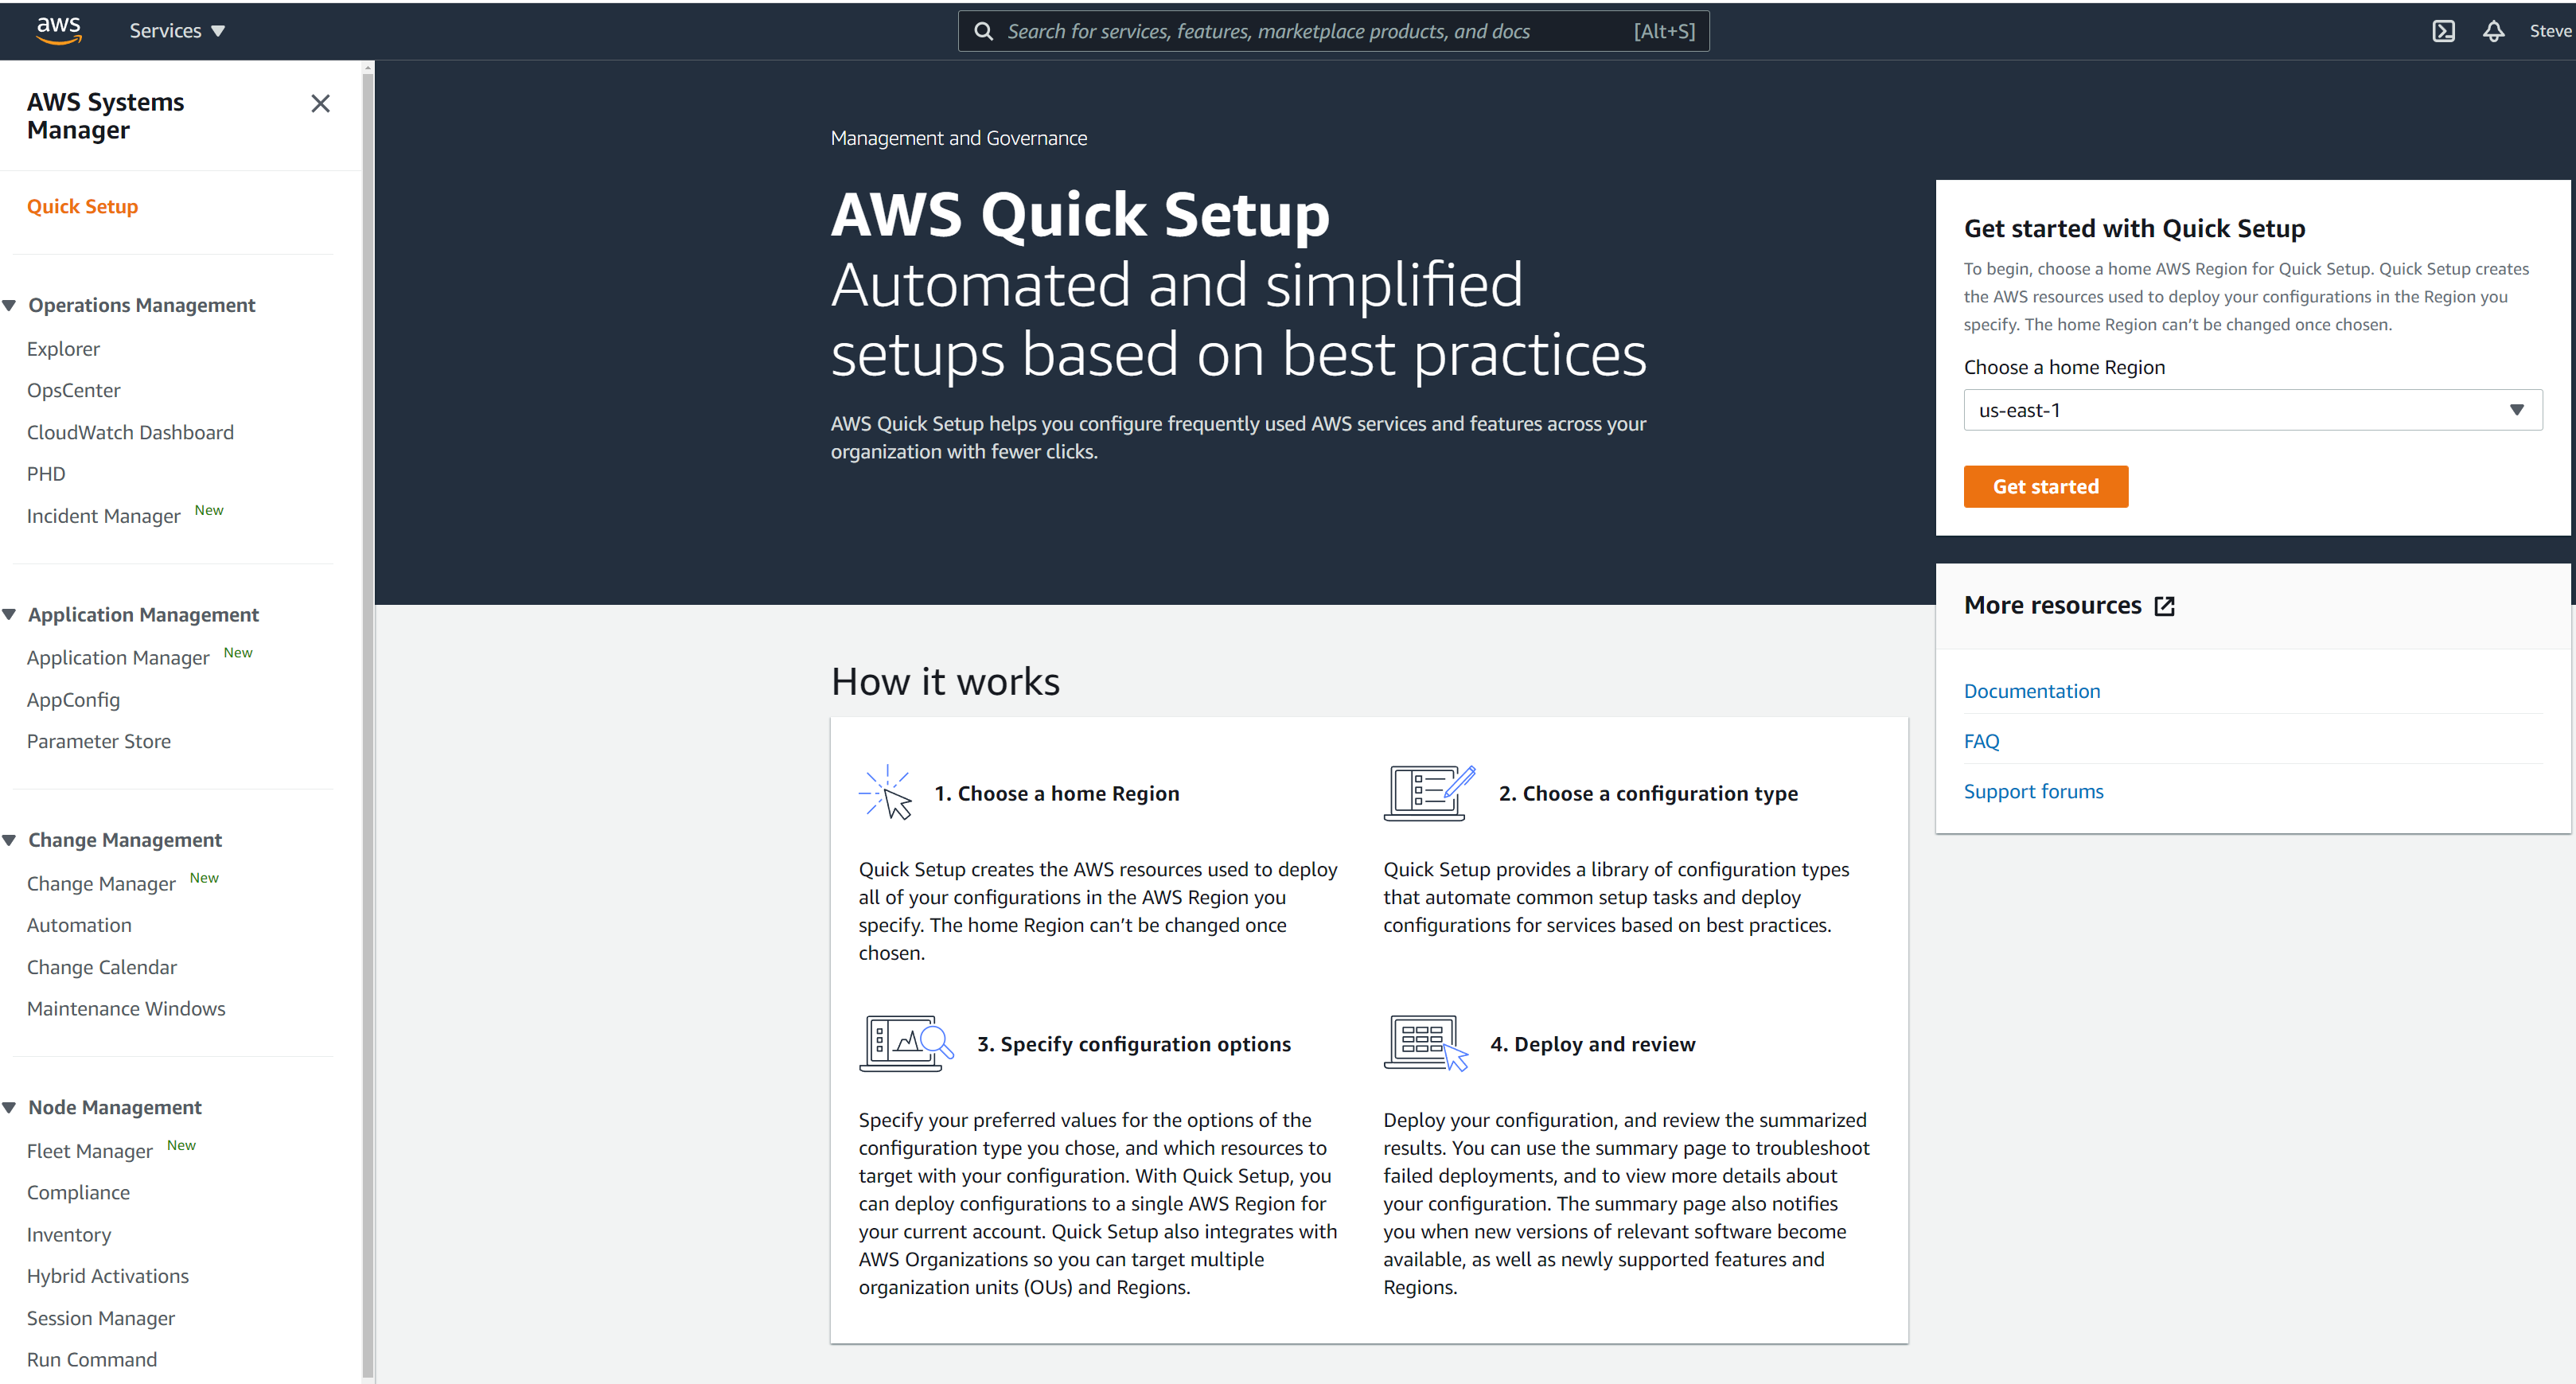
Select Create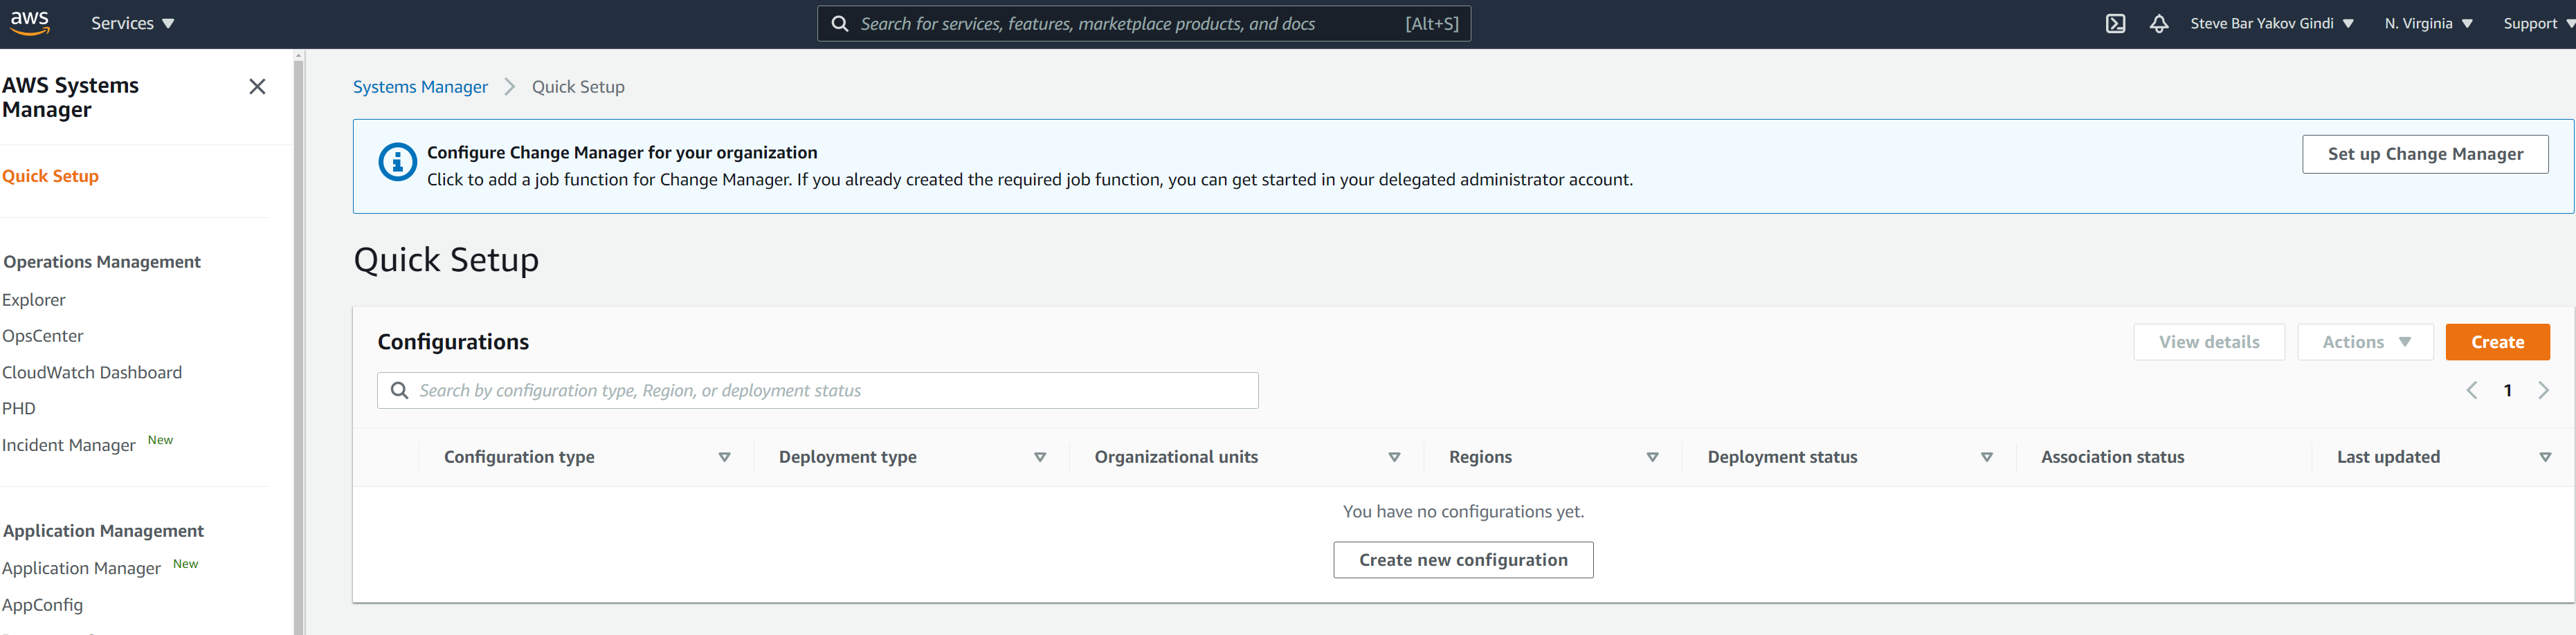
Select Host Management , then next
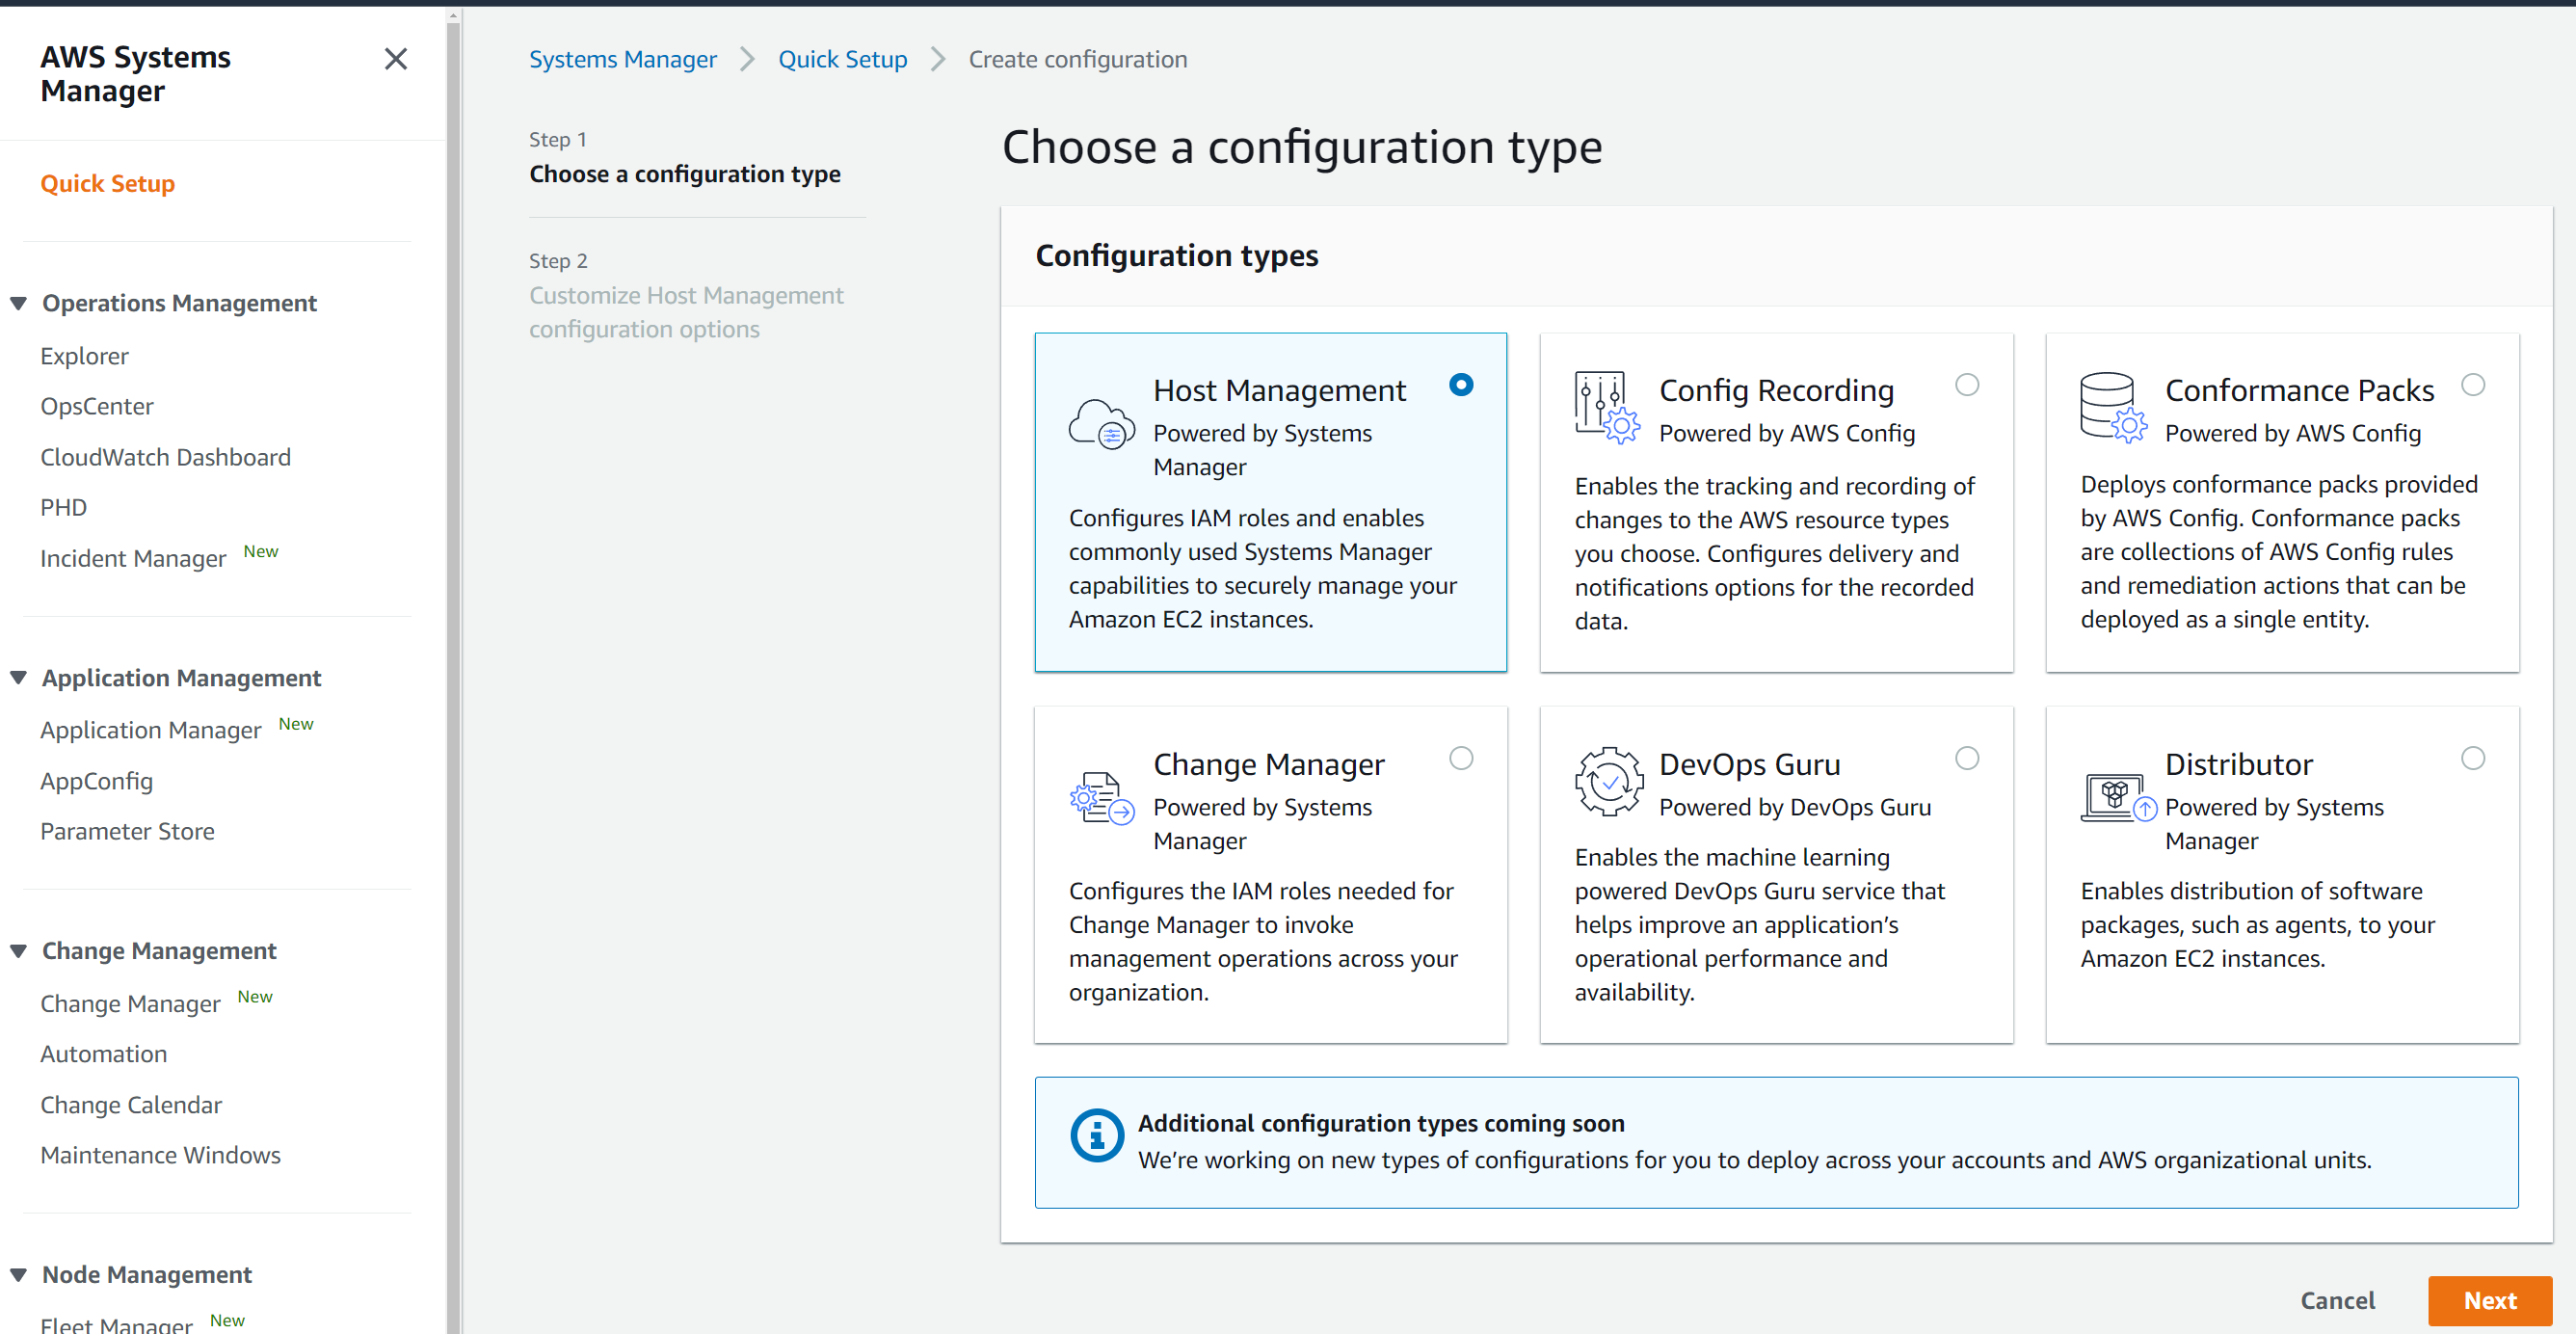
Select Like in the following image, or suit your own needs, this keeps instances safe, Towards the bottom I selected Add required IAM policies, as well as “current account” for targets choose regions, I like to select all, and leave all instances selected., then click create. It might take a few minutes.
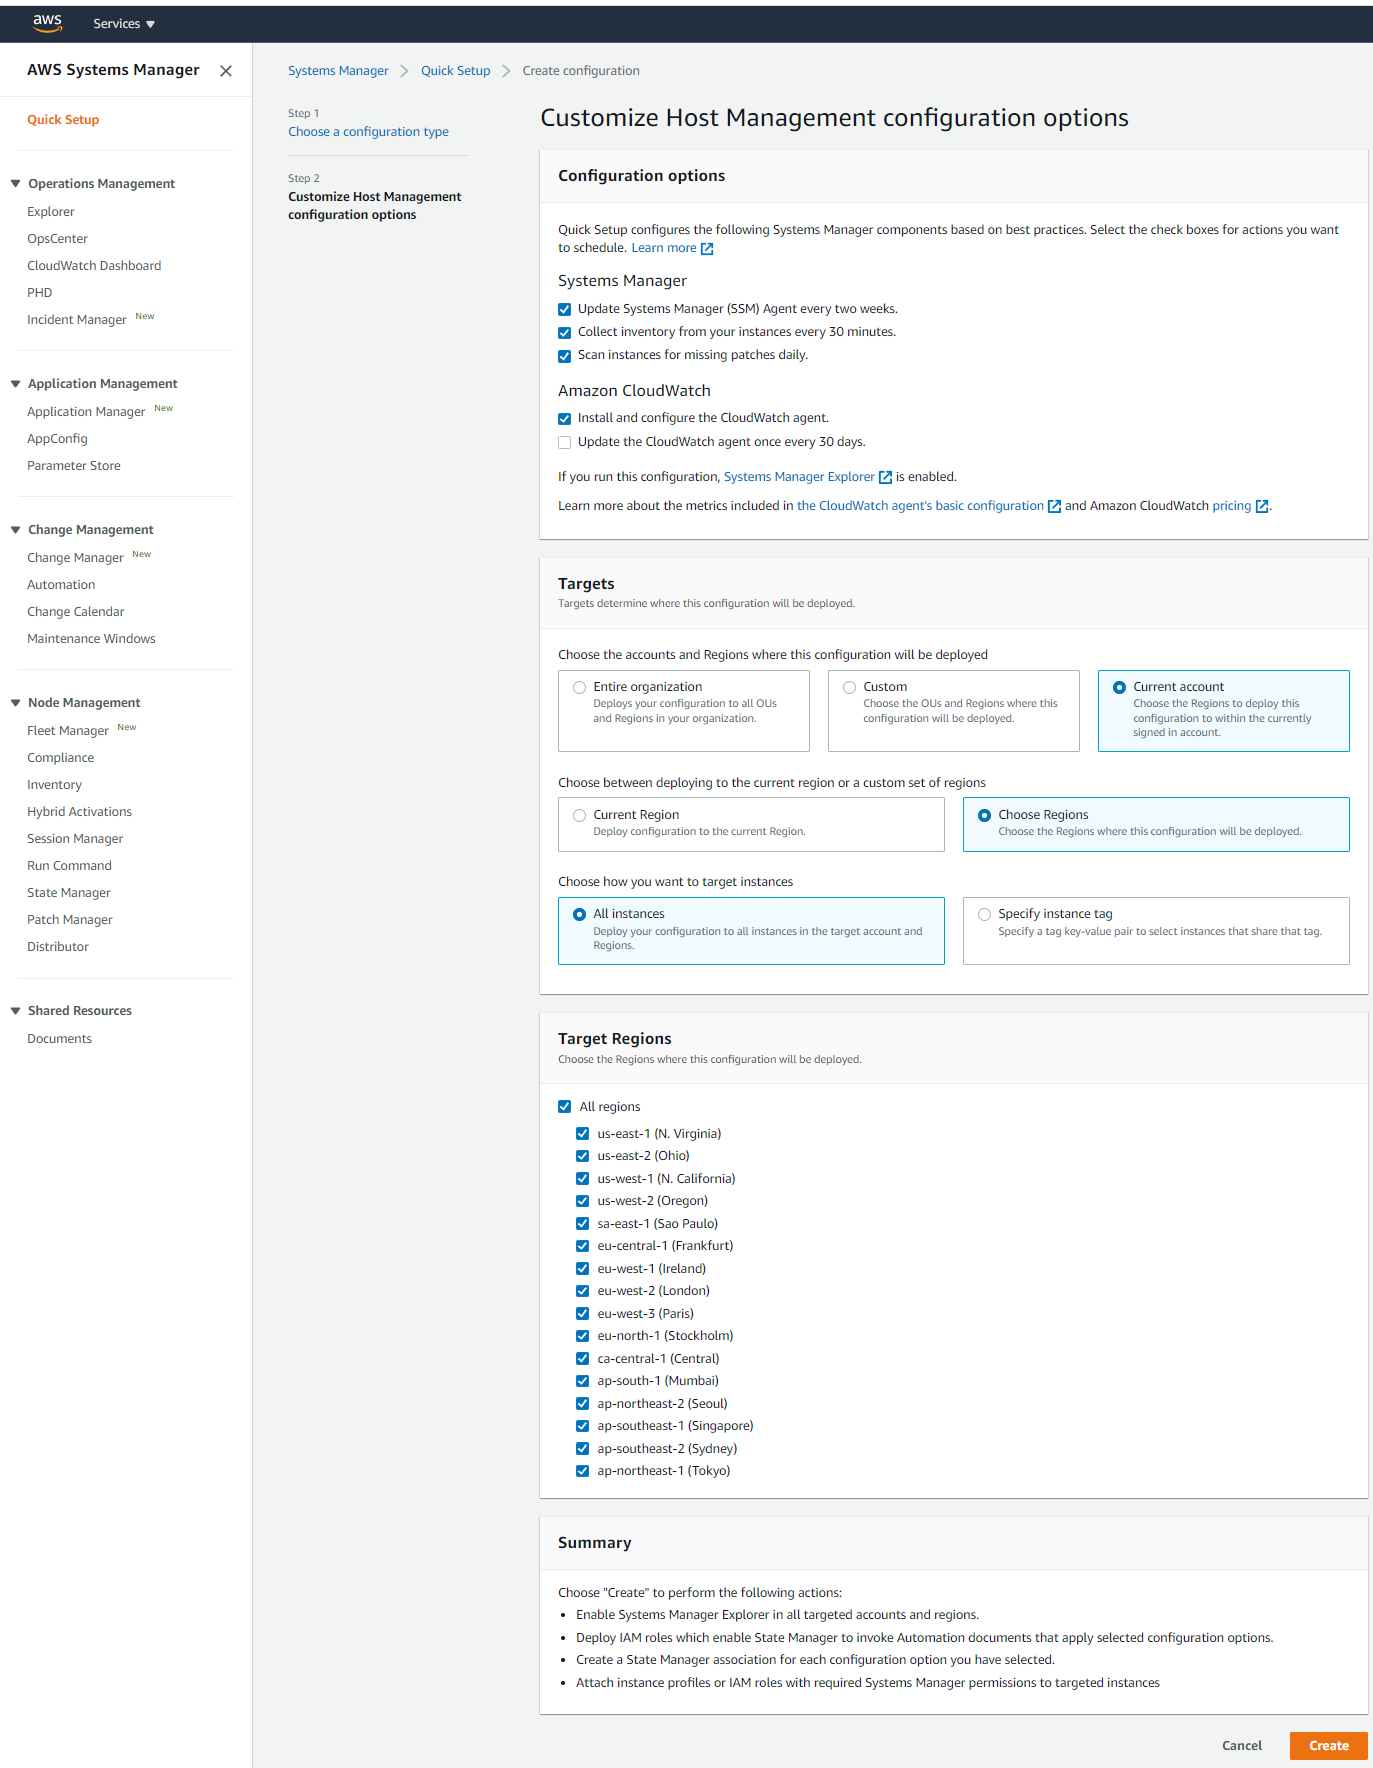
Selecting just the region you need now is much quicker than selecting all.
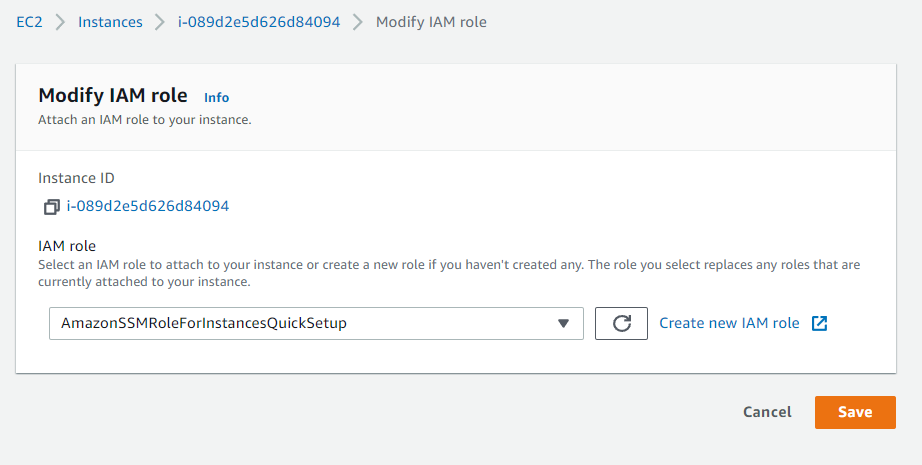
At the end of this you will now have an IAM role named AmazonSSMRoleForInstanceQuickSetup
Now when you select connect to Session Manager the Connect Button should now be Orange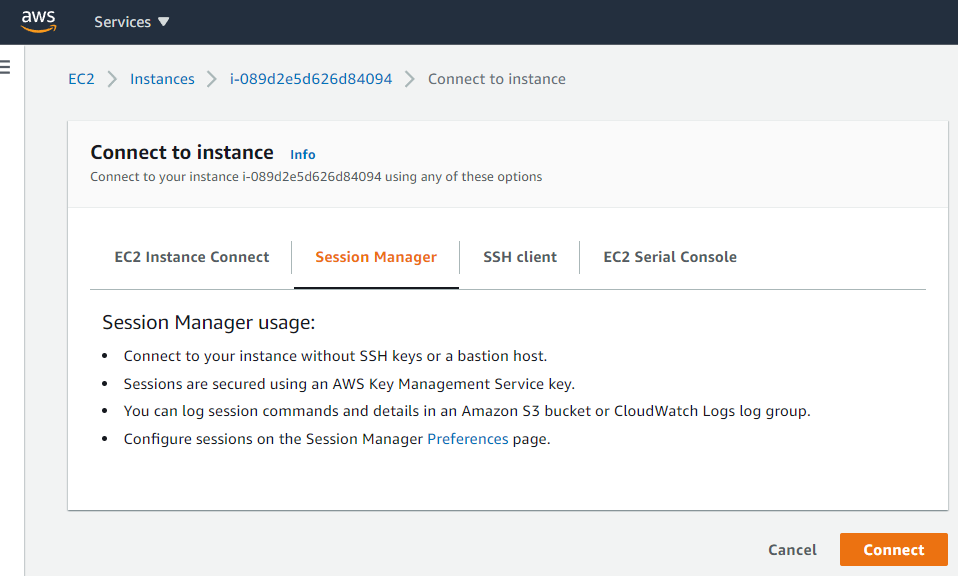
Select Connect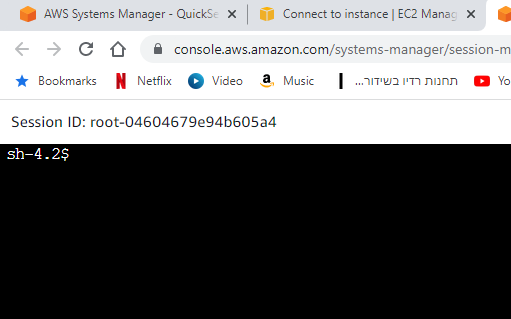
Now you can run the simple floating Cloud Postfix Server, etc, If using Amazon Linux , you will even have sudo access.
This is from our Floating Cloud Blog Post:
Web Linux Console for EC2 – Session Manager – ssm Quick Connect
Web Linux Console for EC2 – Session Manager – ssm Quick Connect – Floating Cloud
AWS also has great instructions about how to connect to your AWS instance. Connect using EC2 Instance Connect – Amazon Elastic Compute Cloud
You should now have it all set up. You should now try to send email to an existing user at your mailserver.
Become root user, then run the install script with your Fully Qualified Domain Name for Postfix Linux Email Server
sudo -i
cd /opt/postfix-containerized/docker-files
BE SURE TO use the correct fqdn and that it Already has MX record .
run the command:
./prepare-postifx.sh YOUR-FULLY-QUALIFIED-DOMAIN-NAME
Login to your new Roundcube Webmail server
This script creates an https certificates which are used by the mail server and the webmail as well as an admin user with address admin@YOUR-FULLY-QUALIFIED-DOMAIN-NAME
you can now send and receive emails (though sometimes AWS blocks any sending)
try to email yourself from another email account
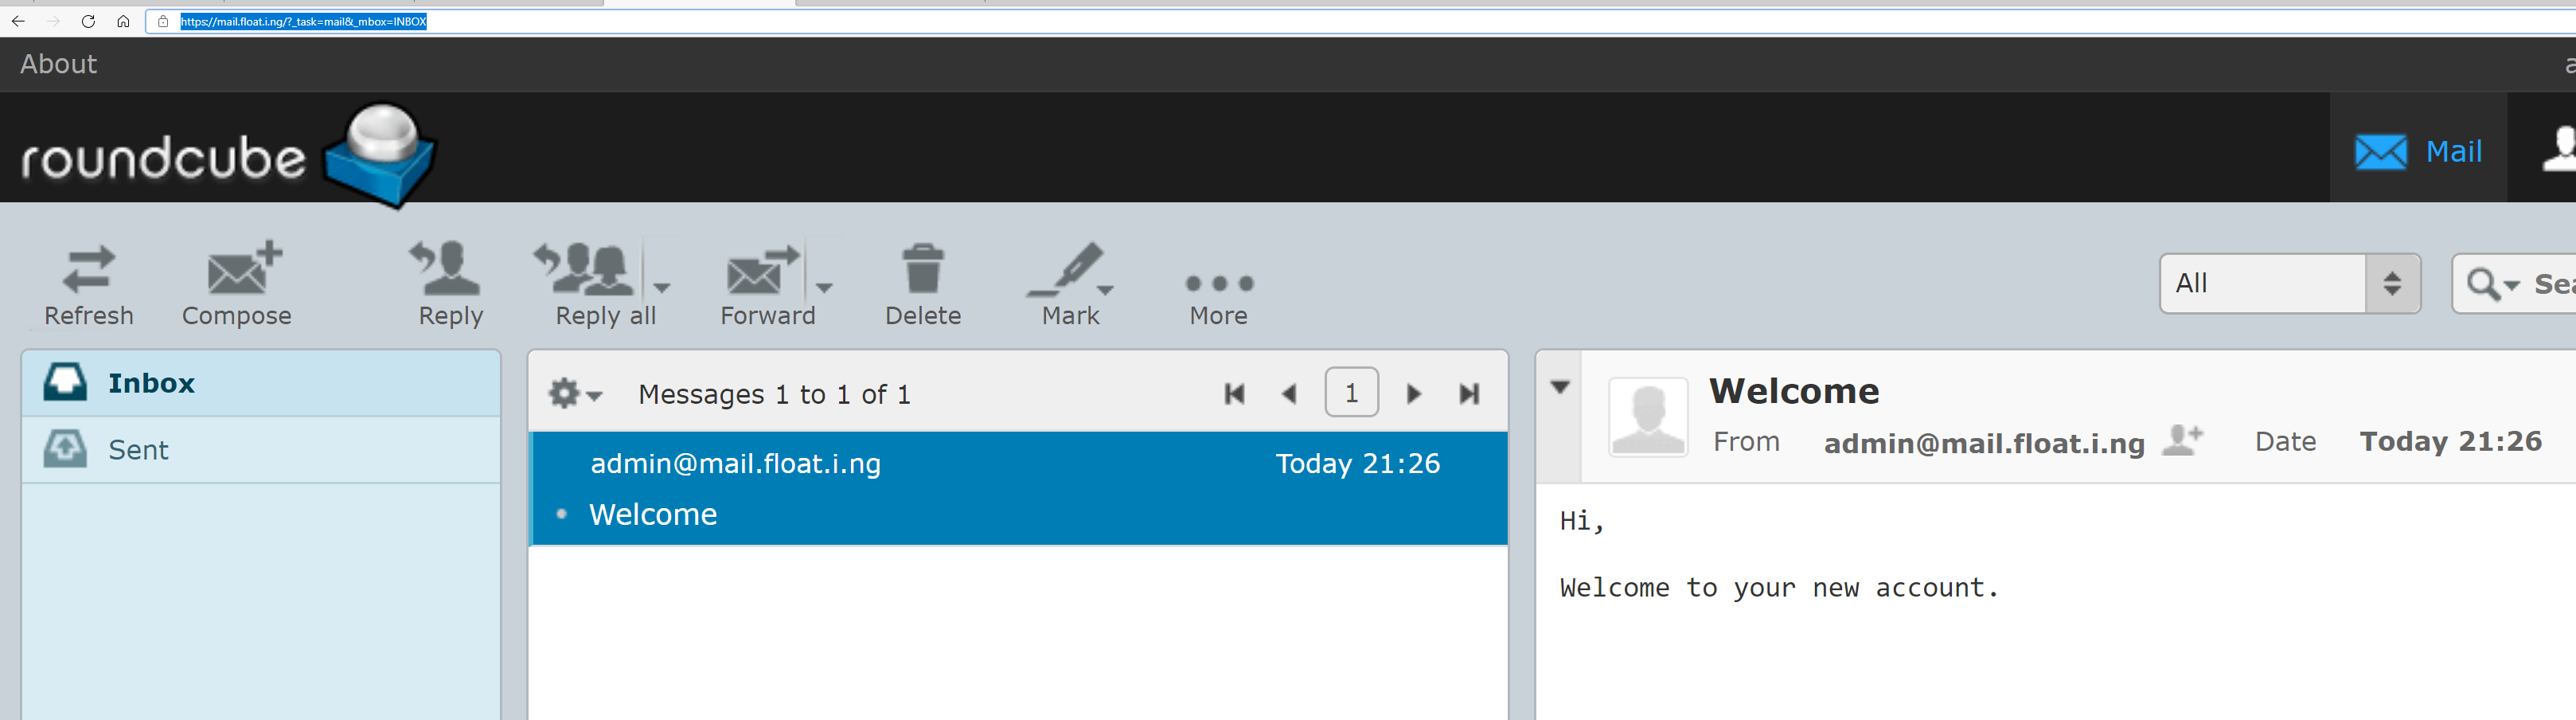
Open up the Roundcube webmail home page https://YOUR-FULLY-QUALIFIED-DOMAIN-NAME
 Login with admin@YOUR-FULLY-QUALIFIED-DOMAIN-NAME, the password is your Instance ID, copy it from the EC2 console instance details, usually upper left of details, like in the middle left of your screen.

You will have Test Welcome Message
then try to respond, if you do not get the message, you likely need to contact AWS to allow sending
Ask to open blocked or throttled SMTP port 25 of Your Postfix Linux Email Server
following is the real link to ask them to open port 25
https://aws-portal.amazon.com/gp/aws/html-forms-controller/contactus/ec2-email-limit-rdns-request
Reverse DNS request is in the same place as limit request
To start installing, launch the Complete Linux Email Server with Webmail in the AWS Cloud. You can also install ARM64 / Graviton Complete Linux Email Server with Webmail
Add Users to Your Postfix Linux Email Server
You can add as many users as you like. Log into https://YOUR-FULLY-QUALIFIED-DOMAIN-NAME/admin
admin@YOUR-FULLY-QUALIFIED-DOMAIN-NAME, the password is your Instance ID, like just above.
 Click on Add Mailbox
Now you can add a new user that gets email, It is REQUIRED to use a password of 8 characters with 2 numbers. Press Add Mailbox after filling in User details.
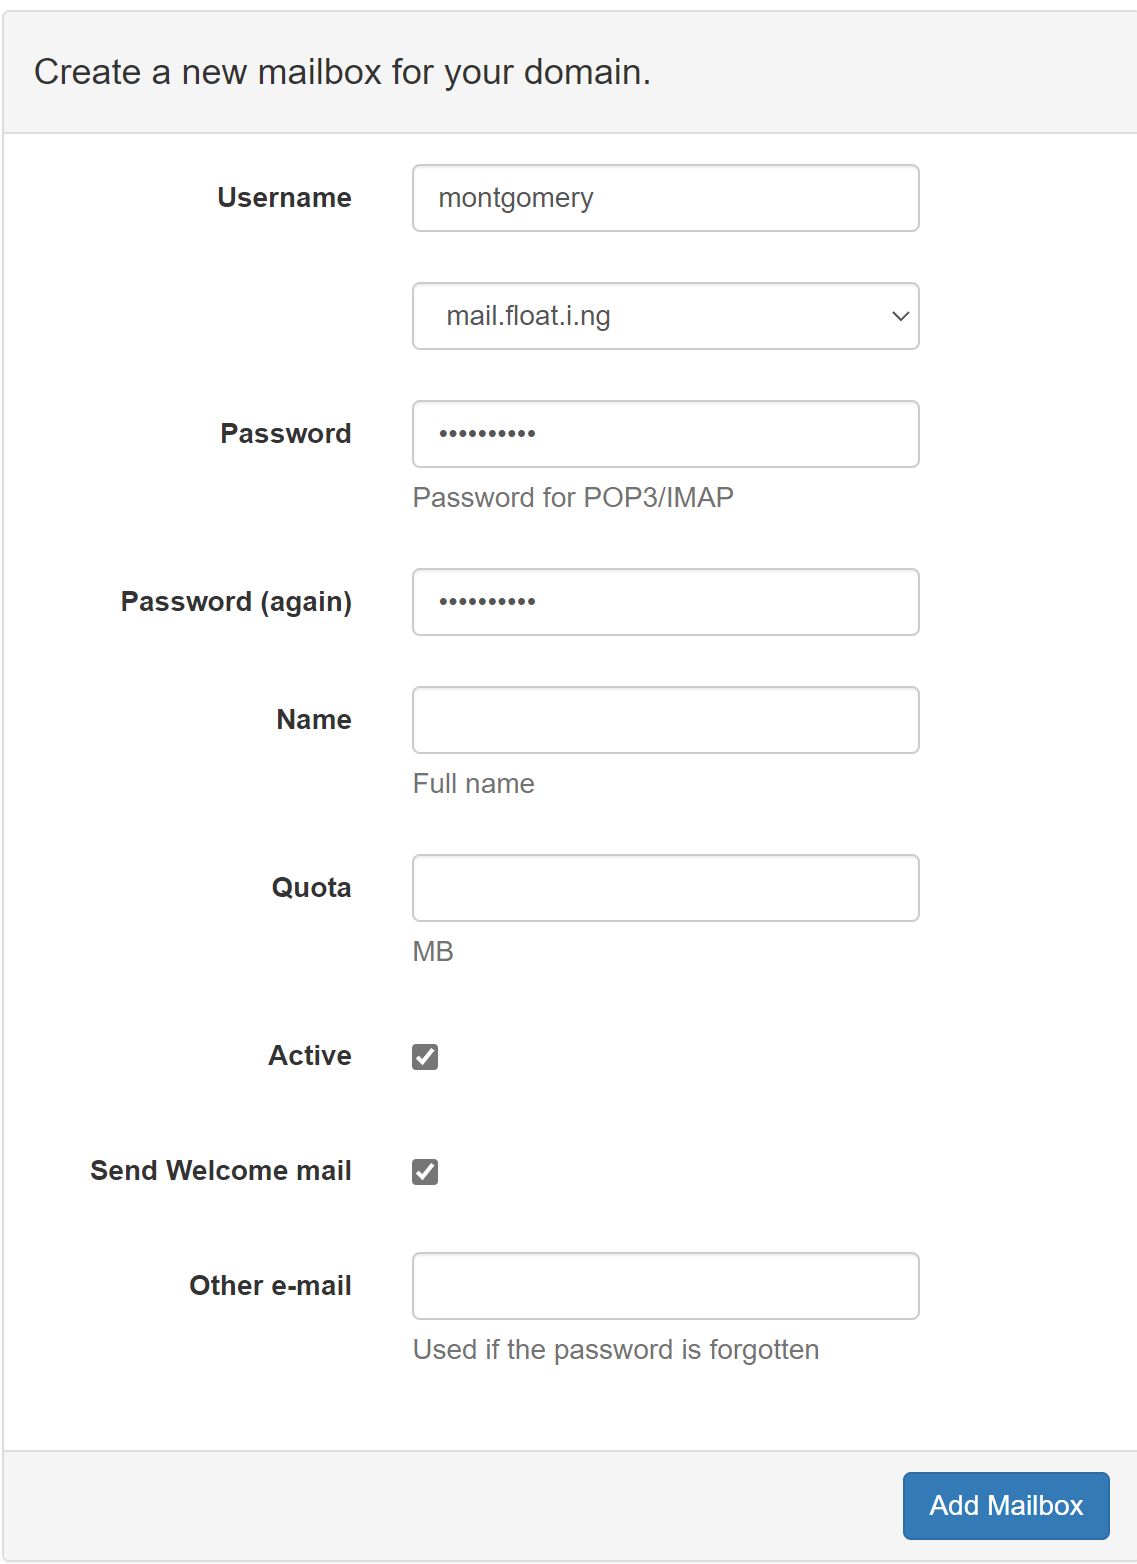
You can now log into the new user account like you did for the admin at https://YOUR-FULLY-QUALIFIED-DOMAIN-NAME with the user credentials that you created, ie montgomery@YOUR-FULLY-QUALIFIED-DOMAIN-NAME , use your username instead of mine
You can also configure email client like microsoft explorer.
Gmail cannot check your email as they do NOT support imap, but you can forward mail there.
Connect to SES, Although it seems that AWS has made an effort to have all of it’s networks removed from lists
Spam Protection for Your Postfix Linux Email Server
This Floating Cloud Postfix Email Server also rejects known spam using “reject_rbl_client” fintering from trusted spamcop. We hope that you get fewer offers for Rayban Sunglasses.
SMTP – Sending Email
See our directions to connect to SES Smtp sending
AWS limits the amount of emails that you can send from an EC2 instance. You can restrict sending from your instance. If you plan on sending email with the instance, instead of using SES you should install your own key for encrypting passwords. It is now configured to accept text only passwords. For links to installing encrypted key, See
https://floatingcloud.io/setup-postfix-with-mysql-server-imap-and-webmail/
You can send some email via the server right after installation, however AWS throttles this go to the following link to request removing the throttle as well to setup Reverse DNS, which will show your domain name is connected to the Elastic IP address. https://aws.amazon.com/forms/ec2-email-limit-rdns-request
Email Clients
You can use any email client that you like. IN order to test this server I used Claws Mail for Windows (http://www.claws-mail.org/) . As well as Roundcube Webmail. You can install our Roundcube Webmail AMI.
You must be logged in to post a comment.