
Views: 7557
Hmailserver on Windows Server with Roundcube Webmail, Easy Install
You can get started with this wonderful combination of MS Windows and Open Source Software. It is available through AWS Marketplace as Hmailserver on Windows Server with Roundcube Webmail so that you can check email anywhere and from any device.
Description
HmailServer Email Server on Windows combined with Roundcube is the best open source packages installed on a Windows. In its basic form , Installing it by yourself, is really easy to install. With MariaDB Database support it is a bit more complicated. We suggest that you go with a Pre-Installed AMI from AWS in order to avoid installation glitches. Installing RoundCube Full Mail Server with Hmail is really easy. It is unlikely that you will get stuck, since this Image is professionally installed and used by many organizations. If you do need it, Support is included.
Quickstart instructions
Setup the DNS and Server Instance
- Get an elastic IP address
- Setup an A record and MX record in your DNS for your Mail Domain using the Elastic IP address
- When launching the instance, it is wise to choose a larger disk than the default
- Launch the server with Disk size of your choice
- Login to your Windows instance
- Run Powershell as administrator
- run: set-domain-with-cert-iis-hmail.ps1 YOUR-FULLY-QUALIFIED-DOMAIN-NAME
- In web browser open the Roundcube Webmail https://YOUR-FULLY-QUALIFIED-DOMAIN-NAME
- Login with
- username: admin@YOUR-FULLY-QUALIFIED-DOMAIN-NAME
- password: Your INSTSANCE-ID (from the ec2 console)
Add Users
- Add other users to your domain. click the last icon on the bottom of the RDP screen. This opens hmailserver administrator app.
- This opens a small window asking to connect using the admin password, which is your instance ID. So press connect
then paste the Instance ID password and press OK. - Now press Domains –> Your Domain Name –> Accounts
- Click Add on the right side
- fill in the address and the password. You can edit a lot more stuff here too.
- Click the last tab labeled advanced to add the Account Users full name
- Press Save
- The new user account can now log into the Roundcube Webmail
Try Out this Amazon Machine Image at the AWS Marketplace aws.amazon.com
Extensive Get Started Instructions for HmailServer with Rundcube IIS Windows
Thank you for installing – email support@floatingcloud.io with any questions
- Before Starting to set up the Floating Cloud Email Server you should setup your DNS, http://docs.aws.amazon.com/Route53/latest/DeveloperGuide/getting-started.html
If you are purchasing a domain via Amazon Route 53 it will configure some things, However, you will still need to: - Assign an elastic IP Address to your instance.
- Add an A record which points to the IP address of your Floating Cloud EC2 Server. The IP address of your Elastic IP address found in the EC2 section of the AWS panel.
- You must also configure MX record in order to receive email.
To allocate an Elastic IP address for use in EC2-VPC using the console
- Open the Amazon EC2 console at https://console.aws.amazon.com/ec2/.
- In the navigation pane, choose Elastic IPs.
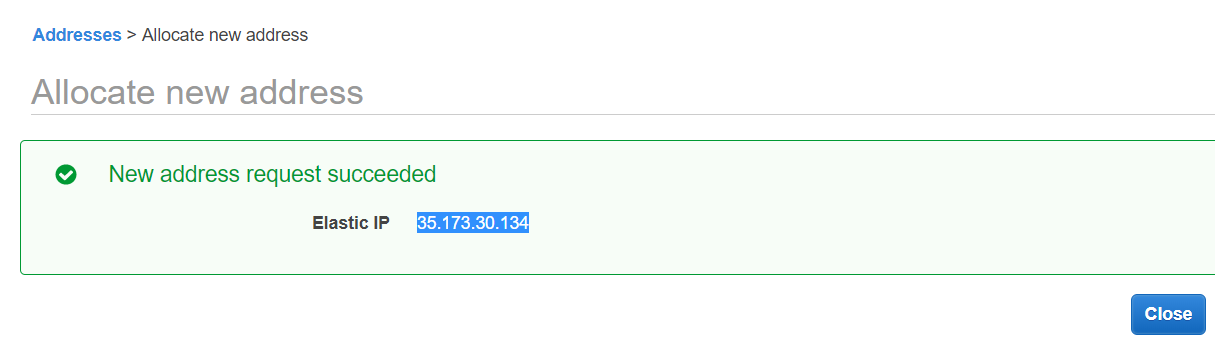
- Choose Allocate new address
- (VPC-only accounts) Choose Allocate, and close the confirmation screen.
To associate an Elastic IP address with an instance using the console
- Open the Amazon EC2 console at https://console.aws.amazon.com/ec2/.
- In the navigation pane, choose Elastic IPs.
- Select an Elastic IP address and choose Actions, Associate address.
- Select the instance from Instance and then choose Associate.
- To configure your DNS so that the internet knows that email can be delivered in your server, you need an A Record and an X record.
Setup DNS with AWS Route 53 from Scratch – Purchase Domain
We suggest having your DNS COMPLETLY setup before launching our Floating Cloud Server especially
Also see: http://float.i.ng/setup-mx-record-in-route-53-with-a-domain-that-you-registered-with-aws/
IN these images and instruction I am registering and setting up a domain called float.i.ng Any links that you see with this domain or with instructions to open your server at http://YOURDOMAIN or the like must be replaced by your real domain name.
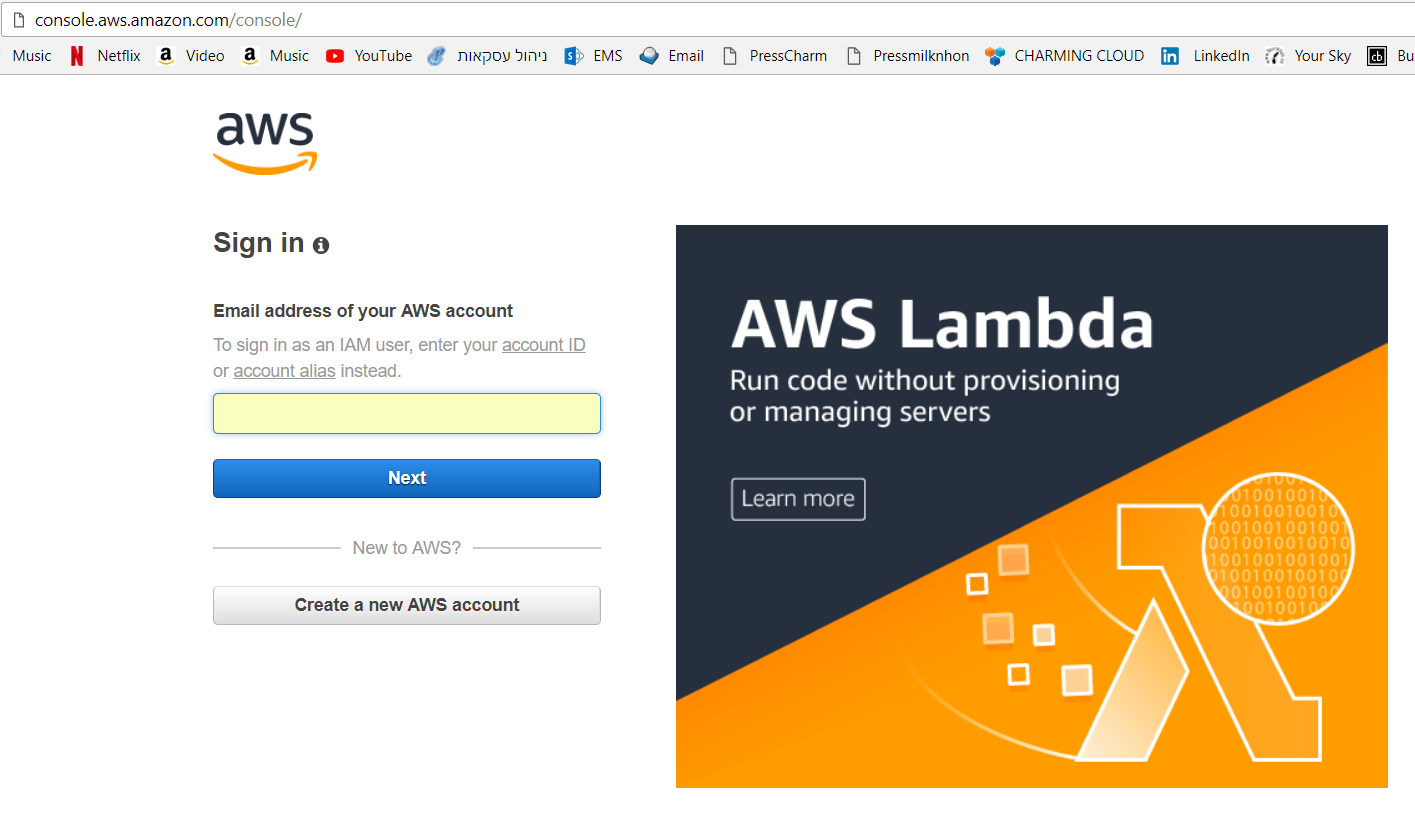
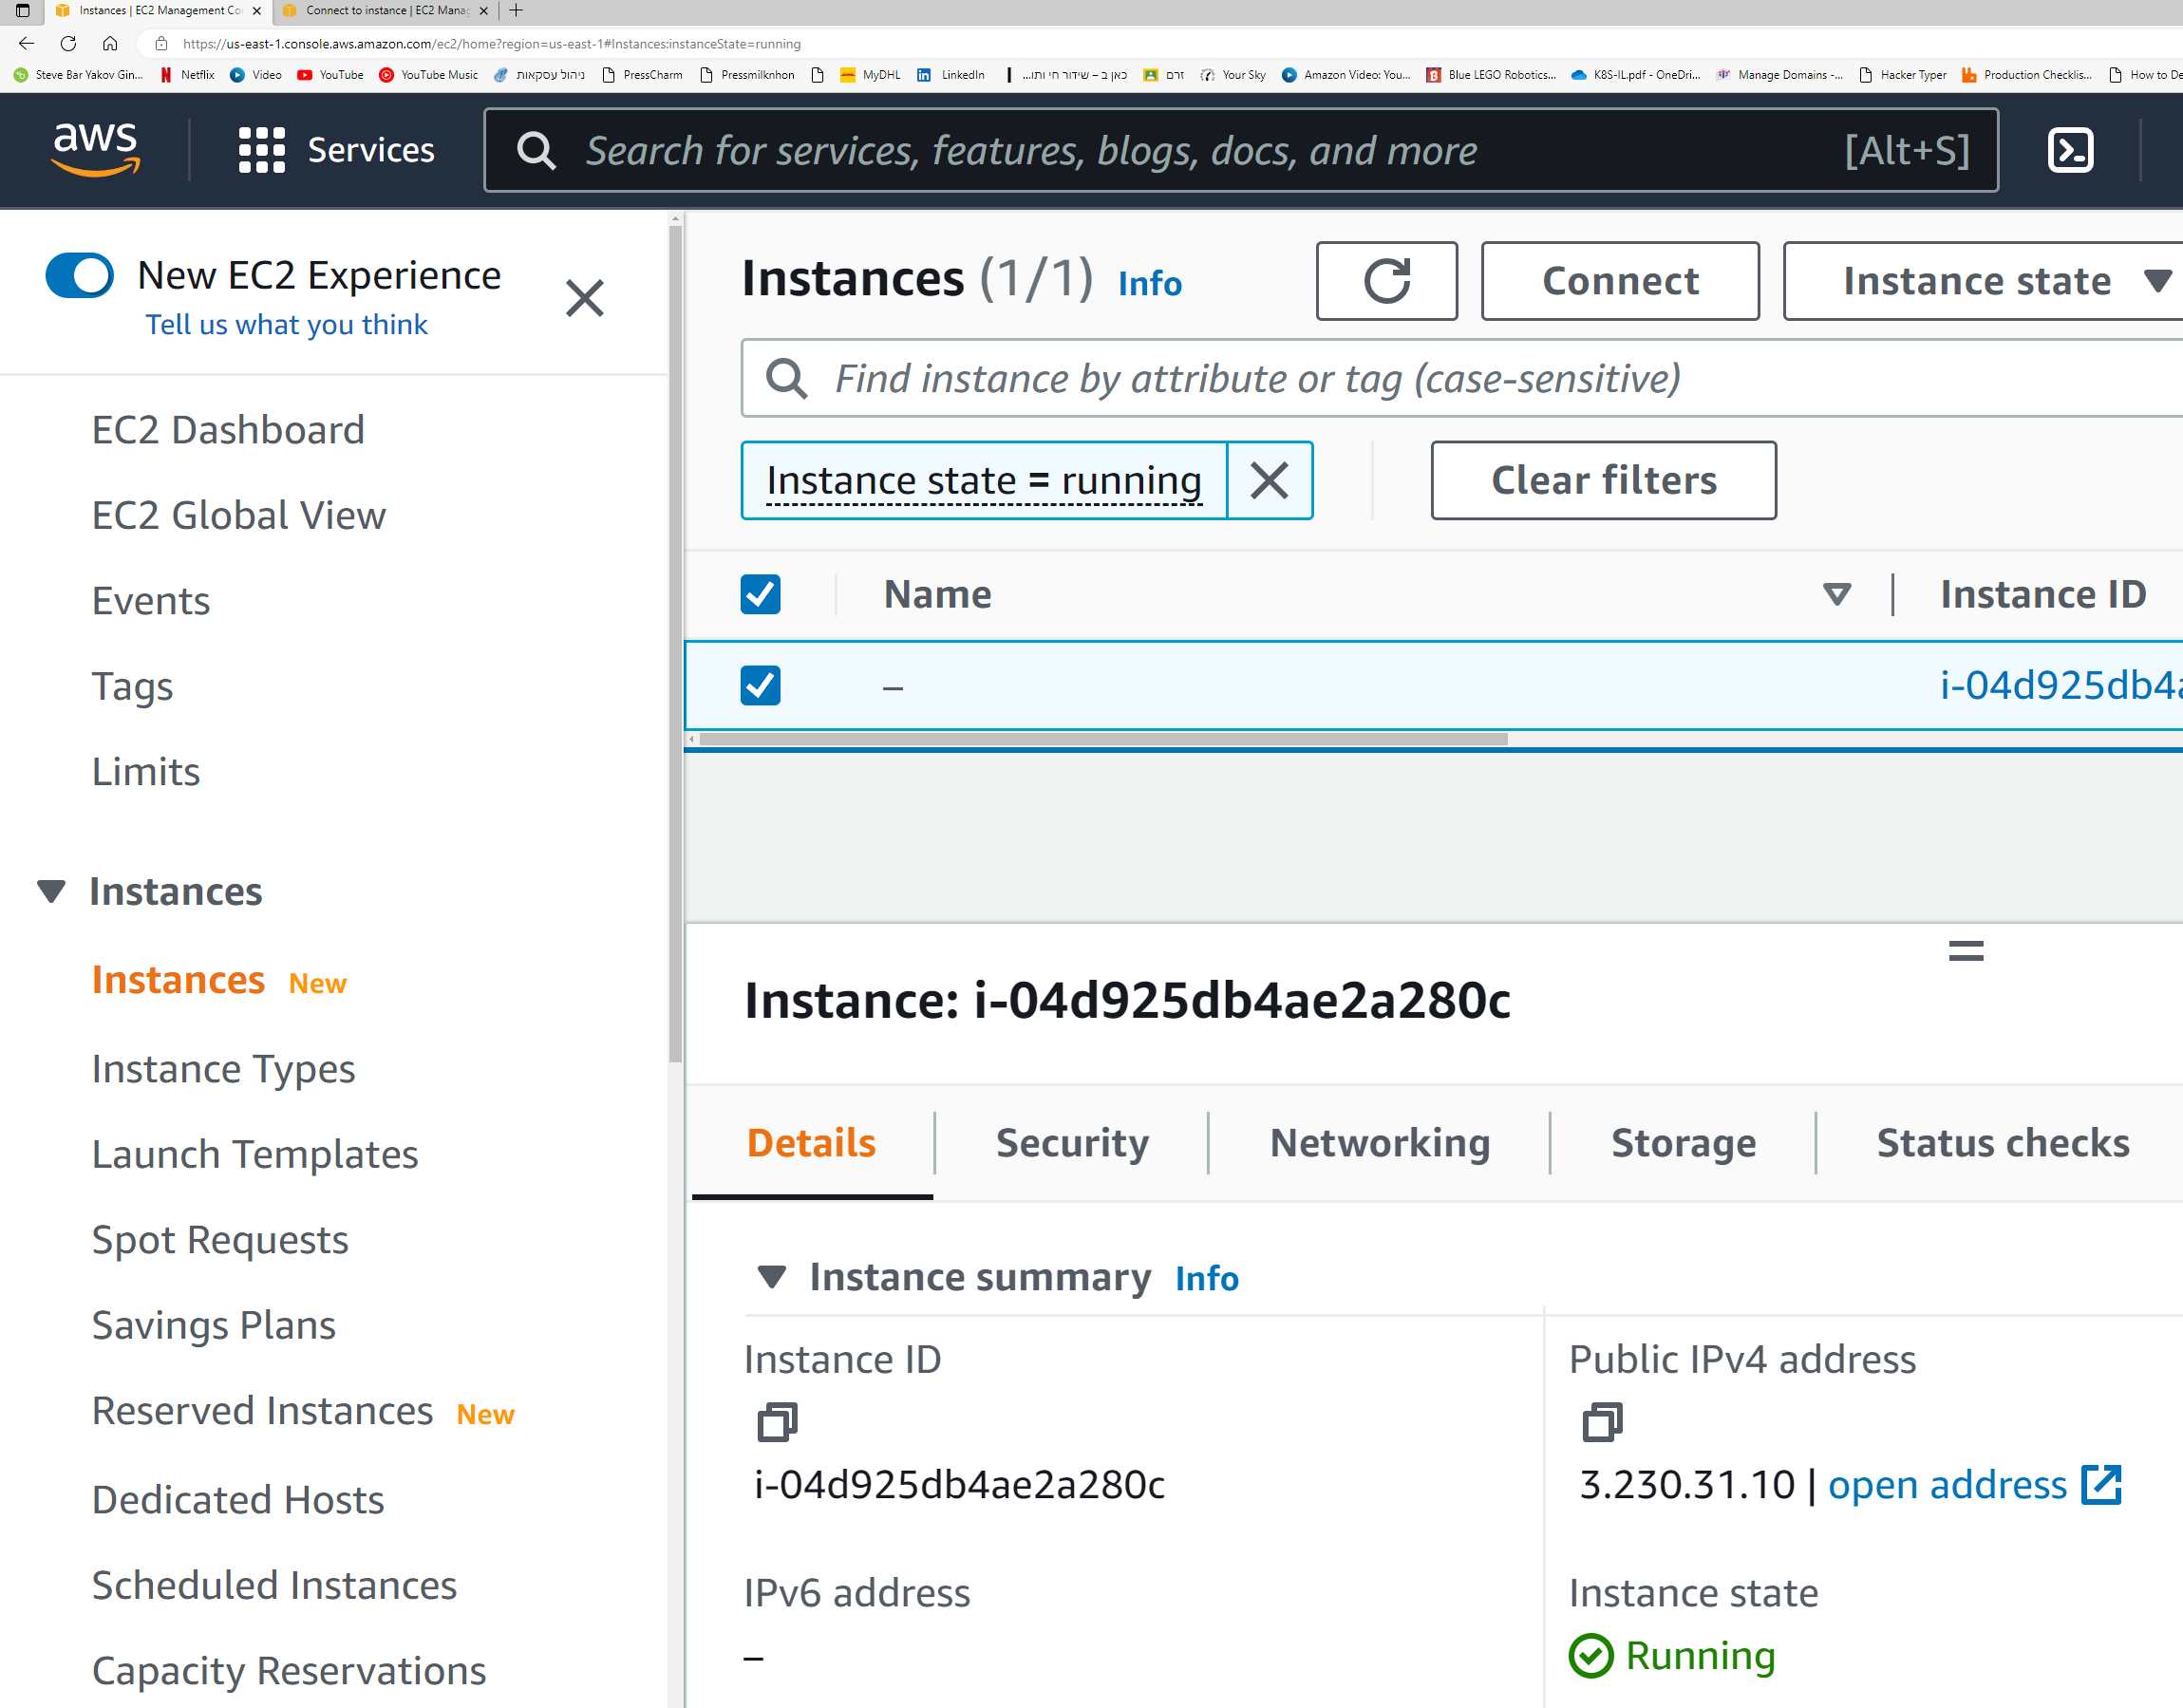
Sign in to console.aws.amazon.com/console/ with your AWS Username and Password, this might be different from your Amazon Login.
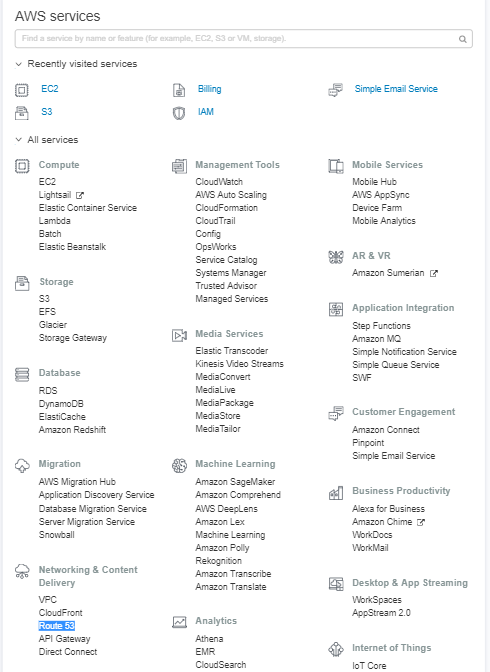
Under AWS Services select Route 53.
Click Domain Registration
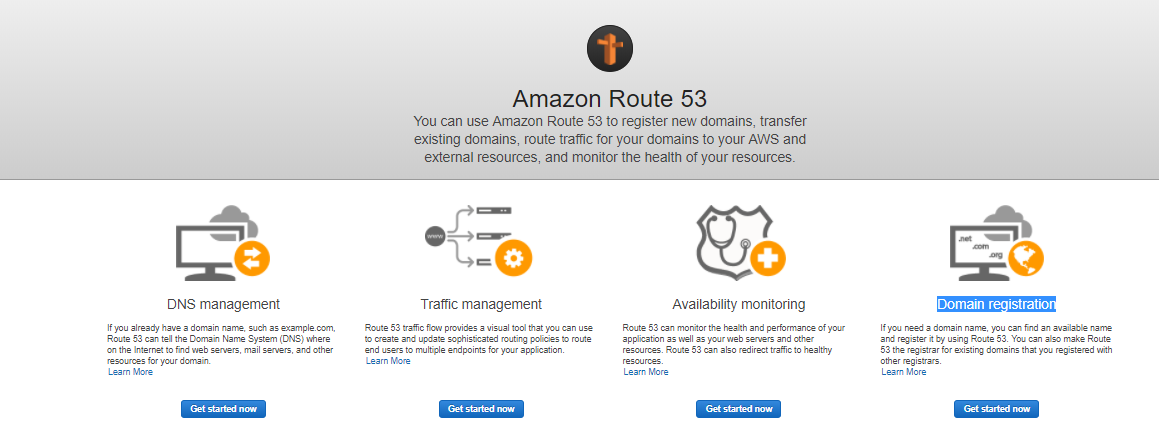
Route 53 Domain Registration
- Check to see the availability of your domain. AWS sells a huge assortment of domains. charges reasonable prices with no tricks for the second year. Like Godaddy might sell you a domain for a dollar then 50 for next year. You should always buy your domains from Amazon AWS Route 53.
- Fill in contact details as required
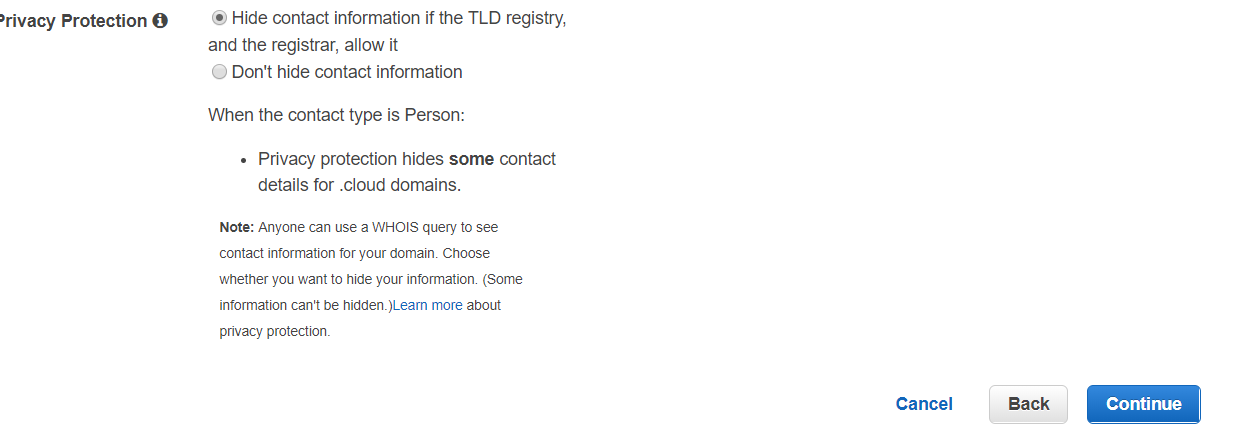
- Select your desired privacy setting
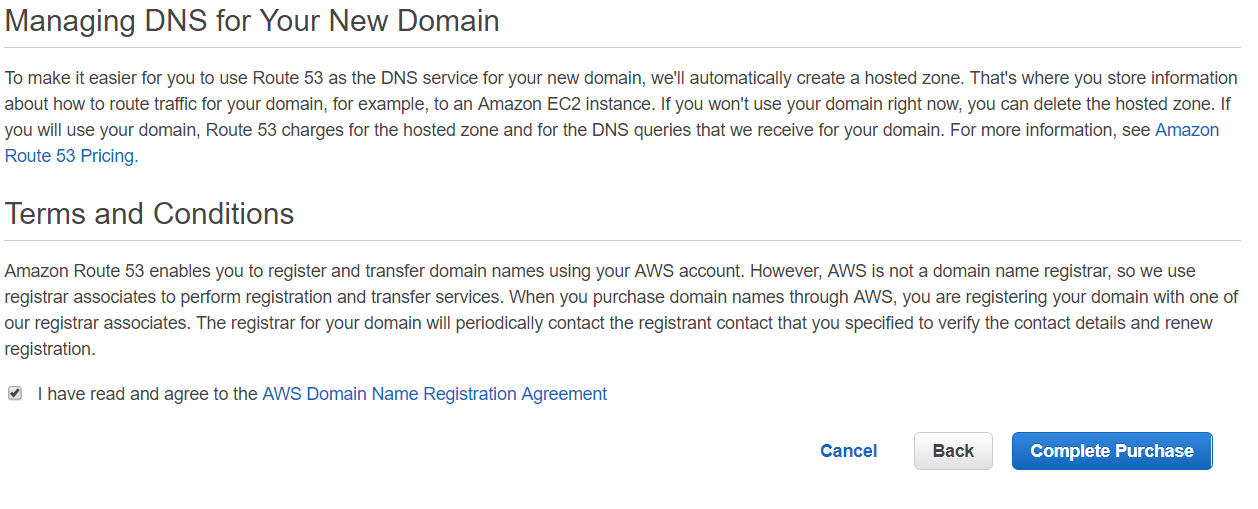
Press continue then agree to terms and complete purchase
After completing the registration, you need to wait some time, depending on which Top Level Domain you ordered.
So! this can take a few days. Put off launching your PhpList Free Trial until your DOMAIN and DNS are organized. But alas it took only 15 minutes.
You then need your DNS to have an A record to point to the IP address of the server. The A record is the domain or sub-domain that you plan to use for this server.
You then need to make an MX record point to that A record. This makes the Instance open to receive email from the rest of the Universe. You will receive bounces to bounce@YOURDOMAIN.com . Without the MX record set correctly your server might be blacklisted since it can’t process the bounces properly.
Be sure that you Allocate the Elastic IP in the region you intend to use for the PhpList Server on Windows.
Click in the lower left column Elastic Ips
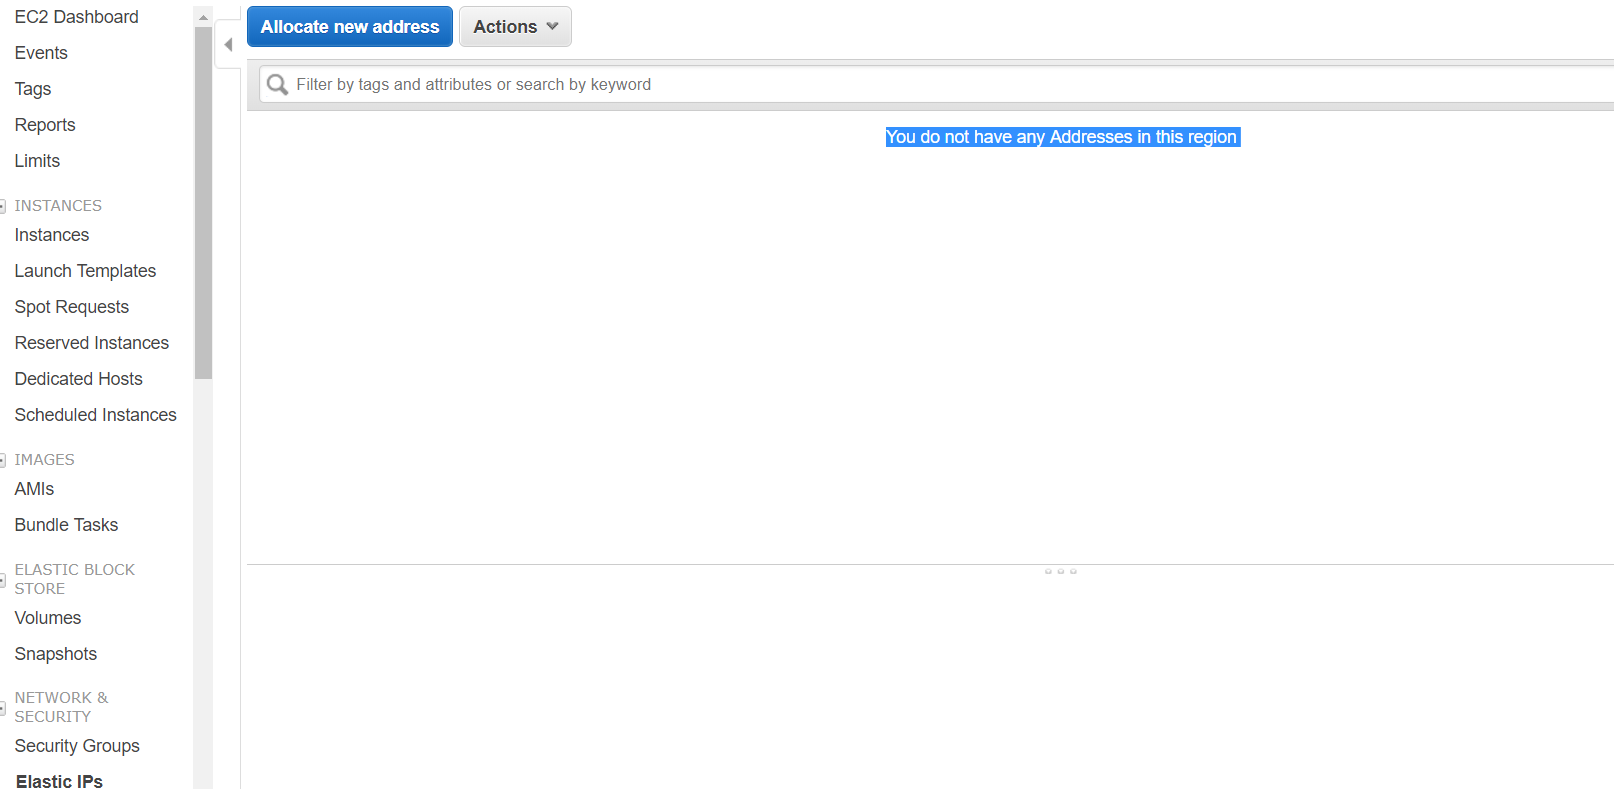
Then Allocate again,

Now copy the IP address into the Route 53 to create an A record for the domain we registered above.
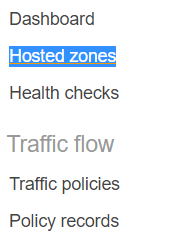
Go back to Route 53 under services click your new domain from the list of domains in hosted zones.
Now you will see a window like this. Select Create Record Set towards the top of the window.
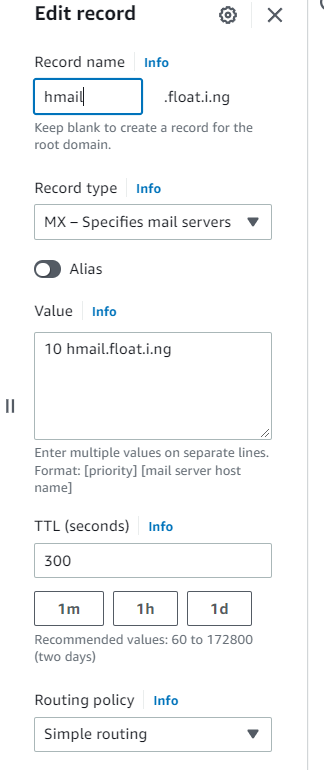
Create an A record pointing towards your new IP address either with your domain name or a sub-domain, that the A record creates, then create an MX record that points to it. I really like my new domain name of float.i.ng and want the web address to go to my Floating Cloud WebSite. In order to get email to float.i.ng we will set the MX record of float.i.ng
The MX record tells the universe that a server named mail.float.i.ng will receive email to anyone@float.i.ng
Click on your domain.
So if your mail server uses the same server as your Web server, you can use a single domain or subdomain.
In the right column next to Name: fill in the subdomain that you would like the server to be known as. You can use your top Level Domain if you plan to use the same IP address as your webserver. In other words, leave Name field blank if you are not using a subdomain. paste the IP address that you got from Elastic IP into Value. Then Press Create
Now create an MX record that points to your A record Fully Qualified domain name. IN our case they are different.
Again , Select Create Record Set, in the right column select MX record.
![]()
Now, next to Value put the number 10 followed by space then the Fully Qualified domain name used in the A record. Then Press Create.

Now you will see the records.
Although we haven’t yet launched the server instance , we have done a lot of the hard work needed to create your HmailServer with Roundcube Server. Lets verify that the Internet knows what we did.
I like to use mxtoolbox
Here we see that the domain that we looked up float.i.ng has an MX record as we set up that points towards mail.float.i.ng . If you made changes to a DNS it takes time for them to propagate, this depends on TTL setting which is measured in seconds. If your TTL is really high, you might need to wait a day or 2 to see the changes.
Setup the DNS via Route 53 – Just the MX Record
If you are using a different DNS than Route 53, please drop us an email to help you out to support@float.ing
The MX record could the name of a different A record. So you could give your Instance, Elastic IP address, as mail.YOURDOMAIN.com while an existing A record points towards the Top Level Domain of YOURDOMAIN.com. But the examples below are for the same domain name as the name of the Mail Server.
Setup the Instance
Launch the instance from the AWS Marketplace
The default Volume size is only 30 GB. It’s likely that you will need more
Security group suggestions, The security group needs to have ports
- 3389 – RDP
- 443 – IIS web server for Webmail
- 25 – SMTP
- 110 – Secure POP3
- 143 – Secure IMAP
- 587 – Secure SMTP
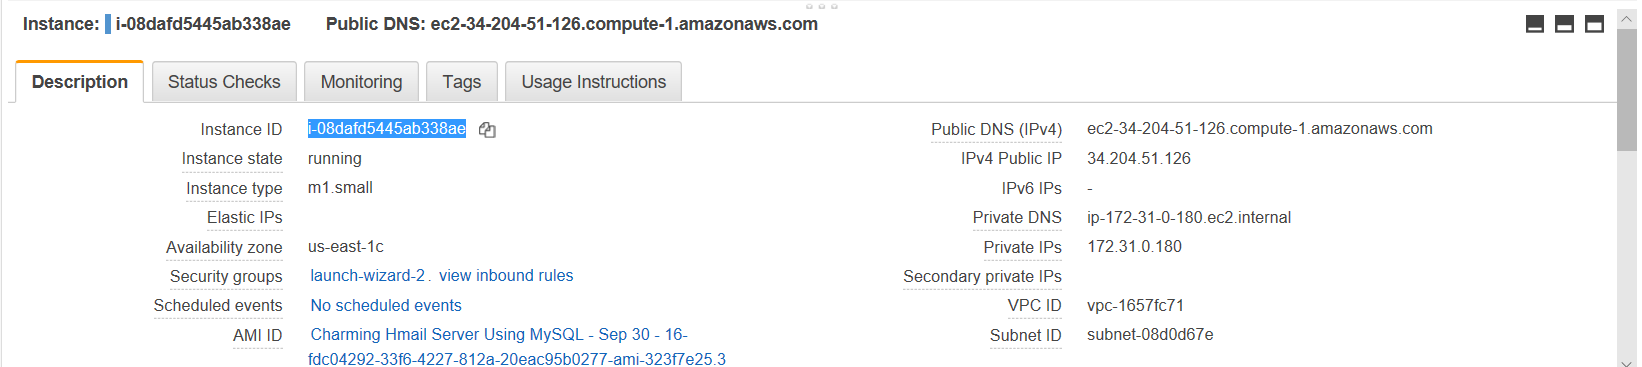
connect previously created elastic IP.
- In the left column of the EC2 Console Select Elastic IPs
- Select your previously created Elastic IP address, that already has DNS pointing towards it
- Click on the Actions button and select “Associate Elastic IP Address”
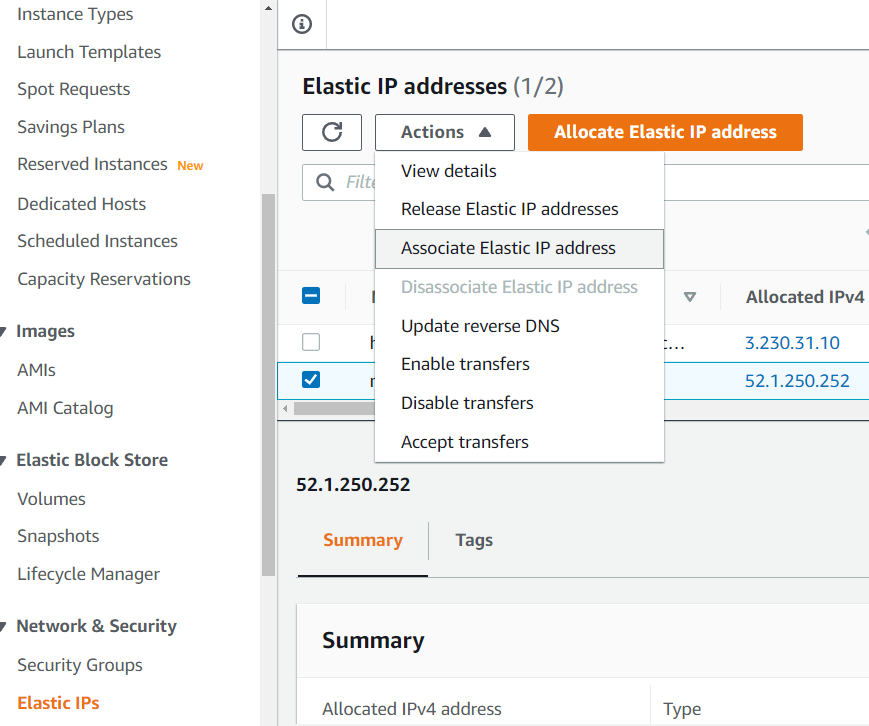
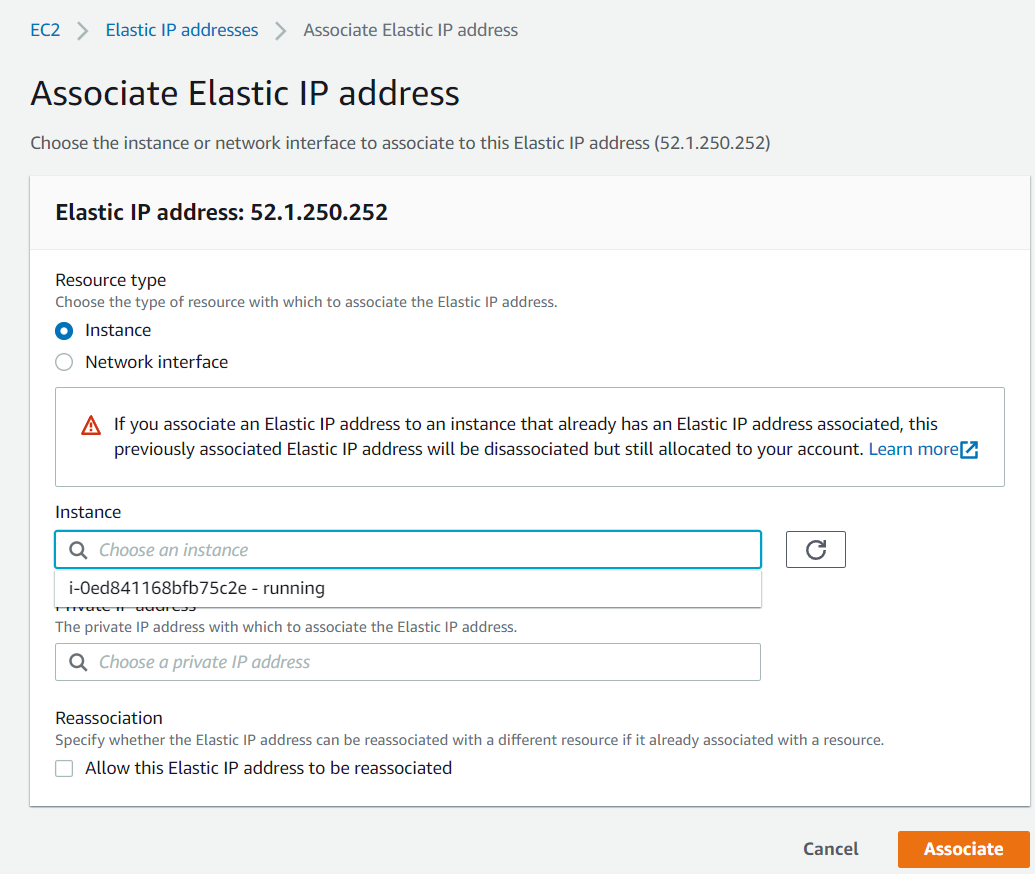
- Click choose an Instance and select your new instance
- Click associate at the bottom.
- Now you can connect to your instance via RDP, even with the domain name
- Now you’ll see a list of just your current Elastic IP Address.
- Click on the middle column that says Associated Instance ID. (If you go back to instances to do this you might get an RDP file referring to the wrong IP address.

This opens another list containing just your instance that’s attached to the Elastic IP Address.
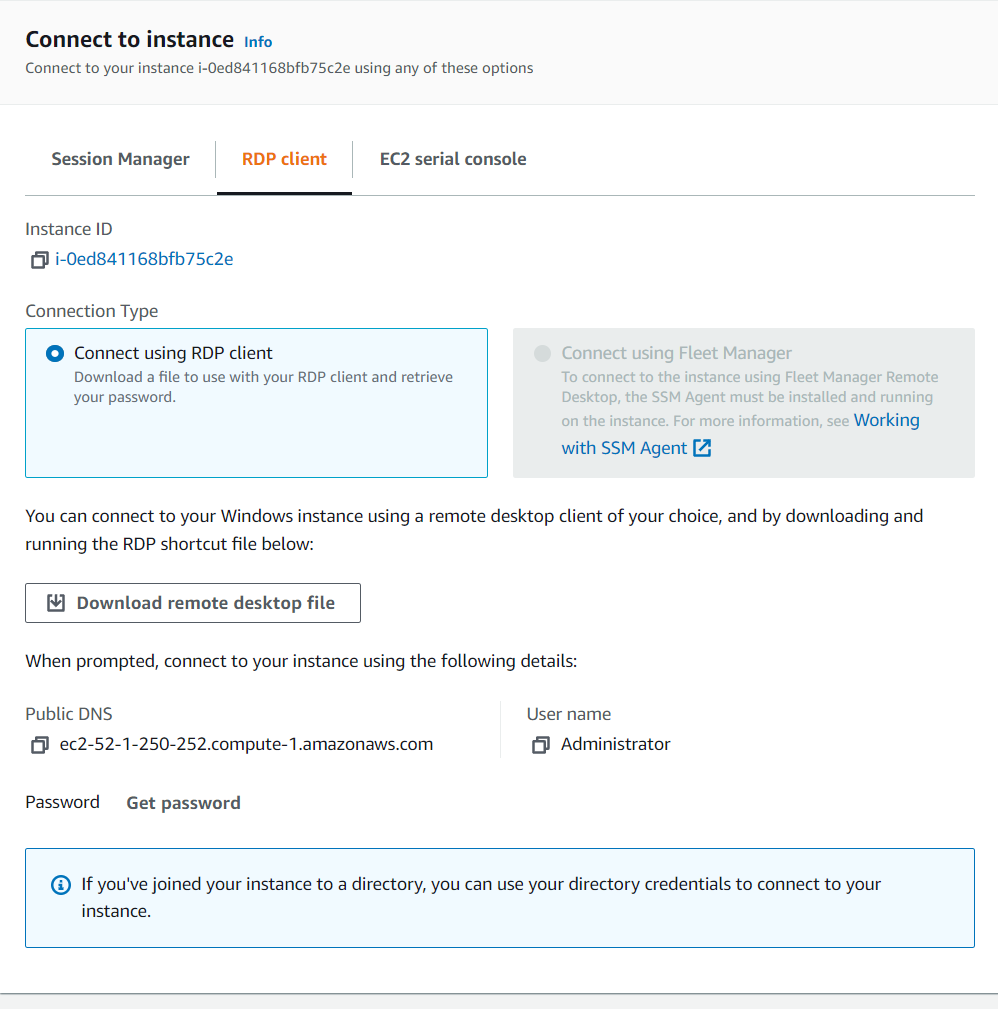
Right click on your instance and select Connect

- Select the middle Tab “RDP Client”
- Click “Download remote desktop file” and save the file in place that you will remember
- Towards the bottom click “Get Password”
- This will open a window that expects to see your encrypted that was used when creating the instance
- Select “Upload Private Key” then point it towards your saved key file

- After the window is filled with encrypted text click “Decrypt Password”
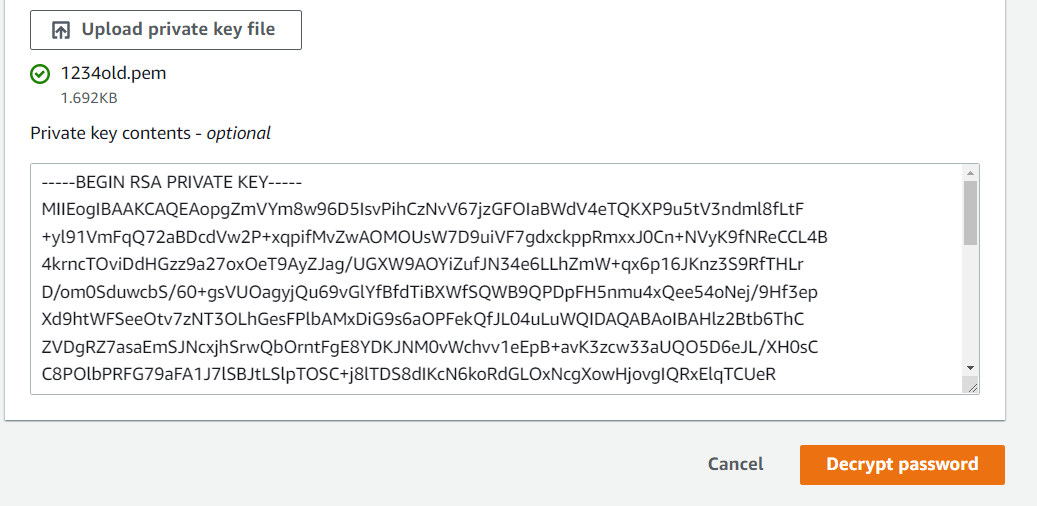
- Copy the password that now appears towards the bottom. It’s easiest to do this with the little boxes to the left of the password
 Now click on the previously save RDP file and paste the password when prompted, Just accept all of the warning.
After Setting up the DNS and your launching your server, you need to setup Hmail Server. This is fairly simple
- You need to login to the Windows Desktop of your new Floating Cloud Server in order to configure HmailServer.
To login to your server from Windows , right click on your instance ID, in the AWS Ec2 Panel, Get Password using your key file then download the Remote Desktop File and open it when it is downloaded.
If prompted to upgrade Windows, do so. We also suggest upgrading optional upgrades.
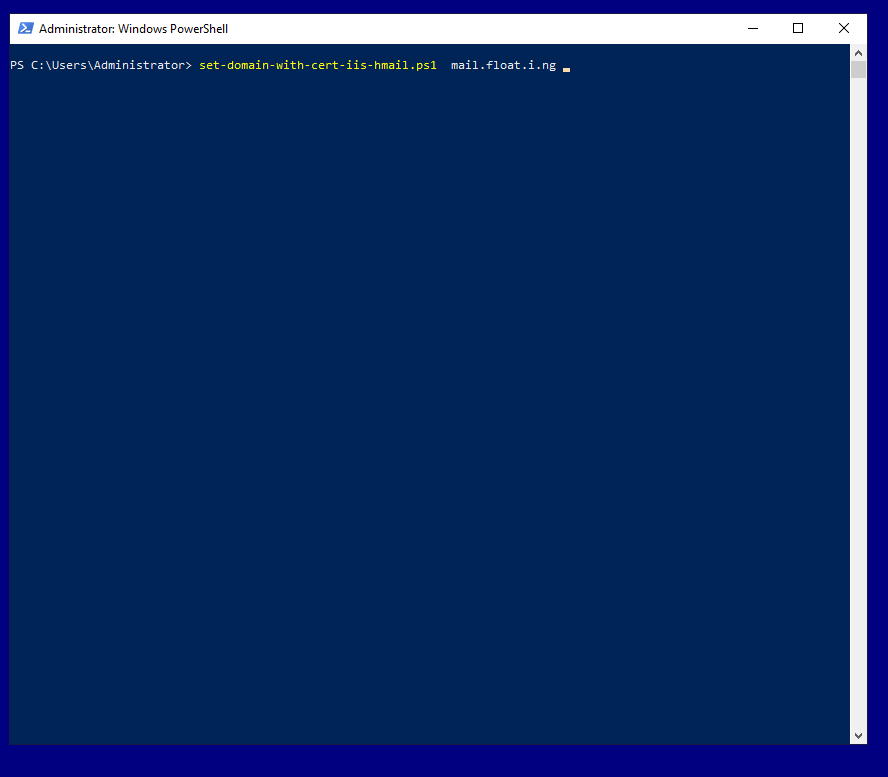
Windows Powershell
Select Run as Administrator (be careful not to select Run ISE)
Run the following command VERY CAREFULLY,
Be sure to include the Fully Qualified Domain Name with has both an A record and MX Record. In the example case we are using one of our test domains “mail.float.i.ng”
set-domain-with-cert-iis-hmail.ps1 YOUR-FULLY-QUALIFIED-DOMAIN-NAME
Pay attention to the output, especially where the wacs - Certificate application is run. It Should say something like:

DEBUG: 10+ >>>> .\wacs.exe --store certificatestore,pemfiles --pemfilespath c:\certs --source manual --host $maildomain --certificatestore My --installation iis --installationsiteid 1 --accepttos --emailaddress $mailaddress --setuptaskscheduler

A simple Windows ACMEv2 client (WACS)
Software version 2.1.19.1142 (release, pluggable, standalone, 64-bit)
Connecting to https://acme-v02.api.letsencrypt.org/...
Scheduled task not configured yet
Please report issues at https://github.com/win-acme/win-acme
Running in mode: Unattended
Source generated using plugin Manual: mail.float.i.ng
Overwriting previously created renewal

Requesting certificate [Manual] mail.float.i.ng
Store step 1/2: CertificateStore...
Installing certificate in the certificate store
Adding certificate [Manual] mail.float.i.ng @ 2022/10/22 18:16:55 to store My
Store step 2/2: PemFiles...
Exporting .pem files to c:\certs
Installing with IIS...
Adding new https binding *:443:mail.float.i.ng
Committing 1 https binding changes to IIS
Uninstalling certificate from the certificate store
Removing certificate [Manual] mail.float.i.ng @ 2022/10/21 11:19:36 from store My
Next renewal scheduled at 2022/12/16 18:16:55
Certificate [Manual] mail.float.i.ng created
DEBUG: 14+ >>>> $hm = New-Object -ComObject hMailServer.Application
DEBUG: ! SET $hm = 'System.__ComObject'.
COpy the instance ID, this is the password for everything other than logging into Windows via RDP. The hmailserver admin username and MariaDB Database use the Instance ID as the password.
Open your server from a web browser
- In web broswer open the Roundcube Webmail https://YOUR-FULLY-QUALIFIED-DOMAIN-NAME
- Login with
- username: admin@YOUR-FULLY-QUALIFIED-DOMAIN-NAME
- password: Your INSTSANCE-ID (from the ec2 console)
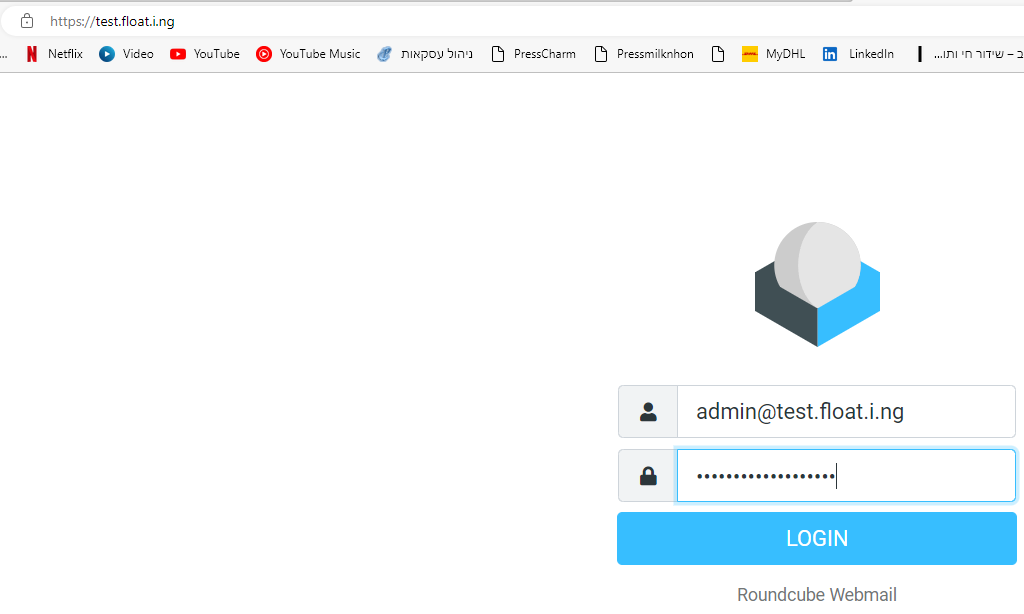
You can now send and receive mail as user Admin.
- Add other users to your domain. click the last icon on the bottom of the RDP screen. This opens hmailserver administrator app.
- This opens a small window asking to connect using the admin password, which is your instance ID. So press connect
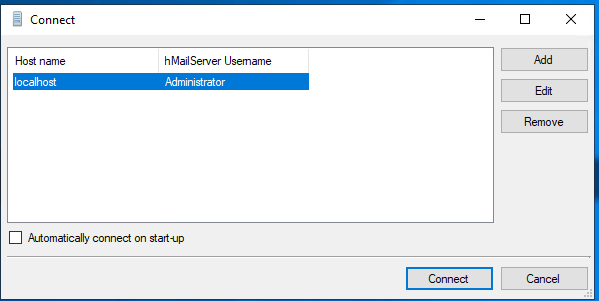
- then paste the Instance ID password and press OK.
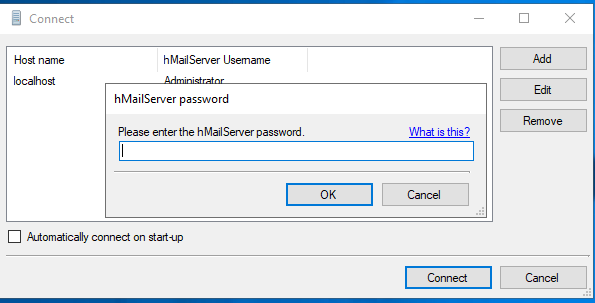
- Now press Domains –> Your Domain Name –> Accounts.
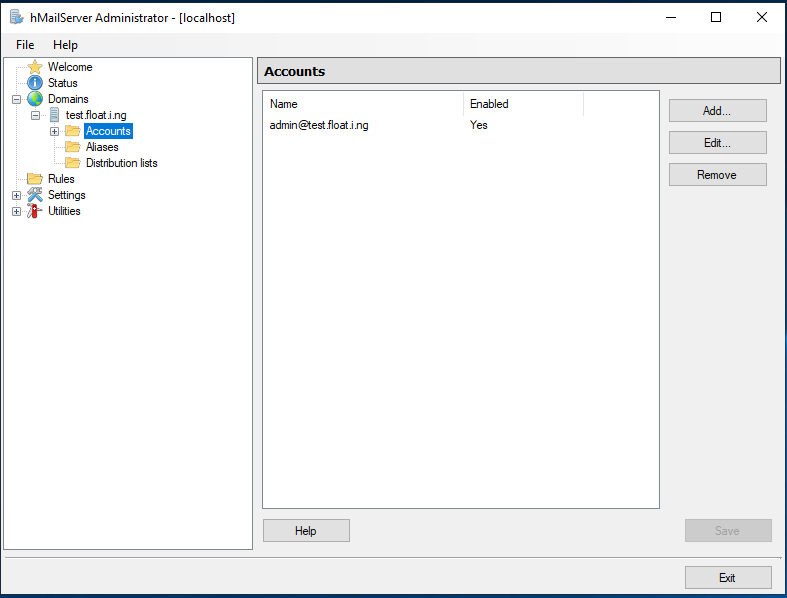
- Click Add on the right side

- fill in the address and the password. You can edit a lot more stuff here too. Press Save. In this accounts tab, you can also change people’s passwords. Press advanced if you would like to include the users full name.
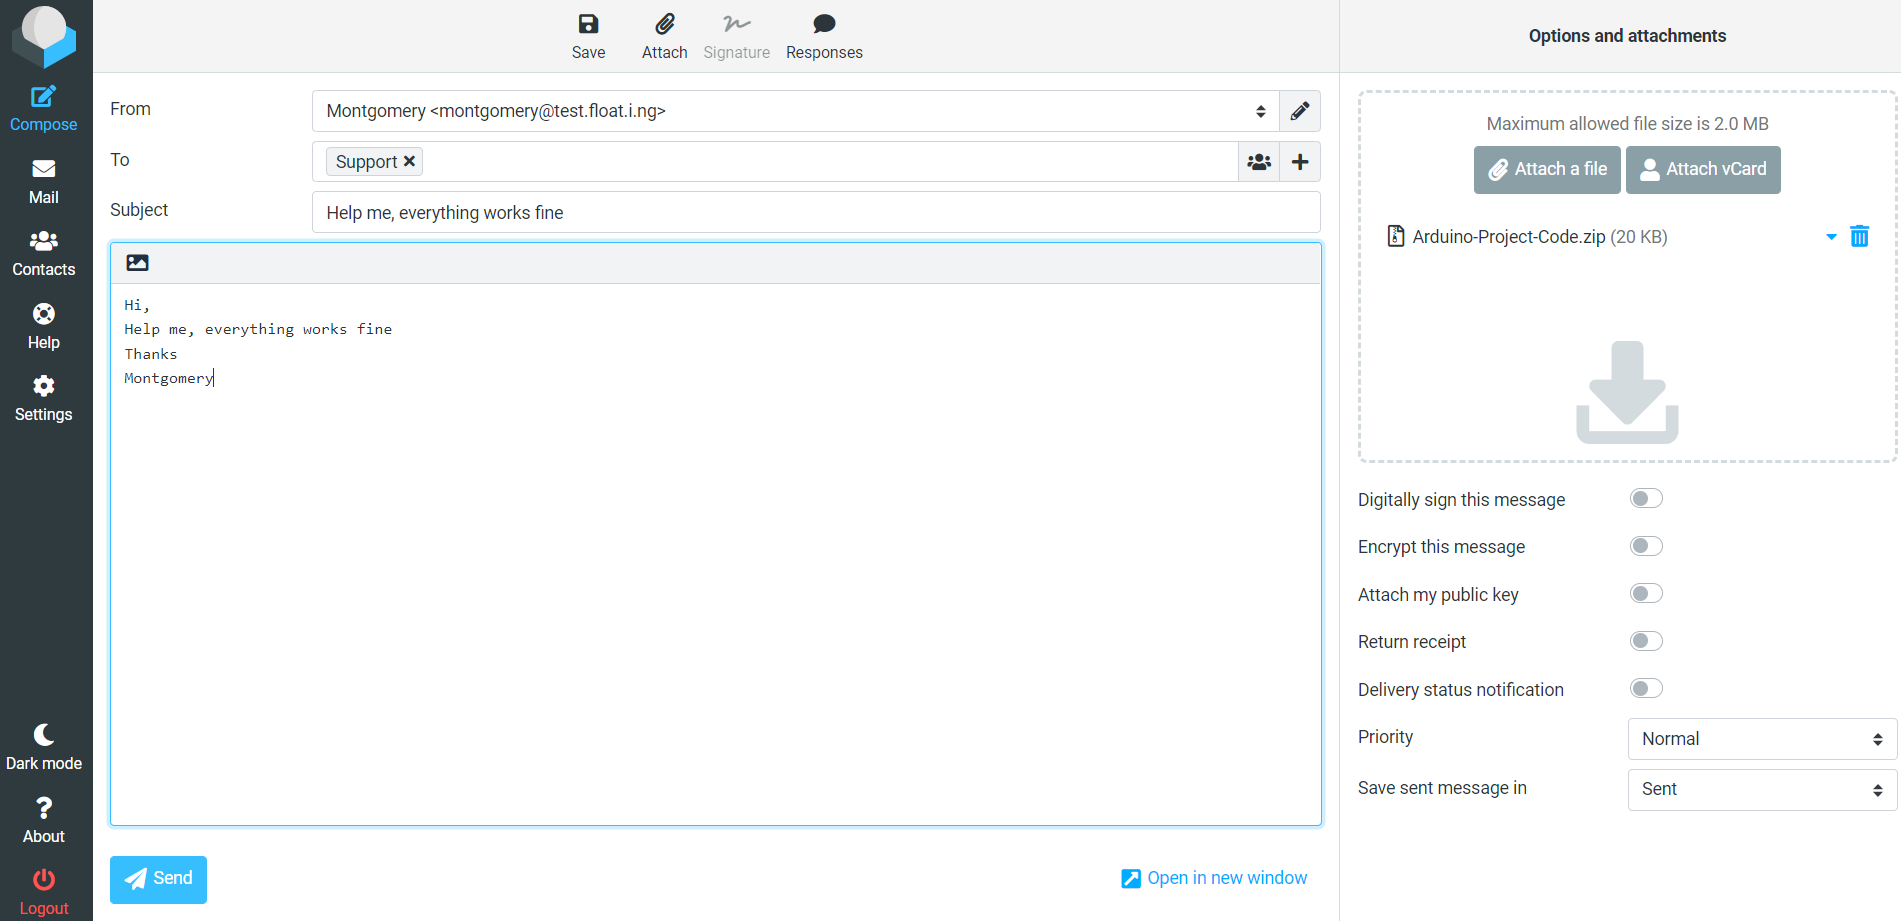
Each user can log into Roundcube Webmail with their full email address, so in this case we have added user account montgomery@test.float.i.ng
You might be asked for a Display name, as we didn’t write Montgomery’s full name when adding the account. SO just fill it in as needed.
The new User Accounts can now send mail via the Webmail. Drag files into the browser to attach them.
Use Diagnostics to verify that your settings are ok go into
Utilities —> Diagnostics
Fill in both fields with your Domain Name, then press start

The results should all be green, except for “Test Backup Directory” which can be red.

If you need to access the MySql Server
The MySql Password is set to the Instance ID . This can be found in the ec2 panel of AWS. An init script plants these passwords in the appropriate config files throughout the server. You can change it if you desire. So, use user root or Floating Cloud and the password is the Instance ID.
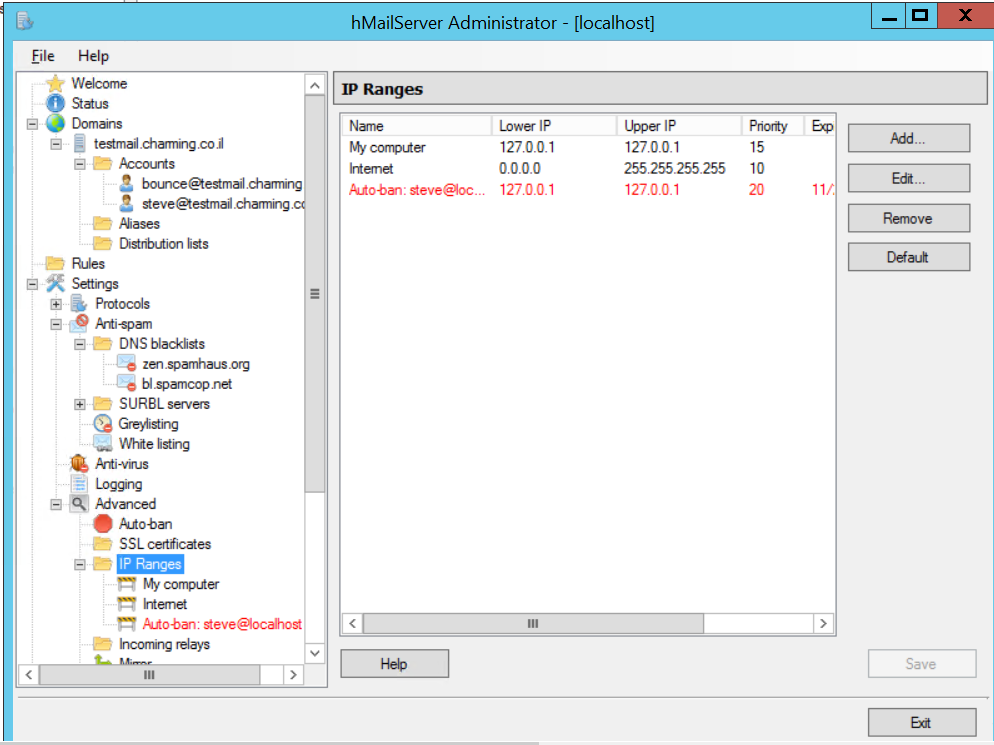
Error Connecting to your Server. Hmailserver Autoban
If you receive an Error “Connection to storage server failed.” You need to remove the localhost from the Autoban list. This happens while testing a new server, but it is VERY useful to prevent spammers from trying to hack your email server. In order to fix it go the admin panel in Hmailserver and select Avanced —> IP Ranges and remove your accountname@localhost.
You can check your email using Roundcube Webmail that is pre-installed in the Floating Cloud Small Business Server.
Goto
http://publicDNS/
Put in the username@domainname and password added above. In other words you need to put the entire email address into login.
Each user needs to setup their personal info in roundcube. Select Setting — Identities — and the email address. Then fill in the details. A signature is great to be taken serious in life.
You must be logged in to post a comment.