
Views: 2521
Important
If the current registrar for the domain is also the DNS service, be sure to transfer DNS service to Route 53 or another service provider before you transfer the domain.
Otherwise, the domain might become unavailable on the internet after it has been transferred.
Transferring a domain from GoDaddy to Amazon Route 53 is a straightforward process, but it’s essential to take certain steps to ensure a smooth transition without affecting your website’s search engine rankings. In this SEO blog, we’ll guide you through the steps for transferring your domain to Route 53.
Step 1: Verify Ownership of Your Domain
The first step is to verify that you are the owner of the domain. You will need to have access to your GoDaddy account to retrieve the domain’s authorization code, also known as an EPP code. This code is required to transfer the domain to Route 53.
Step 2: Prepare Your Domain for Transfer
Before you start the transfer process, make sure that your domain is ready for transfer. Check that your domain is at least 60 days old, not expired, and not locked. Also, disable any domain privacy services if enabled.
Step 3: Initiate the Transfer
Go into your AWS account Console and Open Route 53
https://aws.amazon.com/console/
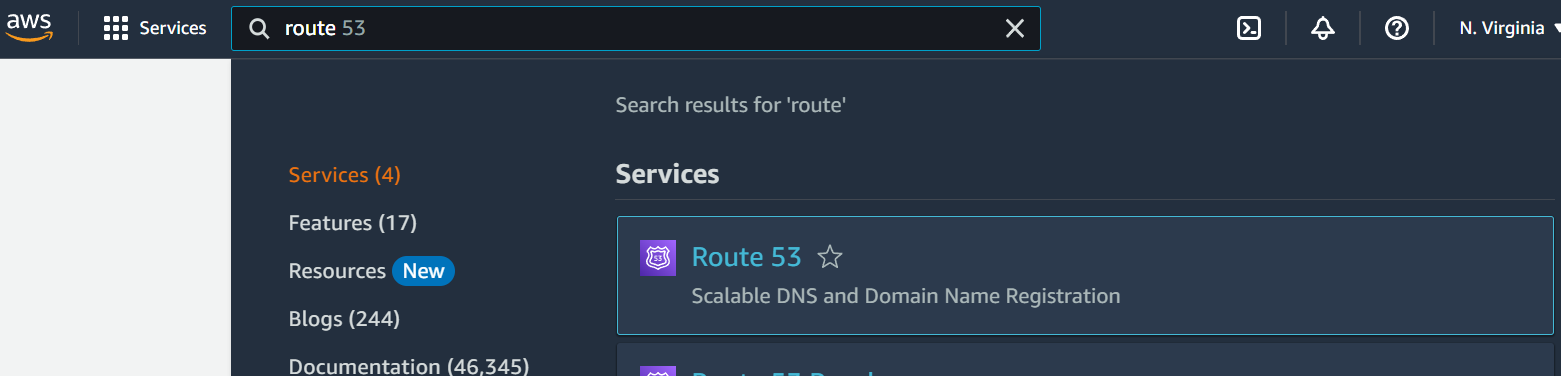
Then Open Route 53. In upper left, next to Services is a search bar. type in Route 53, then click the first link.
To initiate the transfer, log in to your Amazon Route 53 account, and go to the “Registered Domains” tab.
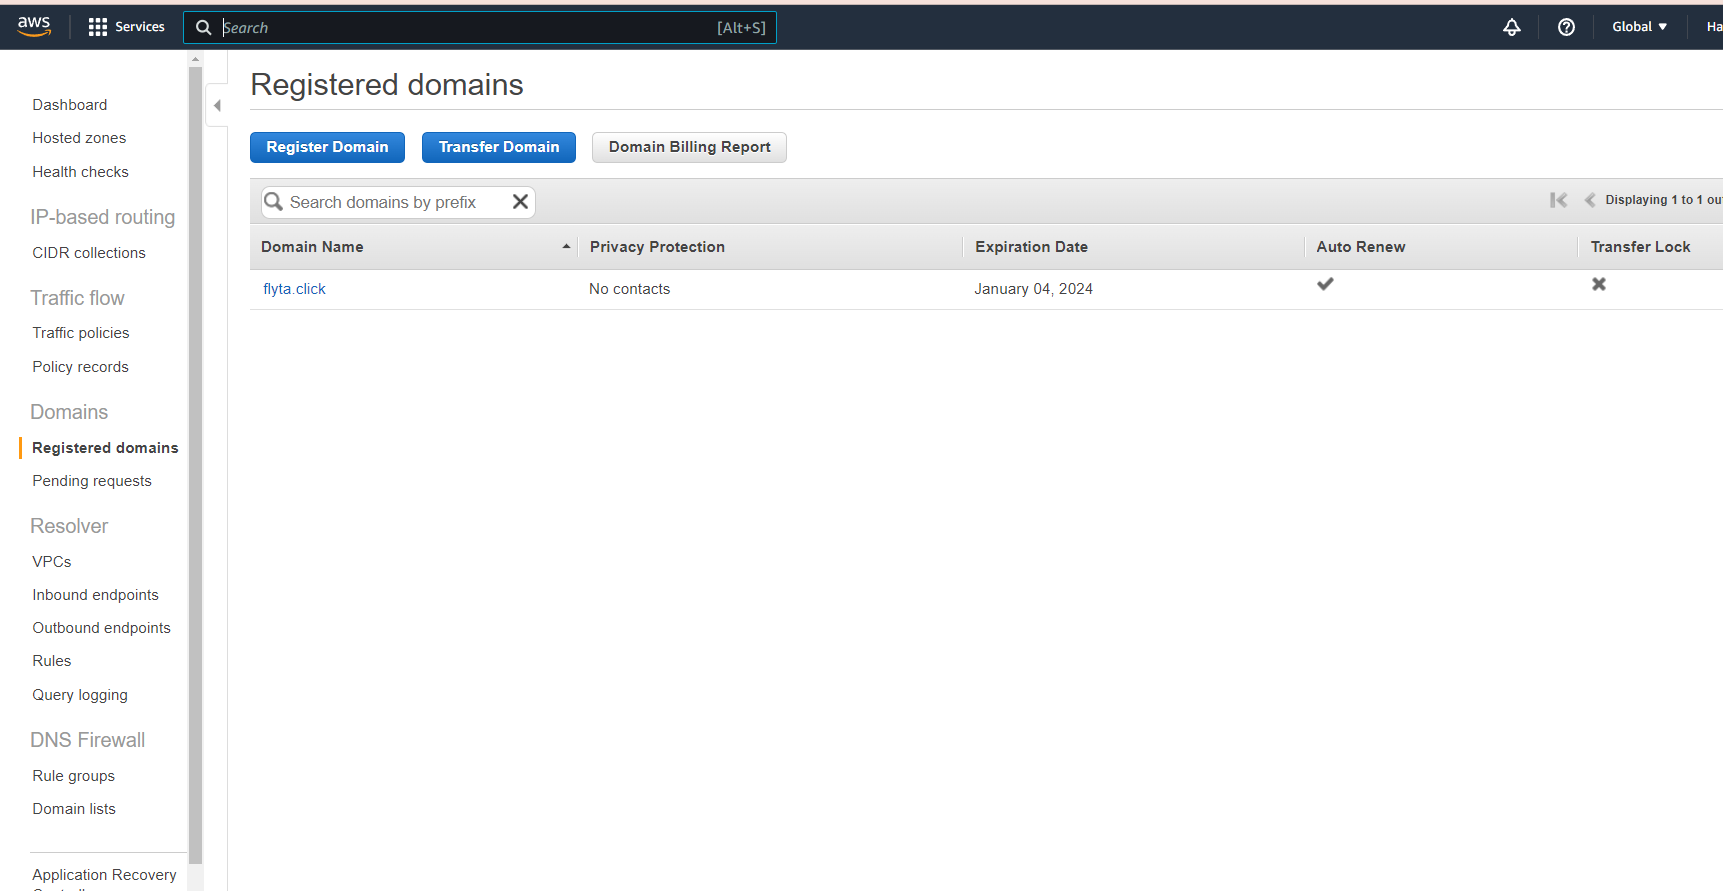
Click “Transfer Domain,” and then enter the domain name you wish to transfer. Next, enter the authorization code you retrieved from your GoDaddy account.
Complete the checkout process and pay the transfer fee.
Step 4: Verify the Transfer
After initiating the transfer, you will receive an email confirmation from Amazon Route 53, and another email from GoDaddy asking you to approve the transfer. Follow the instructions in the email to approve the transfer.
Step 5: Wait for the Transfer to Complete
The transfer process may take up to ten days to complete. During this time, it’s important not to make any changes to your website, such as changing hosting providers or updating the DNS records. Doing so could cause your website to go offline or affect your search engine rankings.
Step 6: Update DNS Records
Once the transfer is complete, update your DNS records in Amazon Route 53 to point to your website’s new hosting provider. This step is crucial to ensure that your website remains accessible and doesn’t experience any downtime.
In conclusion, transferring a domain from GoDaddy to Amazon Route 53 is a relatively straightforward process. However, it’s important to follow the steps outlined above to ensure a smooth transition without negatively affecting your website’s search engine rankings. If you have any questions or concerns, don’t hesitate to reach out to Amazon Route 53 support for assistance.
You must be logged in to post a comment.