Visits: 2626
How to set up and configure hMailServer with Roundcube on Windows Server 2019.
hMailServer is a free and open-source mail server that allows you to send and receive emails using your own domain name. It is wisest to add Letsencrypt Certificate for HmailServer. It is an excellent alternative to other commercial mail servers, and its integration with Roundcube, a popular webmail client, makes it even more powerful. In this tutorial, we will walk you through the process of setting up hMailServer and Roundcube on Windows Server 2019.
We suggest that you go with a Pre-Installed AMI from AWS in order to avoid installation glitches. Installing RoundCube Full Mail Server with Hmail is really easy. It is unlikely that you will get stuck, since this EC2 AMI Image is professionally installed and used by many organizations. If you do need it, Support is included.
You can also install it yourself following these instructions and using the Git repo with base files and script that installs everything for you, inlcuding configuring Letencrypt to renew the certificate. The Letsencrypt certicicate is used by the IIS web server, and Hmail for each port needed.
The instructions below expect a bunch of stuff to be pre-installed on the Windows EC2 server!
- IIS
- FastCGI
- php
- mysql – Maria works too but needs some file copied from Oracle Mysql anyway
- Rouncube unzippped as the root of IIS
- wacs – certbot script that installs the certs into IIS and creates cert files for hmail
- Hmailserver
- It also needs the php.ini file in the correct place. The hmail.ini files need to be C:\Program Files (x86)\hMailServer\Bin\
Download and Install hMailServer
The first step is to download hMailServer from its official website. Once downloaded, run the installer and follow the instructions to install the software. Remember to add Letsencrypt Certificate for HmailServer
Configure hMailServer
When running the script from the Git repo, hmailserver will be completely configured.
After installing hMailServer, open it and click on the “Connect” button. This will open the “Connect” dialog box, where you need to enter your administrator username and password. By default, the administrator username is “Administrator” and the password is blank.
Once you are connected to hMailServer, you need to create a new domain by right-clicking on the “Domains” node in the left-hand pane and selecting “Add domain.” In the “Add domain” dialog box, enter your domain name and click “Save.”
Next, create an account for the domain by right-clicking on the domain name and selecting “Add account.” In the “Add account” dialog box, enter your email address and password, and click “Save.”
Install Roundcube
The next step is to install Roundcube on your server. You can download the latest version of Roundcube from its official website. Once downloaded, extract the files to the “htdocs” folder in the root directory of your web server. Roundcube will need the Letsencrypt Certificate for HmailServer
Configure Roundcube
After installing Roundcube, you need to configure it to work with hMailServer. Open the “config.inc.php” file in the Roundcube installation directory and edit the following lines:
$rcmail_config['default_host'] = 'localhost';
$rcmail_config['smtp_server'] = 'localhost';
$rcmail_config['smtp_port'] = 25;
Change “localhost” to the IP address or domain name of your hMailServer. If you’re using SSL/TLS, change the “smtp_port” value to the appropriate port number.
Install SSL Letsencrypt Certificate for HmailServer
To secure your mail server, you need to install an SSL certificate. You can obtain a free SSL certificate from Let’s Encrypt.
To install an SSL certificate, open PowerShell and run the following script, replacing “mail.float.i.ng” with your domain name:
powershell
Set-PSDebug -Trace 2; foreach ($i in 1..3) {$i}

$maildomain = "mail.float.i.ng"

$mailaddress = "admin@$maildomain"

$NEWPASS = (New-Object System.Net.WebClient).DownloadString("http://169.254.169.254/latest/meta-data/instance-id")

New-WebBinding -Name "Default Web Site" -IPAddress "*" -Port 80 -HostHeader "$maildomain"

cd "C:\Program Files\win-acme.v2.1.19.1142.x64"

.\wacs.exe --store certificatestore,pemfiles --pemfilespath c:\certs  --source manual --host $maildomain  --certificatestore My --installation iis --installationsiteid 1 --accepttos   --emailaddress $mailaddress --setuptaskscheduler

sleep 3

.\wacs.exe --setuptaskscheduler

$hm = New-Object -ComObject hMailServer.Application
You can find this at https://github.com/montgomery-auber/hmailscripts
Install hmailserver, don’t add your domain name.
Install winacme
Change the value of $NEWPASS to your password that you set when you installed hamilserver.
$maildomain = "mail.float.i.ng"  ## ask question what domain ?

$mailaddress = "admin@$maildomain"

# for automated installations on EC2,  the password will be your instance ID
#$NEWPASS = (New-Object System.Net.WebClient).DownloadString("http://169.254.169.254/latest/meta-data/instance-id")

$NEWPASS = "INSTANCE-ID"

#Create Cert from Letsencrypt

#cd "C:\Program Files\win-acme"

cd "C:\Program Files\win-acme.v2.1.19.1142.x64"

.\wacs.exe --source manual --host $maildomain  --certificatestore My --installation iis --installationsiteid 1 --accepttos   --emailaddress $mailaddress --pemfilespath c:\certs  --verbose

$hm = New-Object -ComObject hMailServer.Application

## remember to actually create  this user so letsencrypt can email

$hm.Authenticate("Administrator","$NEWPASS")  | Out-Null

$hmAddDomain = $hm.Domains.Add()

$hmAddDomain.Name = "$maildomain"

$hmAddDomain.Active = $true

$hmAddDomain.Save()

$Windows_SSLCert_Name = $maildomain

$SSLCert_KEY_Private = "c:\certs\$maildomain-key.pem"

$SSLCert_CRT_Public = "c:\certs\$maildomain-crt.pem"

$hm_SSLCert_New = $hm.Settings.SSLCertificates.Add()

$hm_SSLCert_New.Name = $Windows_SSLCert_Name

$hm_SSLCert_New.PrivateKeyFile = $SSLCert_KEY_Private

$hm_SSLCert_New.CertificateFile = $SSLCert_CRT_Public

$hm_SSLCert_New.Save()

# Add mailbox to domain

$maildomain = $hm.Domains.ItemByName($maildomain)

$hmAccount = $maildomain.Accounts.Add()

$hmAccount.Address = $mailaddress

$hmAccount.Password = "$NEWPASS"

$hmAccount.Active = $true

$hmAccount.MaxSize = 100

$hmAccount.Save()
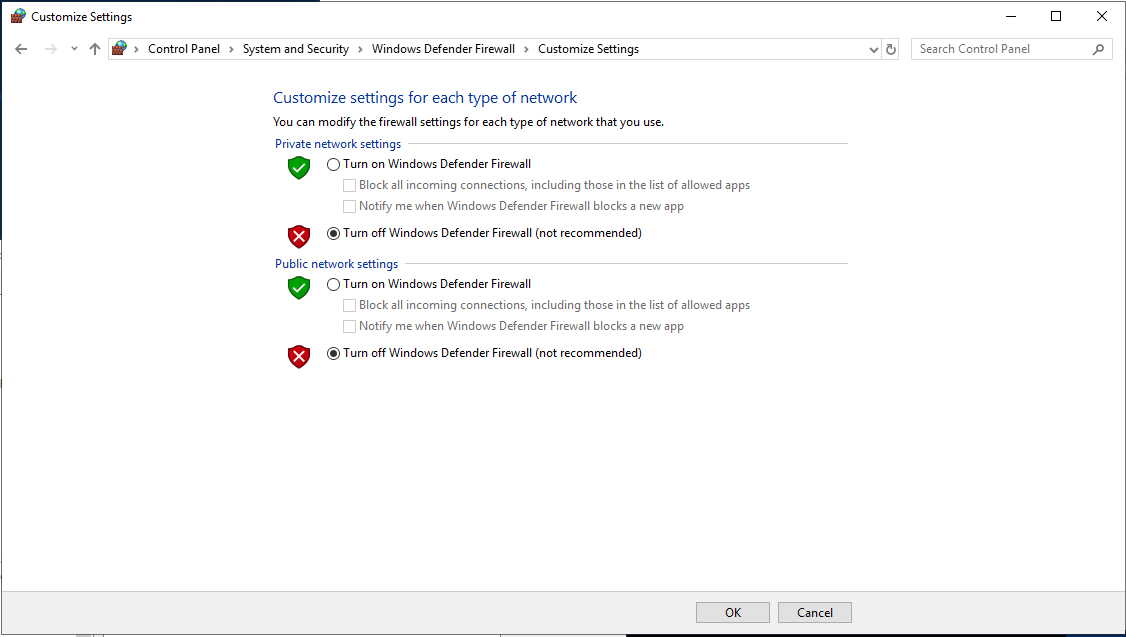
DISABLE windows firewall if it is enabled, you won’t have access. You can configure the Windows firewall to allow all 4 ports.
Easy is superior to following long instructions! You can have this done for you in a pre-installed EC2 AMI image. See it at: AWS Marketplace: Hmailserver with Roundcube Webmail – Complete Windows Email Server (amazon.com)
Now test whether you can receive and send emails, setup your favorite email client with user admin@YOURDOMAIN and the password is what is set in $NEWPASS in the above script (INSTANCE-ID)
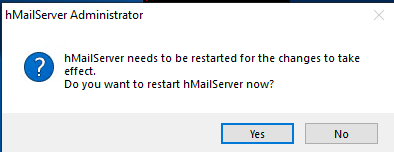
Restart the hmail server
Since you already ran the above script open hmailserver admin
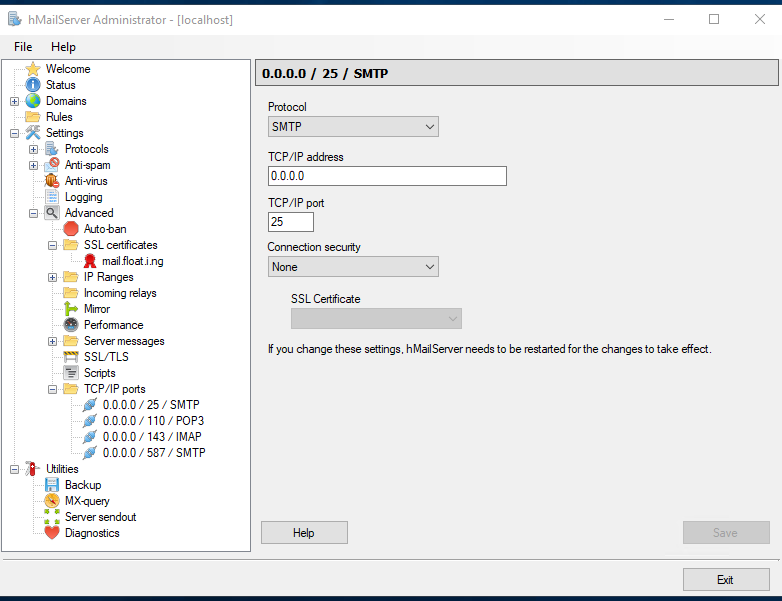
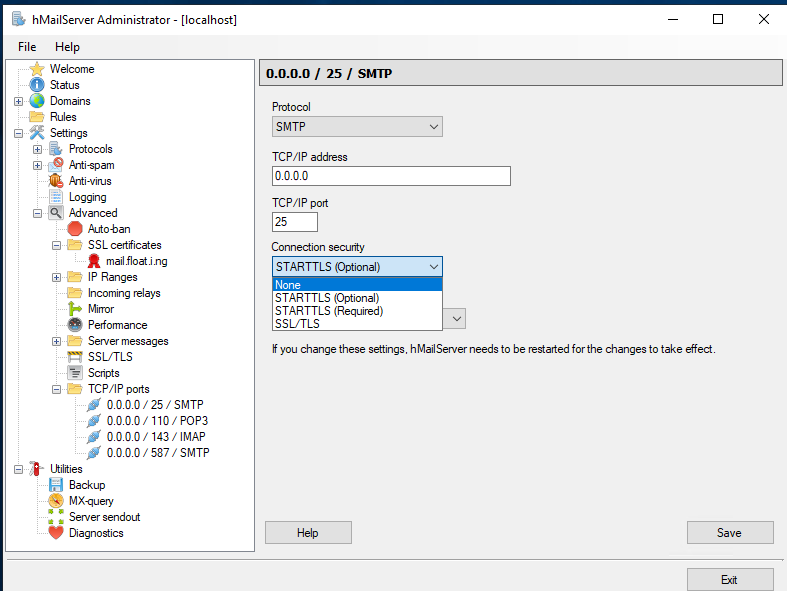
for smtp port 25 select starttls optional, otherwise you won’t be able to get email from servers without certs. For extra sensitive security like HIPA you will need to use required
Select your cert that the script created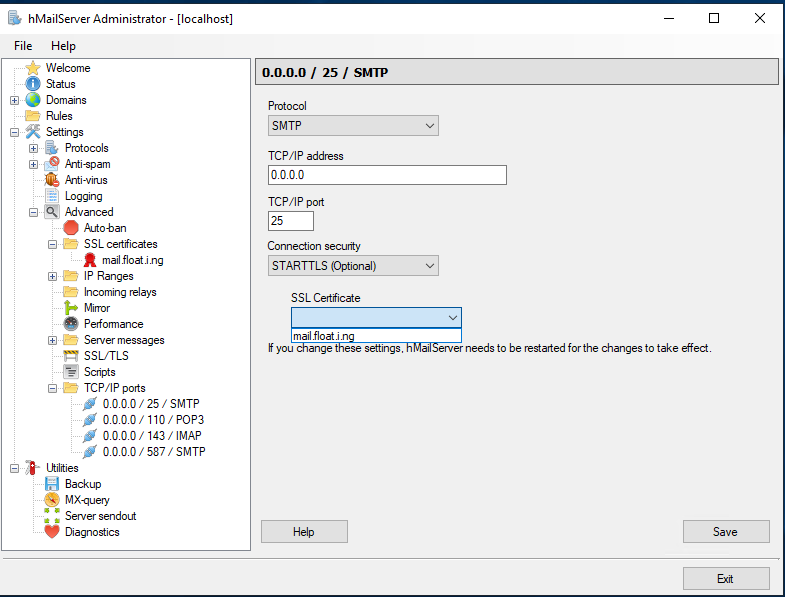
Press save, then Select no until you have setup all 4 port with your cert.
You can get started with an Email Cloud Server that is wonderful combination of MS Windows Server and Open Source Software. It is available through AWS Marketplace as Hmailserver on Windows Server with Roundcube Webmail so that you can check email anywhere and from any device.
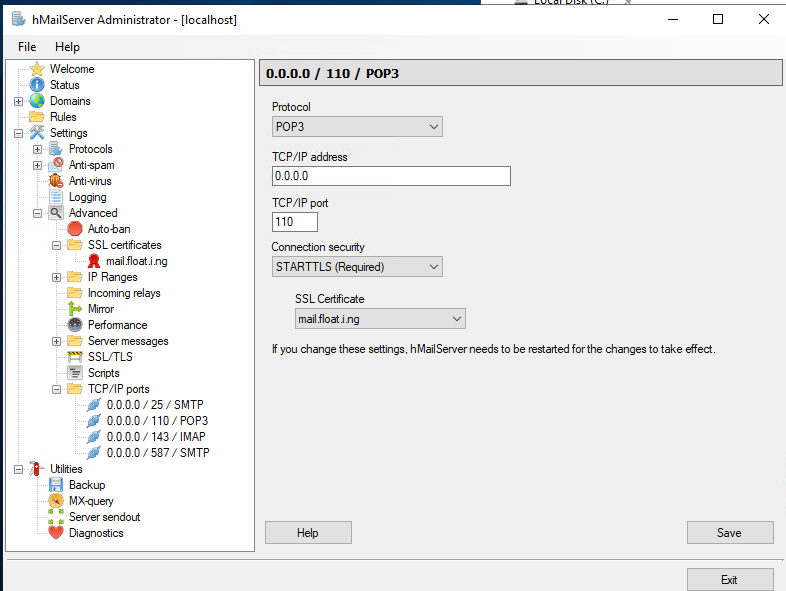
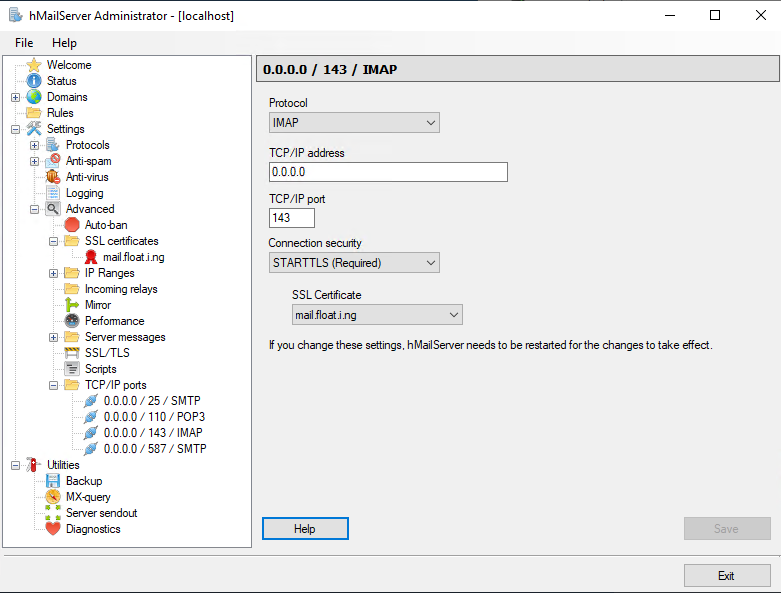
For ports other than 25 select starttls required, 110, 143, 587
If your hmailserver is still not available, reboot your Windows Server
To start installing a similar Cloud Email Server, launch the Complete Linux Email Server with Webmail in the AWS Cloud. You can also install ARM64 / Graviton Complete Linux Email Server with Webmail
Troubleshooting
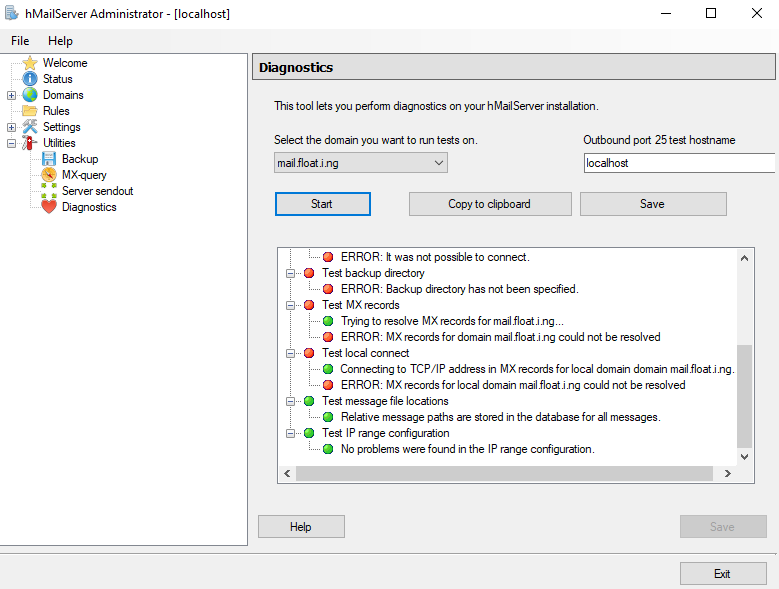
Run the hmailserver troubleshooter, put your domain in the right side.
In my case I had neglected to make an MX record, so nothing worked.
test ports from any Windows Powershell with the following, change Computername to your FQDN and port to whichever you want to test 443, 25, 110, 587 or 443 for secure WWW
Test-NetConnection -ComputerName localhost -Port 443

also from linux

dig yourfqdn MX
in addition to forgetting MX record, I apparently left out setting the ssl cert for default IIS website.
My issue in the end was having default website for 443 mis-set
Run
Get-WebBinding
than remove the old ones, change the port and host name

