
Visits: 2111
Instructions to run a Swarm with Docker Machine and Docker CE
Before you can create docker-machines, you need to assign an IAM role to Docker Swarm Manager that will allow you to create whatever resources you plan to use, so that Docker machine can launch machines and to put containers in them. You can do this after launching the Docker Swarm Manager instance or during the launch. You can find specific instructions below.
Click here to immediately install Docker Machine on EC2 cloud server.
Check out the Blog Article about this EC2 image with scripts to launch Multi Region MongoDB
The community Edition of Open Source Docker is very simple to run and build instances within a single server. You need docker-machine to be able create and log into servers in any region, cloud or even in your Data Center. Launching this instance starts Docker Swarm Manager
You need to assign an IAM role to Docker Swarm Manager, so that Docker machine can launch machines and to put containers in them.
You can do this after launching the Docker Swarm Manager instance or during the launch.
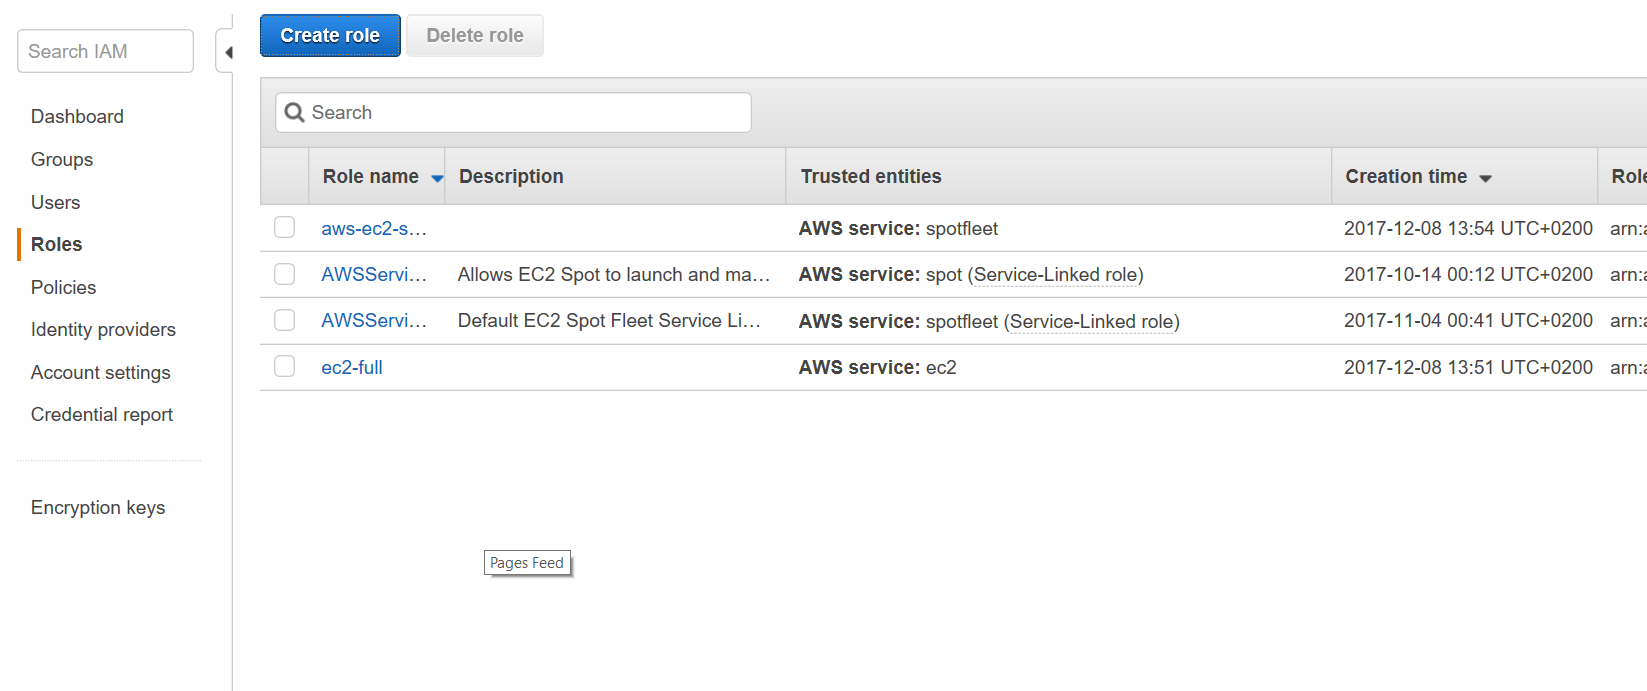
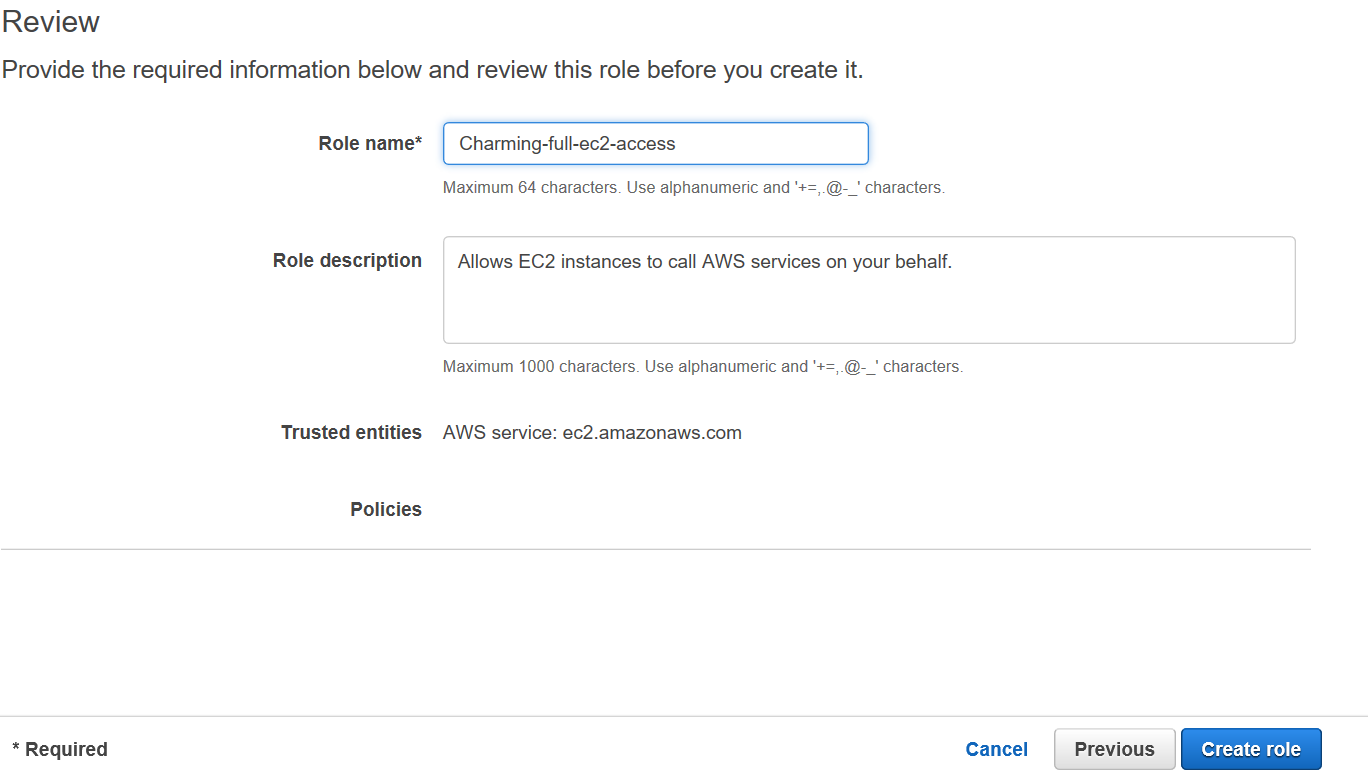
In IAM go to roles then create roles
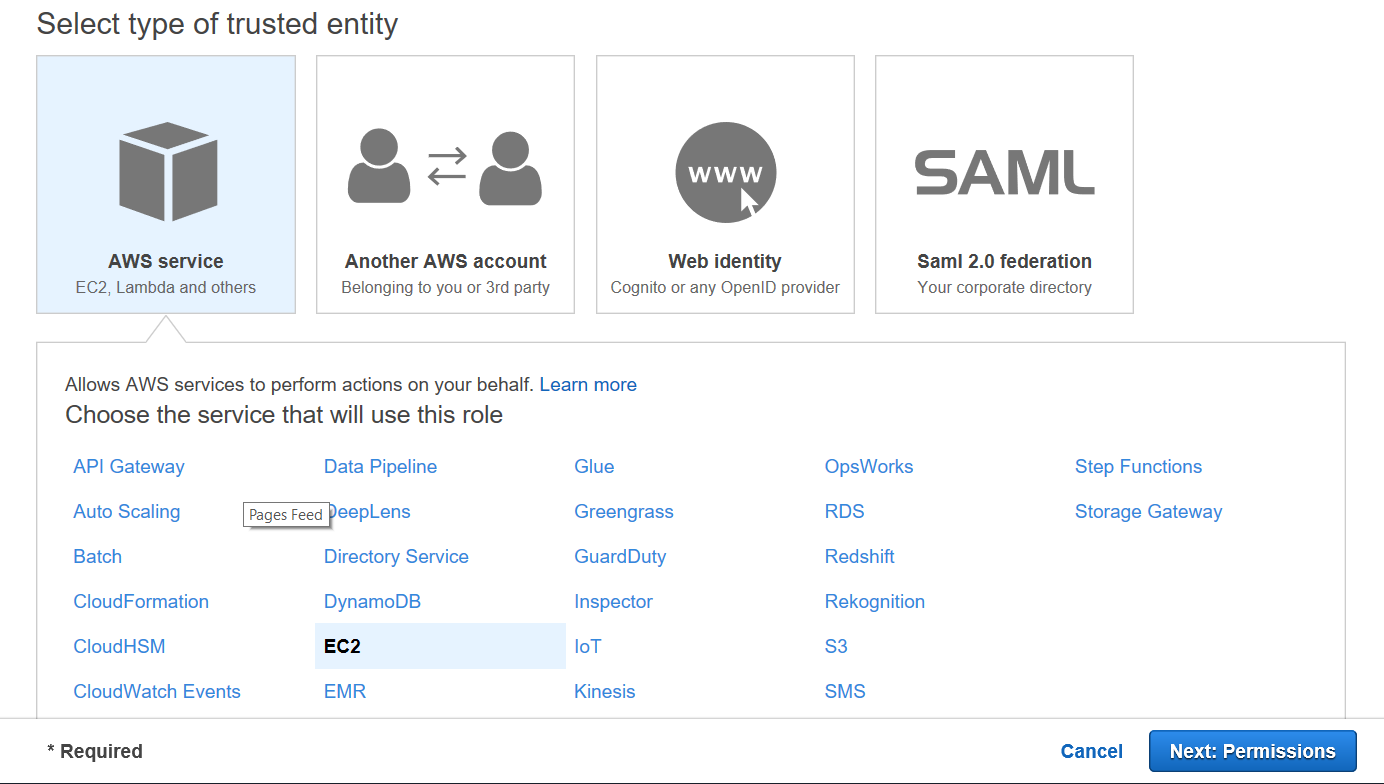
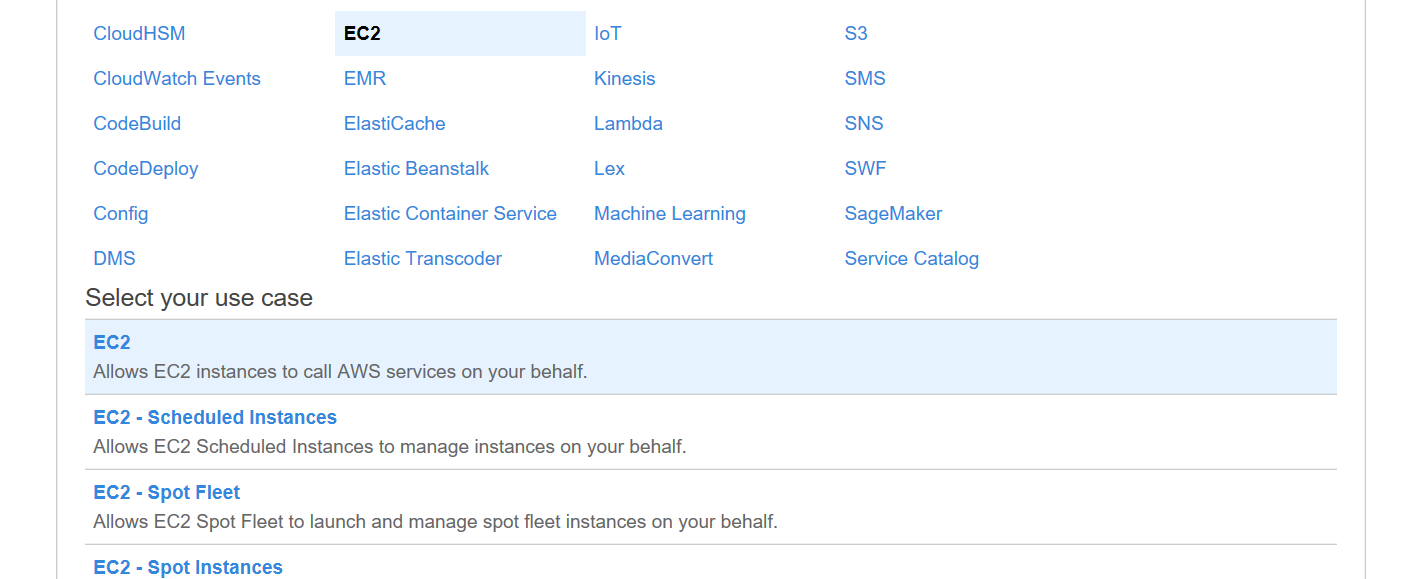
Select EC2, then next
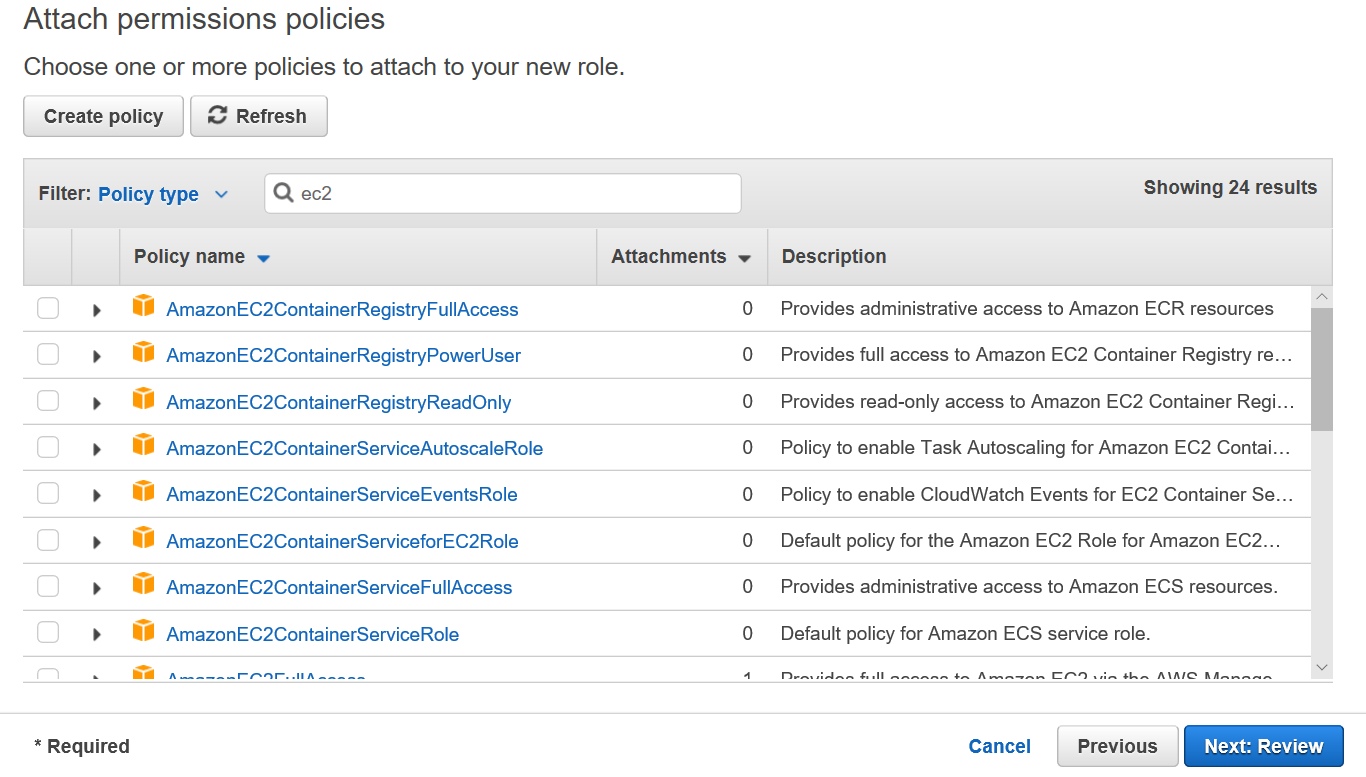
Under Attach Permission search for ec2. You will have a bunch to select from. I choose either AmazonEC2FullAccess or Admin
Assign a name to your role
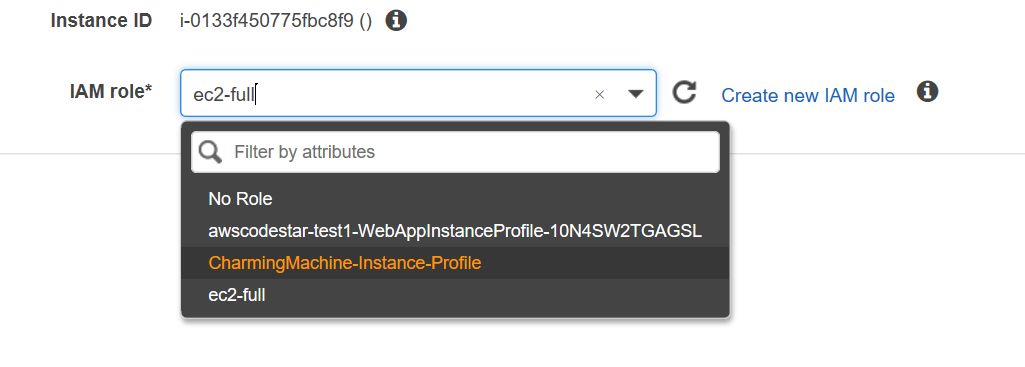
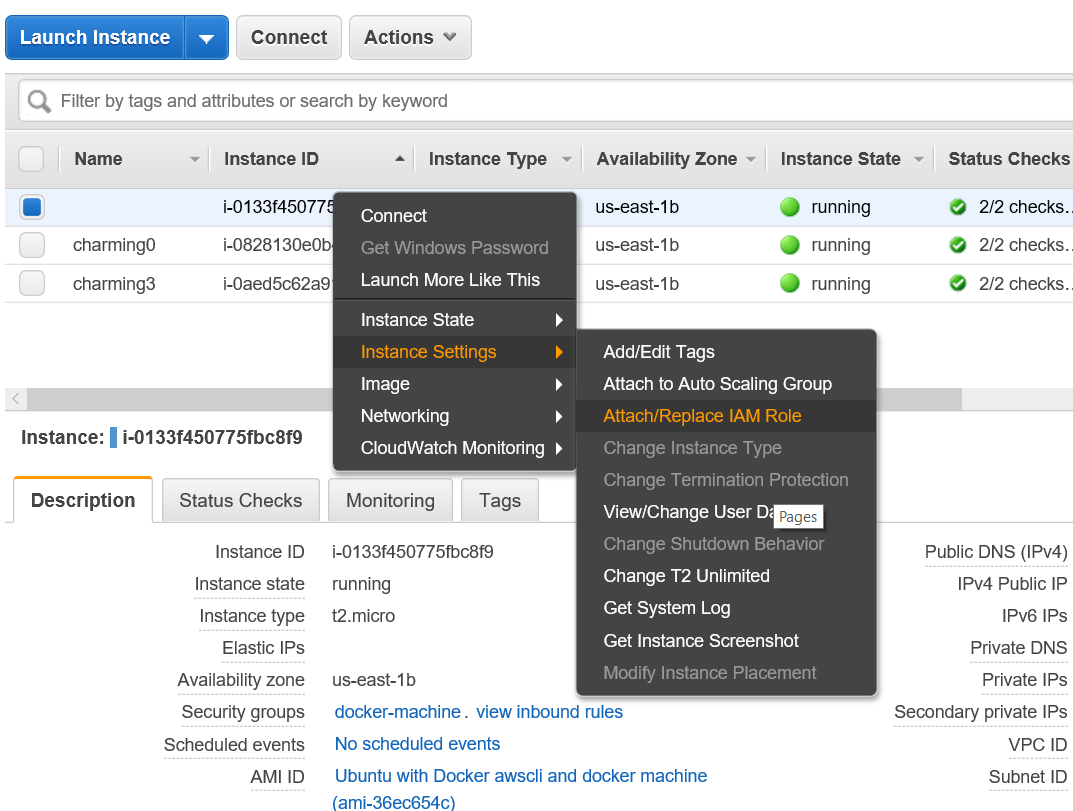
Now go into the Ec2 panel and right click on your Instance, select Instance Setting, attach/replace IAM roles, then select the role that we created.
Your permissions should be something like this, maybe more.
{
“Version”: “2012-10-17”,
“Statement”: [
{
“Action”: “ec2:*”,
“Effect”: “Allow”,
“Resource”: “*”
},
{
“Effect”: “Allow”,
“Action”: “elasticloadbalancing:*”,
“Resource”: “*”
},
{
“Effect”: “Allow”,
“Action”: “cloudwatch:*”,
“Resource”: “*”
},
{
“Effect”: “Allow”,
“Action”: “autoscaling:*”,
“Resource”: “*”
},
{
“Effect”: “Allow”,
“Action”: “iam:CreateServiceLinkedRole”,
“Resource”: “arn:aws:iam::*:role/aws-service-role/spot.amazonaws.com/AWSServiceRoleForEC2Spot*”,
“Condition”: {
“StringLike”: {
“iam:AWSServiceName”: “spot.amazonaws.com”
}
}
},
{
“Effect”: “Allow”,
“Action”: “iam:CreateServiceLinkedRole”,
“Resource”: “arn:aws:iam::*:role/aws-service-role/spotfleet.amazonaws.com/AWSServiceRoleForEC2Spot*”,
“Condition”: {
“StringLike”: {
“iam:AWSServiceName”: “spotfleet.amazonaws.com”
}
}
},
{
“Effect”: “Allow”,
“Action”: “iam:CreateServiceLinkedRole”,
“Resource”: “arn:aws:iam::*:role/aws-service-role/ec2scheduled.amazonaws.com/AWSServiceRoleForEC2Scheduled*”,
“Condition”: {
“StringLike”: {
“iam:AWSServiceName”: “ec2scheduled.amazonaws.com”
}
}
}
]
}
After organizing IAM for your instance you can start working.
Start creating Docker Machines, Swarms and run containers
To start here are some commands to install MOngoDB in your Swarm. Use the AMI that is part of this Docker CE and Docker Machine from Floating Cloud. You can find it in the bottom [anel when you select the ec2 instance.
docker-machine create –driver amazonec2 –amazonec2-region us-east-1 –amazonec2-zone b –amazonec2-ami YOUR-AMI charming0
If you receive an error:
Error creating machine: Error running provisioning: ssh command error:
command : DEBIAN_FRONTEND=noninteractive sudo -E apt-get install -y curl
You need to simply regenerate the certificates
docker-machine regenerate-certs charming0
docker-machine create –driver amazonec2 –amazonec2-region us-east-1 –amazonec2-zone b –amazonec2-ami ami-36ec654c CharmingMachine-Instance-Profile charming0
Docker-machine creates keys for each machine that you created, so you can ssh into them easily with
docker-machine ssh charming0
before installing docker containers on your machines, You now need to create a Docker Swarm
docker swarm init –listen-addr $(/bin/hostname -i):2377 –advertise-addr $(curl http://169.254.169.254/latest/meta-data/public-ipv4):2377
docker swarm join –token YOURTOKEN
If you forget what the token is enter
docker swarm join-token -q worker
Docker-machine doesnt need to ssh into the machine, instead it simply switches to the remote machine environment
enter
eval `docker-machine env charming0`
Then have that machine join the swarm with
docker swarm join –token YOURTOKEN
If you forget what the token is, enter
docker swarm join-token -q worker
When you want to return to your swarm manager server. You need to do this in order to create the docker network overlay
eval `docker-machine env -u`
docker network create –driver overlay charmingnet
To see the list of servers your swarm manager is running
docker-machine ls
The following command has docker service download mongoDB 3.4 stable from the Docker Hub.
docker service create –detach=false –network charmingnet –publish 27017:27017 mongo:3.4 mongod –replSet charming
If you create everything within the same Availability Zone Your docker swarm manager will also serve as a proxy, making it seem like all of these machine are one.
Check out the docker documentation
https://docs.docker.com/get-started/part2/
https://docs.docker.com/machine/
You can send us an email with any questions about docker and docker-machine to support@float.i.ng
Be sure to have all of these ports open in AWS Security Groups plus whatever others you might neet like 3306 for mysql port 80 for a web server
needs ports 2376 2377 7946tcp/udp 4789udp and 22
ADD EXAMPLES OF DOCKER-MACHINE CREATE ETC
docker
eval
be sure to mention security groups that are closed!
o access the container (which is like a mini-linux) run:
docker exec -it $(docker ps -q) bash
You can ssh into the Floating Cloud EC2 instances (to the real Linux prompt). You might want to do this in order to update the Ubuntu server instance
From the manager EC2 instance you, run:
docker-machine ssh charming0
Change the number to 1 or 2 to access the Secondary Replicas.
The following is the same as the above Docker connection method that uses eval.
To access the Database run:
docker exec -it $(docker ps -q) mongo
To access the container (which is like a mini-linux) run:
docker exec -it $(docker ps -q) bash
See our selection of pre-installed MongoDB servers:
[products category=”mongodb”]