Setup Amazon SES with Postfix

Visits: 1064

BE SURE!!! to back up your ec2 as an image  from in the AWS Web UI console.

The Best way to have a completely secure Postfix server tnat can use ses, is to install our simple to install EC2 including Roundcube WebMail. Check it out AWS Marketplace: Mail Server on Linux Postfix using MySQL for tons of users (amazon.com)


create useless sasl file for those who want AWS SES · Issue #4 · montgomery-auber/postfix-containerized (github.com)

https://docs.aws.amazon.com/ses/latest/DeveloperGuide/smtp-credentials.html?icmpid=docs_ses_console

sudo postconf -e “relayhost = [email-smtp.us-west-2.amazonaws.com]:587” \
“smtp_sasl_auth_enable = yes” \
“smtp_sasl_security_options = noanonymous” \
“smtp_sasl_password_maps = hash:/etc/postfix/sasl_passwd” \
“smtp_use_tls = yes” \
“smtp_tls_security_level = encrypt” \
“smtp_tls_note_starttls_offer = yes”

Lines got connect using postconf

In a text editor, open the file /etc/postfix/sasl_passwd. If the file doesn’t already exist, create it.

Add the following line to /etc/postfix/sasl_passwd:

[email-smtp.us-west-2.amazonaws.com]:587 SMTPUSERNAME:SMTPPASSWORD

At a command prompt, type the following command to create a hashmap database file containing your SMTP credentials:

sudo postmap hash:/etc/postfix/sasl_passwd


email-smtp.us-east-2.amazonaws.com

SMTP Username:
LongNAME
SMTP Password:
CONFUSINGPassword

Add the following line to /etc/postfix/sasl_passwd:

email-smtp.us-west-2.amazonaws.com:587 LONGSECRET


The postconf command was combining the last line of the previous main.cf with one of the lines in the command below. This is because the main.cf did not have a line ending at the end of the file.

docker exec -it postfix postconf -e “relayhost = email-smtp.us-east-2.amazonaws.com:587” \
“smtp_sasl_auth_enable = yes” \
“smtp_sasl_security_options = noanonymous” \
“smtp_sasl_password_maps = hash:/etc/postfix/sasl_passwd” \
“smtp_use_tls = yes” \
“smtp_tls_security_level = encrypt” \
“smtp_tls_note_starttls_offer = yes” ### THis line got smushed by postconf


The smushed line looked like this

smtpd_tls_auth_only = yessmtp_tls_note_starttls_offer = yes

the first half of the line is not part of the postconf command

Ask permission

You need to request from AWS to allow you to send emails via SES. They apporve you as long as it’s clear that you wont send spam.

Quota details – Sending quota | AWS Service Quotas (amazon.com)


It is best to use SES to send emails, however the server is setup to send emails too.

In order to send email via SES you need to get permission as well as to add the addresses and domains.

See:

Integrating Amazon SES with Postfix – Amazon Simple Email Service


when running postconf the last line without line ending gets combined with one of the lines in the postconf command
“`

docker exec -it postfix postconf -e \
“relayhost = email-smtp.us-east-1.amazonaws.com:587” \
“smtp_sasl_auth_enable = yes” \
“smtp_sasl_security_options = noanonymous” \
“smtp_sasl_password_maps = hash:/etc/postfix/sasl_passwd” \
“smtp_use_tls = yes” \
“smtp_tls_security_level = encrypt” \
“smtp_tls_note_starttls_offer = yes”

“`

the above would end up looking like

`
smtpd_tls_auth_only = yes
inet_protocols = ipv4smtp_tls_note_starttls_offer = yes
smtp_tls_security_level = encrypt
smtp_sasl_password_maps = hash:/etc/postfix/sasl_passwd
smtp_sasl_security_options = noanonymous
relayhost = email-smtp.us-east-1.amazonaws.com:587
smtp_sasl_auth_enable = yes
`
The line starting with inet_protocols got combined


See – Add line ending to the end of /etc/postfix/main.cf · Issue #3 · montgomery-auber/postfix-containerized (github.com)


The line starting with inet_protocols got combined

The solution was to add the last line to the postconf command , then it worked.

```

docker exec -it postfix postconf -e \
"inet_protocols = ipv4"  \
 "relayhost = email-smtp.us-east-1.amazonaws.com:587" \
"smtp_sasl_auth_enable = yes" \
"smtp_sasl_security_options = noanonymous" \
"smtp_sasl_password_maps = hash:/etc/postfix/sasl_passwd" \
"smtp_use_tls = yes" \
"smtp_tls_security_level = encrypt" \
"smtp_tls_note_starttls_offer = yes" 

Instructions to add aws ses support to postfix, based on:
http://www.postfix.org/SASL_README.html

To make this possible, Postfix supports per-sender SASL passwords and per-sender relay hosts. In the example below, the Postfix SMTP client will search the SASL password file by sender address before it searches that same file by destination. Likewise, the Postfix trivial-rewrite(8) daemon will search the per-sender relayhost file, and use the default relayhost setting only as a final resort.

/etc/postfix/main.cf:
    smtp_sender_dependent_authentication = yes
    sender_dependent_relayhost_maps = hash:/etc/postfix/sender_relay
    smtp_sasl_auth_enable = yes
    smtp_sasl_password_maps = hash:/etc/postfix/sasl_passwd
    relayhost = [mail.isp.example]
    # Alternative form:
    # relayhost = [mail.isp.example]:submission
/etc/postfix/sasl_passwd:
    # Per-sender authentication; see also /etc/postfix/sender_relay.
    user1@example.com               username1:password1
    user2@example.net               username2:password2
    # Login information for the default relayhost.
    [mail.isp.example]              username:password
    # Alternative form:
    # [mail.isp.example]:submission username:password
/etc/postfix/sender_relay:
    # Per-sender provider; see also /etc/postfix/sasl_passwd.
    user1@example.com               [mail.example.com]:submission
    user2@example.net               [mail.example.net]

http://www.postfix.org/postconf.5.html
https://docs.aws.amazon.com/ses/latest/DeveloperGuide/postfix.html


Harden Your Postfix

Visits: 463

Postfix Hardening Guide for Security and Privacy

Postfix Security and Privacy

Postfix is one of the most used components on a server that needs to receive or send emails. With all its options available, it is easy to have a weak configuration. This security guide looks into Postfix hardening, to increase the defenses against spam, abuse, and leaking sensitive data.

start installing a Cyber Hardened postfix without hassles. Quickly Install  Postfix, Dovecot, Postgres, Letsencrypt certificate and Roundcube, launch the Complete Email Server with Webmail in the AWS Cloud.

Enable SASL authentication.

# Enable SASL authentication
smtp_sasl_auth_enable = yes
# Disallow any methods that do allow anonymous authentication
smtp_sasl_security_options = noanonymous
# Define the sasl_passwd file location
smtp_sasl_password_maps = hash:/etc/postfix/sasl/sasl_passwd

The Best way to have a completely secure Postfix server is to install our simple to install EC2 including Roundcube WebMail. Check it out AWS Marketplace: Mail Server on Linux Postfix using MySQL for tons of users (amazon.com)

Now we will edit the /etc/postfix/sasl/sasl_passwd file.

[mail.example.org]:587 username:password

This file can be parsed by postmap to created an optimized version, which is used as the database for lookups.

postmap /etc/postfix/sasl/sasl_passwd

The last part is configuring encryption. To enable this, we have to configure this separately.

# Enable STARTTLS encryption
smtp_use_tls = yes
# Location of CA certificates
smtp_tls_CAfile = /etc/ssl/certs/ca-certificates.crt

Now restart Postfix, and send a test email.

echo “test” | mail -s “test” me@example.org

Related and useful commands

  • postqueue -f (flush mail queue and retry delivering all emails)


Cryptography, encryption, and privacy

Enable TLS logging

To see the details from TLS, increase the level of Postfix logging. Set smtp_tls_loglevel (outgoing) or  smtpd_tls_loglevel (incoming) to the value one (1).

postconf -e smtp_tls_loglevel=1

Testing keys

With OpenSSL you can easily test your SMTP configuration and related ciphers. One of the areas to test is the strength of the initial connection handshake. This is typically done with the DiffieHellman (DH) algorithm, that exchanges the cryptographic keys.

echo | openssl s_client -starttls smtp -connect localhost:25 -cipher "EDH" 2>/dev/null | grep -i -e "Server .* key"

Note: you need at least version 1.02 of OpenSSL, otherwise not all details are displayed. Use openssl version to double check that you are on a recent version.

This command should give you two lines of output. The first line is the temporary key and should be at least 1024 bits when using DH, to prevent the Logjam attack.

Server Temp Key: DH, 2048 bits

The second line is the public key size. This will typically be a 2048 bit key (or higher) on modern systems.

Server public key is 2048 bit

Setup MX Record in Route 53 with a domain that you registered with AWS

Visits: 6988

Register a domain with Route 53

Many people get stuck setting up an EC2 Instance as a  mail server. Did you send a test message to your new instance and never receive the email ? To set up a mail server you first need the MX record to be properly setup in Route 53 or in Your DNS. Some of our Floating Cloud Clients  get stuck setting up there Mail Servers. The best way to start is to first purchase your domain from AWS Route 53, that way it is easiest to set up.  I like to purchase domains from AWS because the price doesn’t change from the second year on.  Many domain registrars  charge you only a couple of dollars to register a domain for a year, but then will charge you up the wazoooo for the following years.

It’s very simple to install an email server with Postfix, Dovecot, Postgres and Roundcube Webmail. Here are the instructions to configure Postfix Email Server

These instructions assume that you purchased the domain from Route 53. To purchase a domain from AWS via Route 53 go to: https://console.aws.amazon.com/route53/home#DomainRegistration:

After Registering your domain Route 53 sets up a “hosted zone” for you this includes an SOA – Start of Authority Record and NS record that tells the universe what servers know your real IP addresses. I failed a job interview not know what an SOA was, so be sure to remember it!

Elastic IP Address

Once you have registered your domain you can use your Elastic IP address for the A record for the DNS. Do not use an assigned IP address when you launch and EC2!!! This changes when you shutdown then re-launch the instance. See https://docs.aws.amazon.com/AWSEC2/latest/UserGuide/elastic-ip-addresses-eip.html

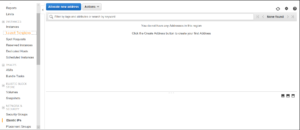
To get an Elastic IP Address for your EC2 Instance open your EC2 console Panel. In the left column go all the way down until you see Elastic IP addresses, select that. It is under Networks and Security. Then click on the blue button at the top “Allocate New Address”, then Allocate in the next screen. Then you will receive an Elastic IP Address.

Now you need to assign the IP Address to the EC2 Instance that you previously launched.  You should label your EC2 instances, then when it is easy to remember which instance is which in these kind of configurations. You can click on your new IP address that will appear or select it from the list of Elastic IPs that has now started.

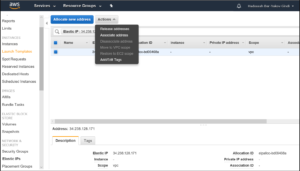
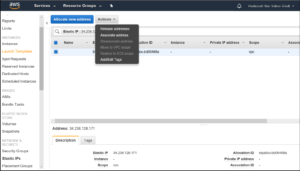
Right Click on your IP Address from with the list of IPs and select “Associate Address”


Select from the list of instances your Instance that needs the IP Address, then click the blue “Associate” button


Setup the Route 53 DNS

Now you can setup the DNS with your instance.

Copy your Elastic IP Address number from list of Elastic IPs

Now go into Route 53 from the services drop down menu at the top of your Console Panel. It is under Networking & Content Deliver in the lower left, but might move.

Then click on Hosted Zones, since you purchased your domain from AWS they set this up automatically.

Now Select your domain name from within the list of hosted zones. For our demonstration purpose we will set up a domain called test.floatingcloud.io, so that we can eventually receive email to username@test.floatingcloud.io . There are many ways to set up DNS and MX records but we are keeping it simple.

Select create Record Set. In the right window next to “Name” write your subdomain name if you have one or leave it blank for Top Level. Next to value paste your Elastic IP address.


Now you have set up an A record.  You can connect to it via SSH or RDP, if it has a working webserver, your domain will now work.

Now we need to point out MX record the server. the MX record tell the internet where to send mail. You can have an A record with an entirely different domain name receive mail on behalf of different domain. For instance you can have an A record for mail.yourdomain.com and point the MX record for the Top Level Domain yourdomain.com and recevie email to user user@yourdomain.com . But we are keeping it simple here, using the same sub-domain name for both A and MX records.

So again select “Create Record Set” at the top of the window. In the drop down menu in the same right window select MX Record.

Now in the Value window put the number 10 before the domain name, then a space followed by your domain name of the above A record. Next to name type in your subdomain, if you are using one or leave it blank if it is top level. The number represents priority, if you later setup and backup mail server, you give this a higher number for it to be used only if the first one is down.

You should now have it all set up. You should now try to send email to an existing user at your mailserver.

Web Linux Console for EC2 – Session Manager – ssm Quick Connect

Visits: 1401

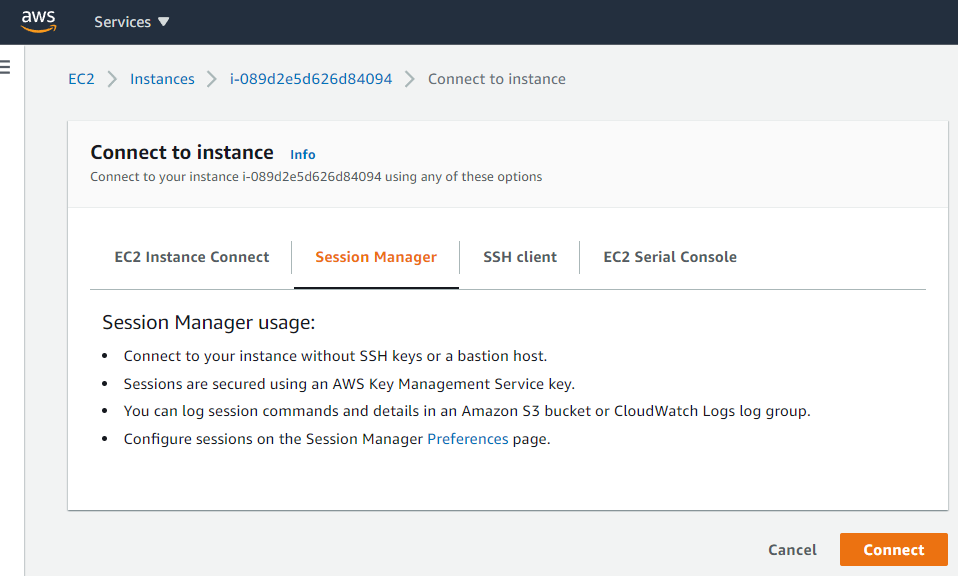
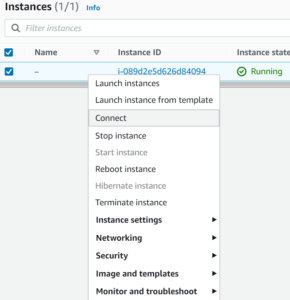
Using AWS Session Manager you can connect to your instances via Web Console instead of SSH. This is similar to what was always offered by Azure and Google Cloud.

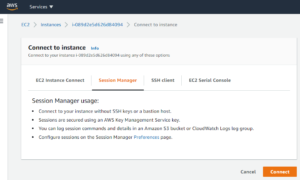
Then Select Session Manager

If you see that its greyed out, you need to still configure it.

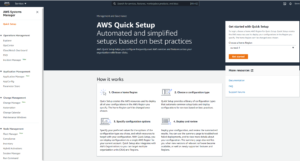
So instead go to ssm manager  Quick Start 

Now select get started on the left side, If you dont see get started  in correct home region, it’s because you have set it up before.

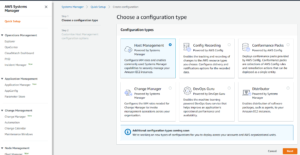
Select Create

Select Host Management , then next

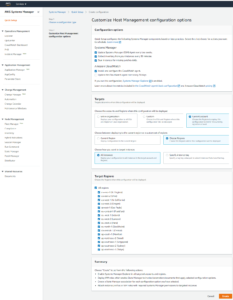
Select Like in the following image, or suit your own needs, this keeps instances safe, Towards the bottom I selected Add required IAM policies, as well as “current account” for targets choose regions, I like to select all, and leave all instances selected., then click create. It might take a few minutes.

Selecting just the region you need now is much quicker than selecting all.

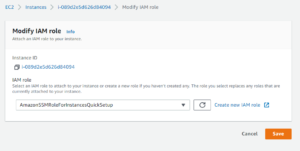
At the end of this you will now have an IAM role named AmazonSSMRoleForInstanceQuickSetup

Now when you select connect to Session Manager the Connect Button should now be Orange

Select Connect


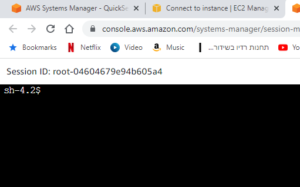
Now you can run stuff, If using Amazon Linux , you will even have sudo access.

Gmail is bounced as spam

Visits: 208

I am installing my easy to install floating cloud email server in AWS Marketplace: 

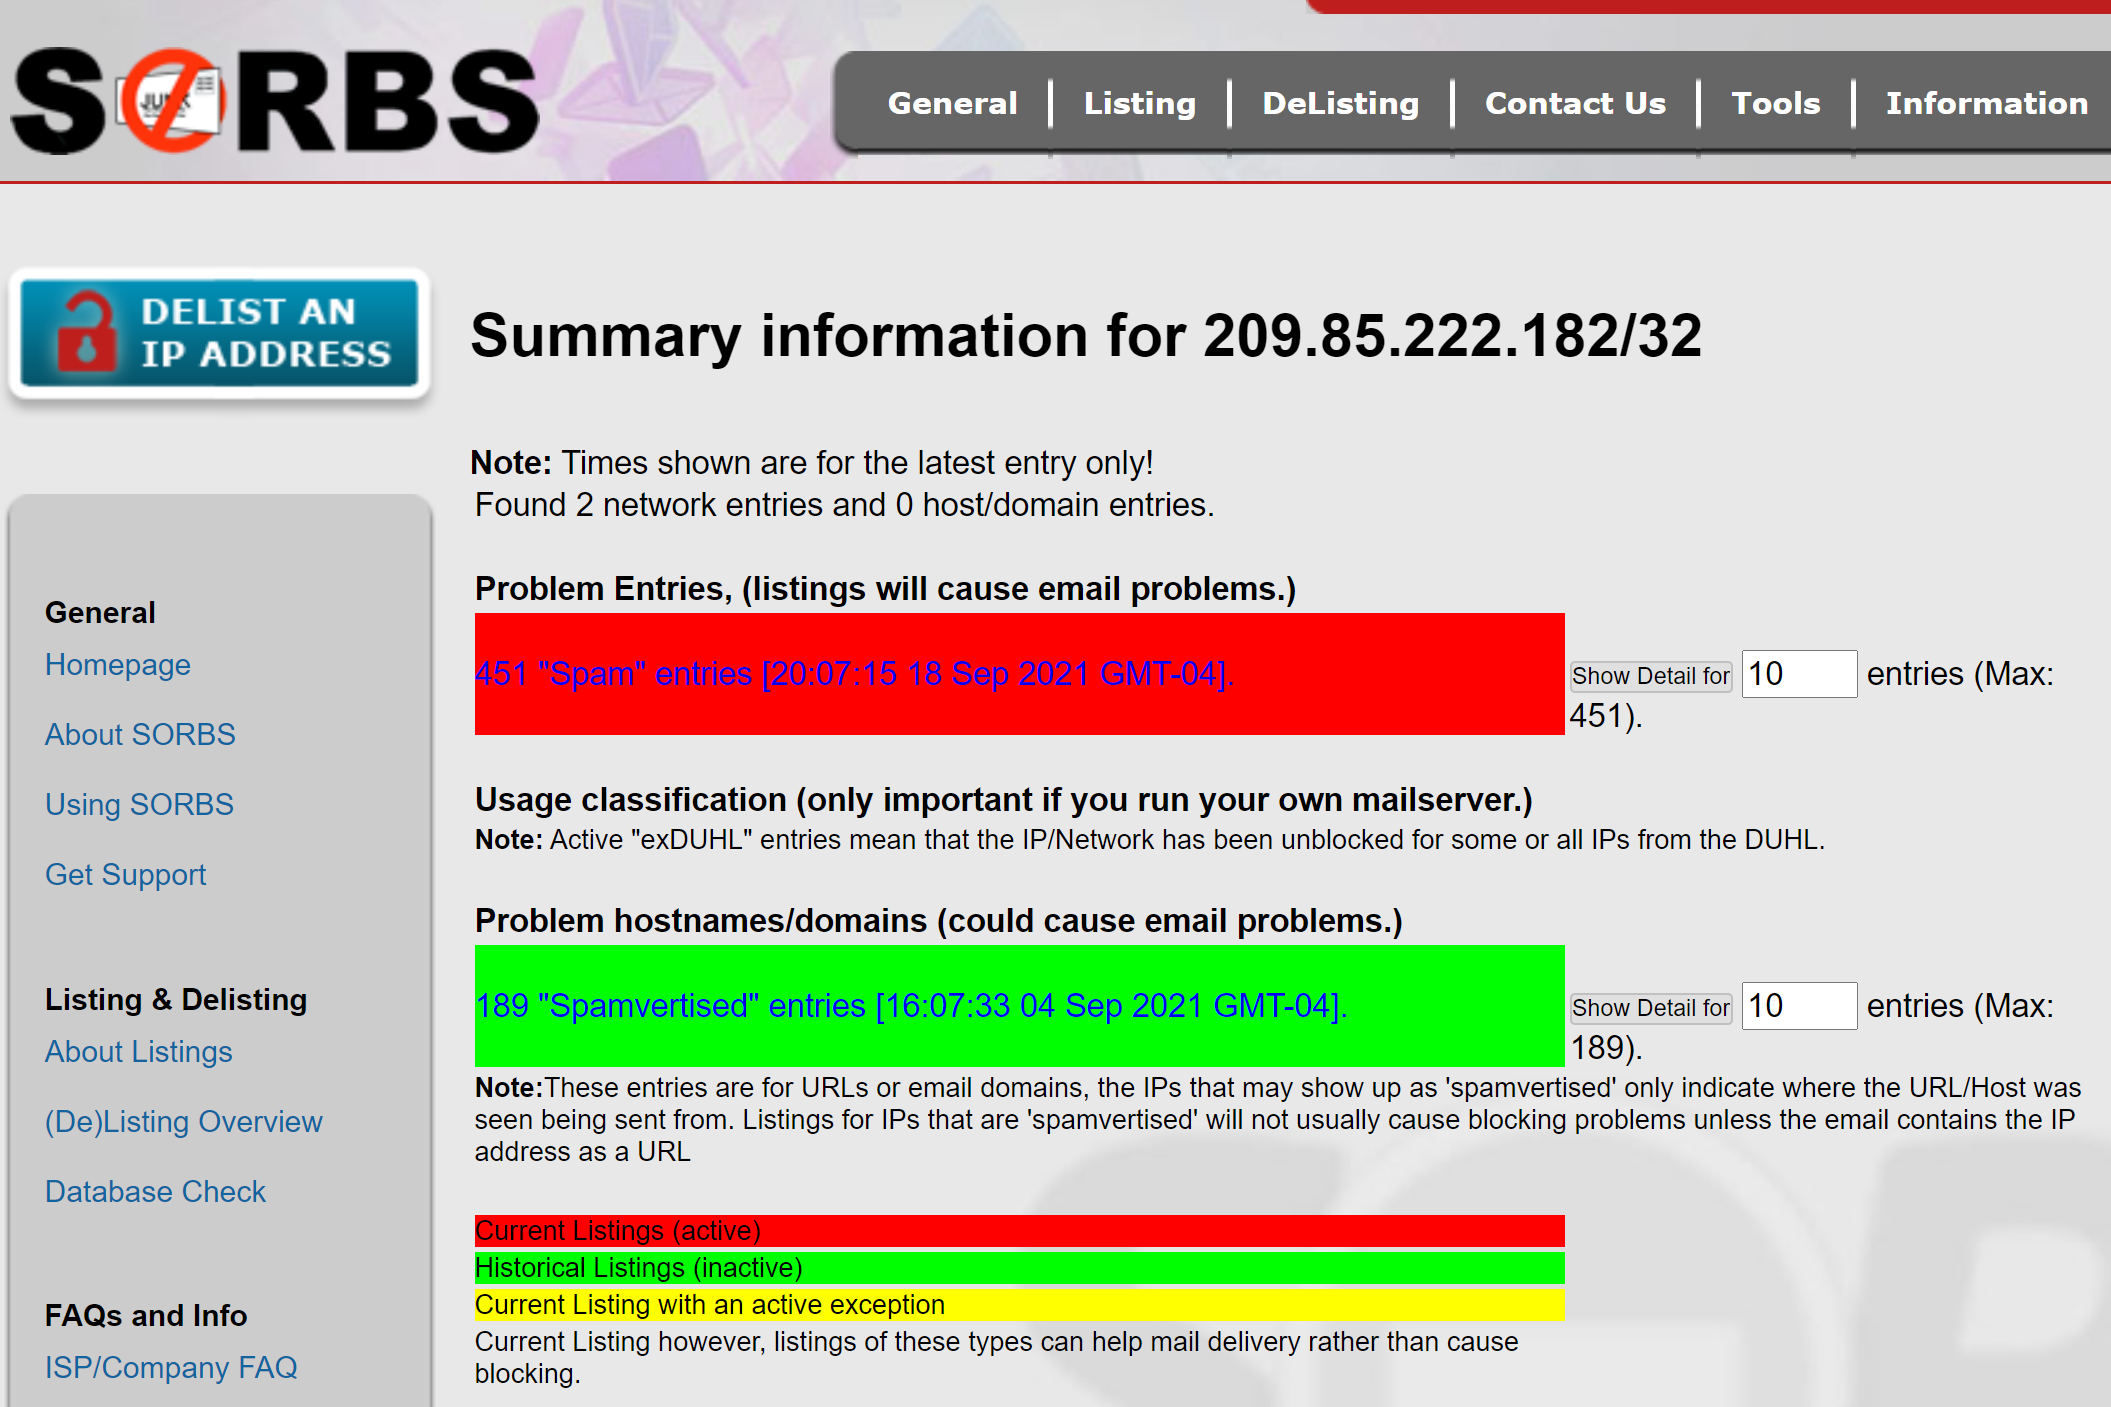
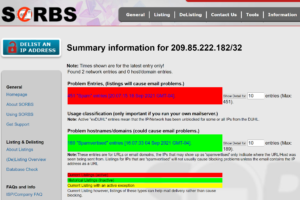
I am in the Final test stages. I have implimented only a small amoiunt of spam protection, however this is enough to block the biggest spammer in the multiverse. The blocked ip address is owned my google and used to send email: nslookup 209.85.222.182
182.222.85.209.in-addr.arpa name = mail-qk1-f182.google.com.

I have installed this on AWS EC2 and requested that AWS lift smtp restrictions. I also use AWS SES. Neither is llisted by sorbs.