copy over the database export with “mysqldump –u[user name] –p[password] [database name] > [dump file] “and a tarZ of the wp-content files
create dirs to store the wp-content, this will be a docker mounted volume
create initdb.d dir to be mounted as a volume, put the sql export in there. mysql reads and runs that if it’s DB dir is empty
edit the docker-compose.yaml file below, you might want to delete the table_prefix if you use the default wp_
run “docker-compose up” after it work re-run with “docker-compose up -d”
It takes a while to work, after you get can’t connect to DB errors, the db does magically come up
account www or apache should be created on the server and ownership of the files should go to it, indeed perhaps create this user in docker group too without root access, for security. I used Ubuntu 19 which comes with user www-data so I just changed the owner to that for www-content, then I was able to update the plugins.
These scripts Use Docker Swarm with the Community Edition of the official MongoDB container. This MongoDB Replica set can be spread throughout the World. The first script is an AWS Cloudformation that asks a few questions. This creates an EC2 instance which serves as the Docker Swarm Manager. A Bash scripts launches 3 more instances in regions of your choice, edits files that tell each instance about the Replica Set then configures all instances to become part of the MongoDB Replica Set.
Watch the video to see how simple it is to have a MongoDB Replica Set all around the world.
Talk to me if you would like more replicas or a different Database, like MySql or MariaDB. Fill in the contact form
Instructions to quickly install a MongoDB Replica Set in a Docker Swarm
You shouldn’t launch the instance when you subscribe. The CloudFormation script will launch your Swarm Manager. So when subscribing select To run the CloudFormation script you should select the Manual Launch tab.
Once you have subscribed and confirmed your subscription you can run the CloudFormation template. It asks a few questions with drop down menus. Allow a half hour for the script to run, then read the access instructions.
You need to have mongo client installed on the computer that you use to access your Replicated MongoDB from Floating Cloud or to use your API driver.
Each server has a different port opened to access the Database.
mongo mongodb://PublicDNS-Ofcharming0:27017/test
You can now start building your database. All changes are immediately written to the replicas.
Secondary Replicas can be accessed from a CLI as follows:
mongo mongodb://PublicDNS-charming1:27018/test
mongo mongodb://PublicDNS-charming2:27019/test
In the above command, “test” is the DB name. The remote connection URL below has the DB name test at the end. Use a different db name to connect to one that you created.
From the Mongo Shell you can see installed DB’s type”show dbs”
Warning: Security for your This MongoDB Replica set is your RESPONSIBILITY! No Password or encryption has been set.
You can Connect your app remotely.
In order to connect to the MongoDB set and its manager you need to ssh to the manager. The manager is a Docker Swarm Manager, it stores the keys to each server, so that you can control and login to the servers.
Access the Manager EC2 like you would any other Ubuntu Linux EC2 Server. Follow the instructions from the EC2 Panel, in the Region that you ran the Cloudformation.
Once you have a bash prompt, you can access each container that stores the MongoDB engine
There are 2 ways to access the Docker containers
do eval `docker-machine env charming0`
Change the number to 1 or 2 to access the Secondary Replicas.
From here you can run docker exec to access the container or the MongoDB running in the container.
To access the Database run:
docker exec -it $(docker ps -q) mongo
To access the container (which is like a mini-linux) run:
docker exec -it $(docker ps -q) bash
You can ssh into the Floating Cloud EC2 instances (to the real Linux prompt). You might want to do this in order to update the Ubuntu server instance
From the manager EC2 instance you, run:
docker-machine ssh charming0
Change the number to 1 or 2 to access the Secondary Replicas.
The keys for each of the MongoDB set are stored in the Swarm Manager. Ssh has been limited by security groups only from the Swarm Manager.
The following is the same as the above Docker connection method that uses eval.
To access the Database run:
docker exec -it $(docker ps -q) mongo
To access the container (which is like a mini-linux) run:
docker exec -it $(docker ps -q) bash
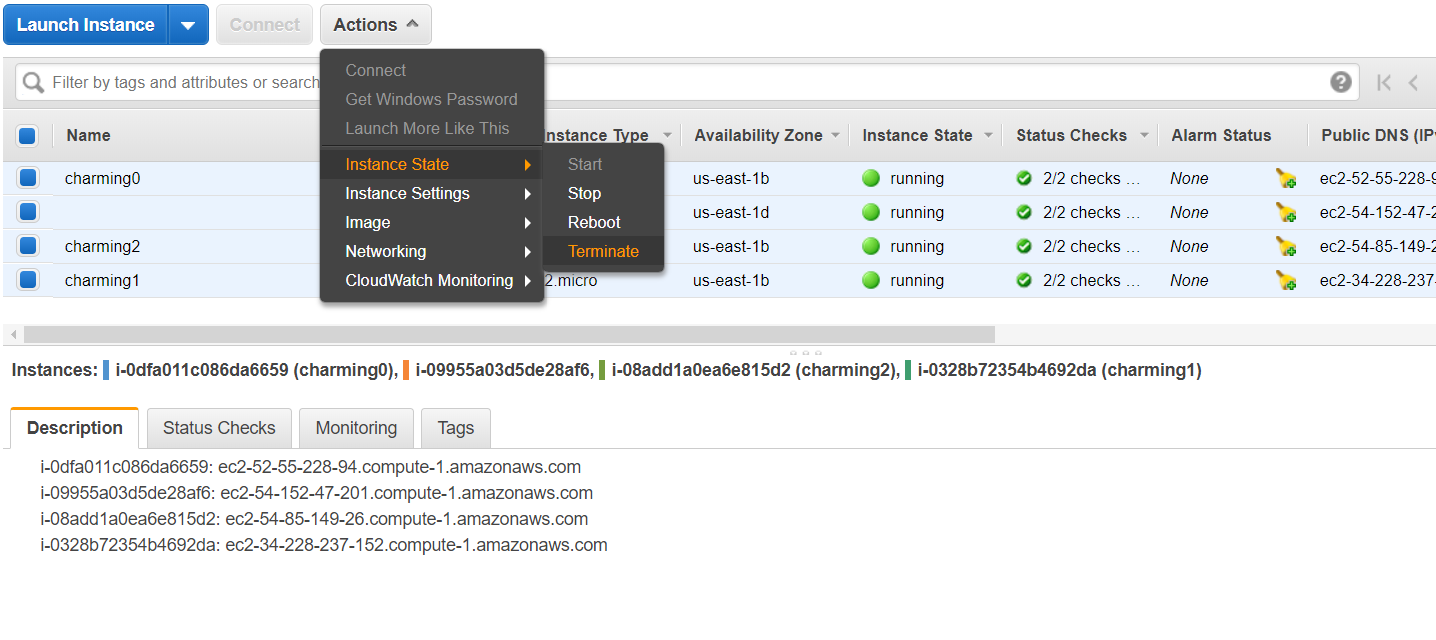
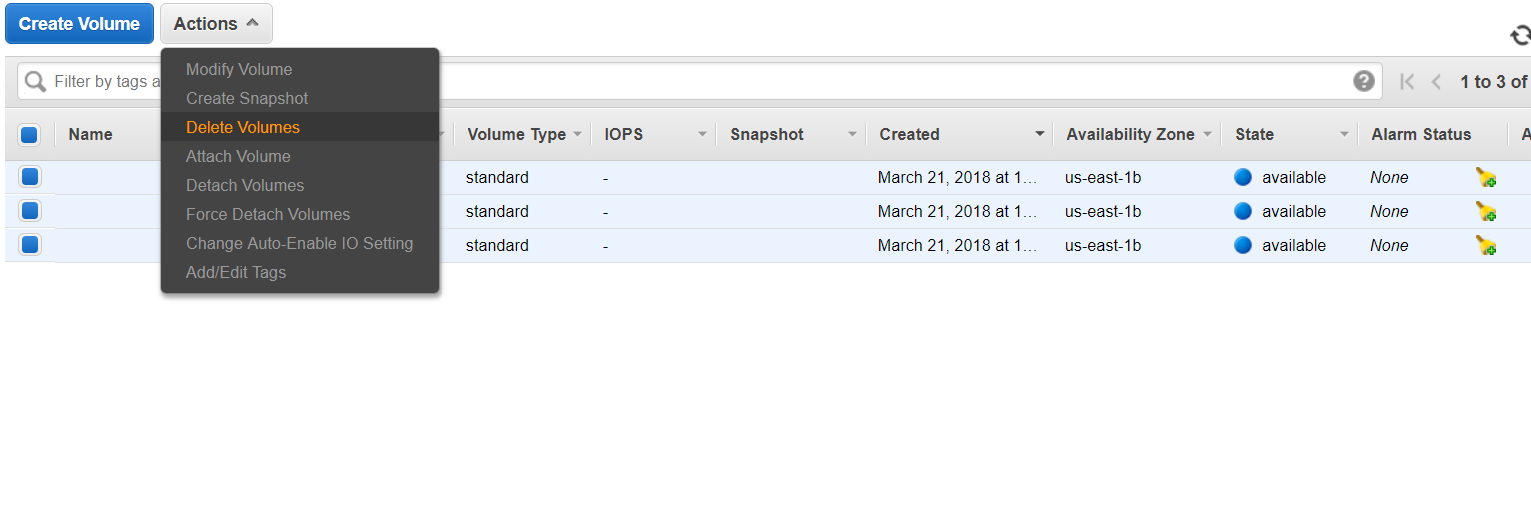
Important! The Data is stored on a separate EBS Volume which is mounted as /mnt/charming. This is formatted as XFS like MongoDB prefers If the Replica set is damaged your data should be safe. You can find each EBS Volume in the EC2 Panel, they are named charming with a number after them from 0 through 2.
Important this set is NOT highly available. When one of the servers is turned off it is really hard to recover. The Swarm Manager contains all of the SSH keys to the other instances, so if that dies you will lose access, but not your data. The data is pretty safe as it is replicated and never automatically removed.
Uninstall Replicated MongoDB
The Swarm Manager has termination protection, This is to remind you that you should first delete the MongoDB Instances.
The MongoDB was created by Docker Machine and Docker Swarm, so in order to un-install you first need to run our Floating Cloud Un-install script.
From the Linux Shell enter:
uninstall-mongo-swarm.sh
This removes the Replicated MongoDB Servers as well as IAM rules and roles that were created by Docker-Machine.
This Script does NOT remove the Docker-Machine security group nor does it remove the XFS Volumes that have your precious data. You can delete these from the EC2 panel.
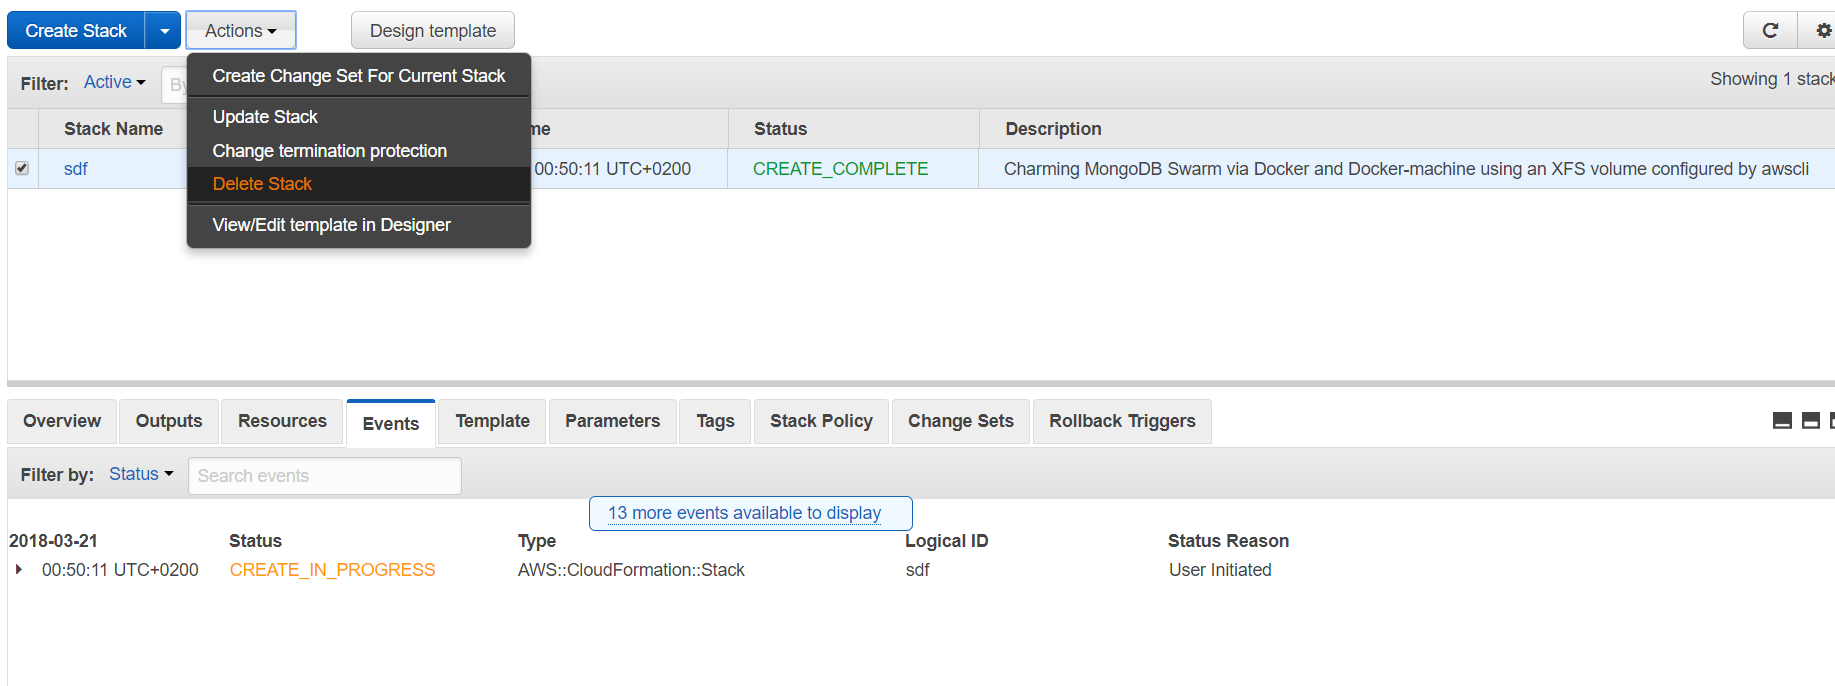
In Order to remove the Swarm Manager Instance and it’s IAM roles you need to first remove termination protection in the EC2 panel. Right Click on the instance and select settings and change termination protection. After removing Termination Protection you can go into the CloudFormation panel in the AWS Console and delete the Stack.
This removes the Instances from whatever regions you chose, as well as the keys that Docker-machine created to have access to them.
It does NOT remove the XFS EBS volumes from the various regions, since these contain your valuable data. If you want to remove them you need to go to the volumes option in the EC2 panel of each region to delete them.
After this you can remove the Swarm Manager via the CloudFormation panel in AWS from whatever region you ran it. The default is US-East-1 N. Virginia. Select delete stack.
Amazon Linux does not come with mkfs to format a volume with xfs , as MongoDB likes.
The simplest way to create a multi region MongoDB Replica set using Docker Swarm is to use our scripts that are already written. They launch a CloudFormation and the scripts written below.
In order to run the CloudFormation you need to subscribe to the AWS Image in the AWS Marketplace.
make xfs failed, “mkfs.xfs: No such file or directory”
Install mkfs.xfs with:
yum install xfsprogs
Then do:
mkfs.xfs /dev/device-name
libguestfs-xfs
At floatingcloud.io we work really hard to install cloud servers for our clients, that makes life easier for their Sysadmins and Developers. You can now launch MongoDB server pre-installed on Linux that already sits on a formatted XFS File system. Secure MongoDB 3.4 on XFS is configured with a secure personally assigned password.
We have made an effort to install our Servers in a user friendly way. However, shold you have an issue All instance include Full Tech Support.
The simplest way to create a multi region MongoDB Replica set using Docker Swarm is to use our scripts that are already written. They launch a CloudFormation and the scripts written below.
In order to run the CloudFormation you need to subscribe to the AWS Image in the AWS Marketplace.